
Introduction
These articles are designed to a) clue you into what you're about to bite off if you get one of these models, and b) show you what we have in the way of servos to customize the build to your needs. Along the way, we'll share a few thoughts, which you may find valuable.
So quid pro quo is you'll see some of what Extreme Flight doesn't inform you of before you buy, and in turn, we get to yak about our wares . . . win-win. Way it works is we divide our recommended equipment list into three categories - Sport, IMAC, and XA.
Why 3-lists? Simple, it's because we don't know you from Adam. By this meaning how you fly, how you'll power the model, your hopes and dreams for it, or anything to do with your budget.
Our thinking is without waiting to speak with us (maybe you're reading this whilst we're closed), you maybe can figure out for yourself what the likely best setup is for you and your budget based on how you fly. Saying you're the critical part of the equation, not us or Extreme Flight!
Anyway, beyond offering servos suitable for sport, IMAC, and XA-type maneuvers, we also touch on accessories. Things like it being wise to use twisted extensions if it's equipped with a spark-ignition engine. What's this got to do with servos? Very little except it's through extensions that stray RFI from a failing ignition module may affect servos and result in a crash. Want to buy twisted leads elsewhere? Honestly? We don't really care because we eat selling servos, not the knick-knacks you need to complete your build.
Saying what makes this guide valuable is we're try 'not' to make assumptions about your state of knowledge. Anyway, we also touch on suitable batteries, and even what length servo arms are best. The idea is maybe you gain insight you don't typically see in a magazine review, Facebook post, or forum thread.
But at heart, if this white paper isn't valuable, then why should expose yourself to our yak-yak about our stuff ever again? All deals have to be fair and we try to earn our keep in exchange for your time.
Bottom line? These caseSTUDY articles are a free resource for before you build.
A bit about it, or why a mid-size
Before we get started, allow me to share a few idle thoughts regarding this superb model aircraft. Specifically as regards an 85-inch version of Extreme Flight Extra 300 because it affects what you'll want servo wise. First, 85-inches is what they refer to as a mid-size model.
Second, if you come at this with experience with 40-60 size models (or a world of 6S propulsion), then something like this may strike definitely you as large instead of mid-size. On the flip side, folks flying models sporting a 120-inch wingspan will view it as diminutive. So defining mid-size is a matter of where you stand.
Where does Extreme Flight stand? While they don't tell me anything, from the cheap seats it's my opinion for labeling it mid-size likely has to do with them offering many variations of the Extra.
And not just the 300, but the 260 (very similar aircraft but with the shorter single-place canopy), a low-wing 300L iteration, plus several NG versions. So because they offer an Extra in a vast array of wingspans to include . . .
- 48-inches
- 49-inches
- 60-inches
- 67-inches
- 70-inches
- 75-inches
- 78-inches
- 85-inches
- 91-inches
- 95-inches
- 104-inches
- 105-inches
- 114-inches
- 120-inches
. . . then we suspect referring to an 85-inch model as mid-size is because it's the middle of the range. After all, 85-inches is 37-inches larger than the smallest and 35-inches smaller than the largest. Basically, smack dab in the middle of the range. Why so many Extras?
Well, likely in part because Walter Extra's aircraft make for seriously good handling models, too. And in part because these guys (Extreme Flight) are so very good at what they do, they don't miss a trick. Meaning identifying and filling every conceivable market niche!
Heck, take me, for example. I have the 60-inch version (and in the same color scheme) as the featured model in my own fleet.
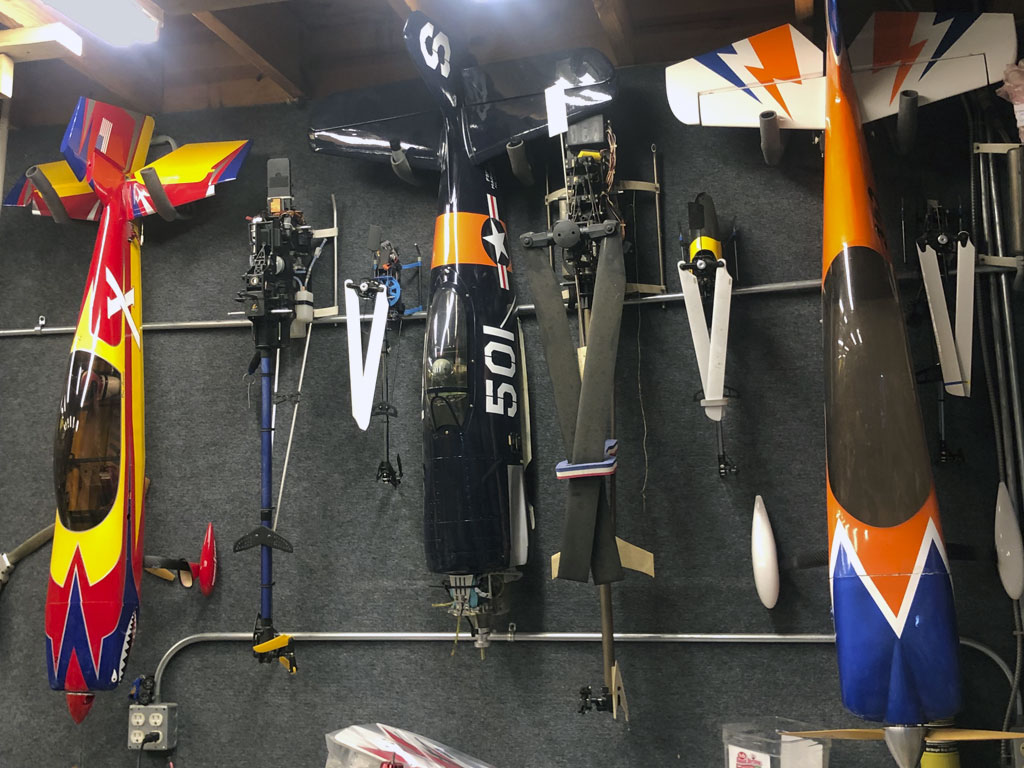
-The bright yellow, red, and blue scheme is a favorite with many

What recommends mid-size
As to what recommends the mid-size to many folks is this; it pretty much defines the upper limit size-wise of models folks can transport without a trailer. Don't laugh, this is a big deal if you lust for the superb handling of a giant scale Extra but don't want to add the complication of a trailer.
Speaking beyond just the expense of buying a trailer, but 3rd party interaction (register, tag, insurance). Added to which beyond being pricey, they come naked so you have to outfit it for your vision. Then there's where to park it during the week and it's easy to understand why folks want one that big, but no too big. Mid-size is their language. And of course, this doesn't touch on propulsion, e.g. 50-60cc, or 12S electric.
Meanwhile, a quick visit to their site reveals Extreme Flight also offer equipment recommendations. Our only observation being, their interests and yours don't necessarily align. Fortunately, just like they offer an Extra in 14-sizes, we can offer you more nuance, servo-wise.
For example, we once had a fellow write inquiring about servos for one of their Legacy Aviation brand 85-inch Muscle Bipe models. An aircraft, which quite frankly, is a superb XA-type biplane. Thing is, he was attracted to the look, but wasn't really wanting it for XA-maneuvers.

So because we chatted a fair bit about how he actually flew (plus what he intended to use to power the aircraft), it was pretty clear we could help refine his servo selection to better suit his needs. Thus, we guided him into spending a lot less money than what they proposed because our focus was on his requirements instead of those for some 3D-god wannabe.
Note; this isn't actually Extreme Flight's fault because they market what amounts to a katana in the model airplane world populated by machetes. Saying it would be silly for them to recommend anything but high performance servos.
Basically . . . one size doesn't fit all. So because this was the case with that fellow, it may be the case with you, too as you contemplate ownership of one of these superb Extra 300 EXP models. It's at the heart of why we share our thoughts. One of the equipment recommendations feature these same servos.
To the question, 'Did he buy our best servos?' Yes, he did, but maybe not in the way you think. This is because, as usual, the answer to which of our servos is the best is . . . it depends. On what? On him, and what he needs.
This, because there's no difference in quality or failure rate between our $40 and $200 servos, absolutely none! It's why my 1/5th scale Ziroli Stearman (powered by a 9-cylinder radial engine) is equipped with the sister servo to the ones the fellow above selected, our DS180DLHV. These are amongst our least expensive servos!
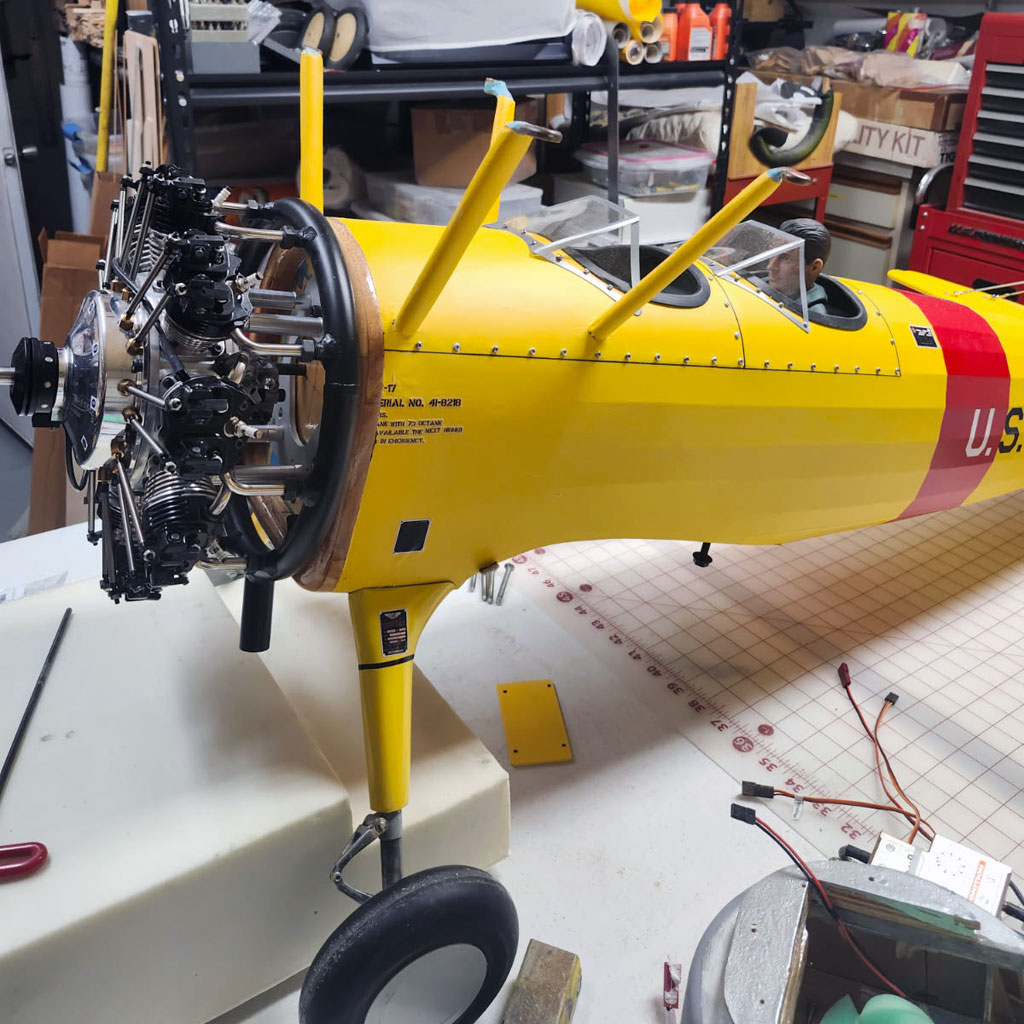
- Price doesn't equate to quality in the ProModeler lineup
Curious about our less expensive lineup? Learn more with this;
Anyway, what he definitely did was this; he got our best servos for 'his' purpose (instead Extreme Flight's, or ours). And that's the point; when you're equipping a model like this, it's about customizing the package to best meet your needs versus what folks selling models think, what some online keyboard-jockey thinks, or even what we think.
Yes, we can guide you, but it's your call. And there's an obvious truth in this because one thing is certain, if you have enough information you can always make the decision that's best for you. But the key is you must have the information you need.
As for us? Our goal is met if after reviewing this white paper you suss things out without needing further help. That said, we stand ready for a call, or email, if you have further questions . . . or just want to chat because we love talking airplanes!

- Swiped off Extreme Flight's website showing an alternative scheme
How white papers come about
How the white papers come about
Curious what leads up to our doing one of these articles? Well, quite honestly it varies. Usually it's due to a call or an email seeking advice. But this one got the juices flowing out of the gate because it was just a photo. That's it, he emailed a photo . . . no comment, or anything.
We're speaking of the article-hero - the article lead photo of Rich Taylor and his model on the dry lake bed flying site with, as you can see, the stunning backdrop of the Sunrise mountains.
Note; the photo was totally unsolicited - important because the shoe is usually on the other foot (e.g. me begging photos).
Anyway, this article features his 85-inch model and when I asked about the photo, he responded . . .
I've been buying your servos for boat racing on the NAMBA circuit.
I now buy and use your servos for aircraft also, because they are the
best servo I've found on the market. I've been in the modeling game
since 1976 and your equipment is just better than any other I've
experienced in the past. So you keep making them and I'll keep buying
them. Simple enough?
Next, let's touch on a bit of interesting background info about the full scale aircraft.
Background
So this particular model's bright yellow, red, and blue color scheme may have been inspired (or loosely based, you decide) on the scheme of the now disbanded Northern Lights. This Canadian civil aerobatic flight team was founded in 1994 by ex-Snowbird pilot Andre Lortie and they had the chops to participate on the airshow circuit for more than 450 shows before calling it quits.
Major point being, the bright colors are as visible and effective for this reduced scale version of Walter Extra's design as their color choice was for generating excitement in full scale spectators.

- Great photo of a now defunct Canadian flying team (credit; FlugKerl2)
As most of you know, Walter Extra created the Extra EA-300 design in 1987 as a tandem version of the EA-260 from the year before (EA being Extra Aircraft). He promptly evolved the 300 into the single place 300S. This was followed by SP, SHP, and SR versions (the latter equipped with a special high lift wing for Red Bull Air Race World Championship series). And all still single-place.
What came next was the 300L, once again back to two-place (like the original EA-300). Further developments led to the 330LP, LC, and LX (now with low-mount vs mid-mount wing). And visually an even easier 'tell' with these low-wing aircraft is the longer tandem canopy (for two vs one person).
Further evolution led to the LT (still L for low wing, and still tandem), but a more comfy derivative with the T being for touring. Put another way, this meaning for folks who wanted to travel using an acrobatic aircraft instead of the typical Bonanza, Cessna, or Cirrus!
Anyway, with the 330LE, SC, and SX he returned to the single-pilot roots of the 1986 design, the EA-260 (the aircraft Patty Wagstaff flew to world championships in 1991 and 1992) and original EA-300 that started this series.
Know what's missing from the list? The 300EXP, which never existed because EXP is the invention of Extreme Flight! As nearly as I can figure, an 300EXP is a mid-wing Extra 300S - but - with the long tandem canopy of a 300L (likely for delivering better knife edge).

- Eyeball the 4-blade prop and aileron spades
Servos and Arms - Sport, IMAC, and XA
Equipment list - Sport, IMAC, and XA
So now let's jump into the avionics, the three equipment lists we are suggesting are a great place for many pilots to begin their journey with this gorgeous model. We start off with a setup for sport pilots, then jump into what folks competing in IMAC may find suits them best, and then delve into the XA-setup for those who tilt in that direction.
Note; the recommended XA-servos are for our most insane customers. Simply put, they are stronger than necessary, and actually suitable for 104-inch models - but - they are the best for purpose because of how fast they are. That said, call and chat with us because depending on you and how you fly, we may have another recommendation (think DS415BLHV for the slightly less intense).
Saying for XA maneuvers, torque is a secondary consideration because it's much more about transit speed when you're playing at that level. And yes, you pay through the nose for this echelon of performance.
Anyway, first up is the sport performance setup.
Sport - Servos and arms
- 1) DS90DLHV - throttle (plus another for choke)
- 2) DS270DLHV - ailerons
- 2) DS270DLHV - elevators
- 2) DS270DLHV - rudder
- 1) PDRS105 - Anti-vibration throttle arm
- 4) PDRS25-25T - aileron arms (they guide you to 50% longer 1-1/2 inch arms)
- 2) PDRS35-25T - elevator arms (1-3/8 versus the 2-inch arms)
- 1) PDRS50PP-25T - rudder pull-pull installation
Note; consider opting for more powerful DS360DLHV servos with a 60cc engine, and the IMAC setup if you opt for an 85cc engine.
These DL-series servos we're guiding you to are offered in a range rated between 90-360oz-in of torque. If there's one thing folks especially appreciate it's the finned aluminum center case because they run cooler on hot summer days than all-plastic designs.
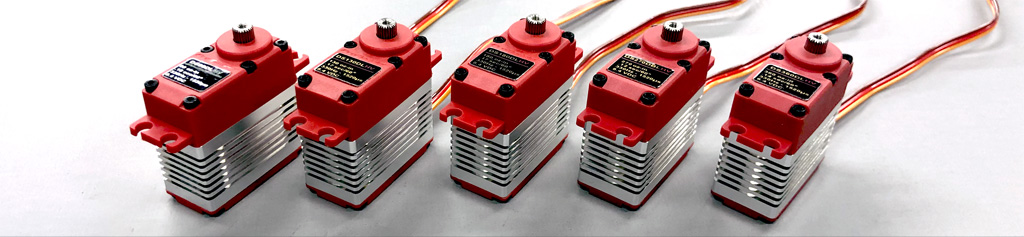
- The five servo DL-series lineup are rated from 90-to-360oz-in
Another detail folks appreciate about the DL-series servos are the durable stainless steel gears. How can we offer stainless in a sport servo? Simple, it's because we agreed to our gear hobber's demand we use them across our entire lineup in exchange for a great price.
So you win with better gears, we win because they cost less, and they won because it increased their sales volume for stainless gear sets (which lets them get better prices for raw material). So it really is true when they, money is what makes the world go around!
What this means for you is getting the same-same more durable heavy-duty stainless steel gear sets as in our top-of-the-range all-alloy brushless servos (like we recommend for IMAC and XA duty). Best part? This comes without breaking the bank!
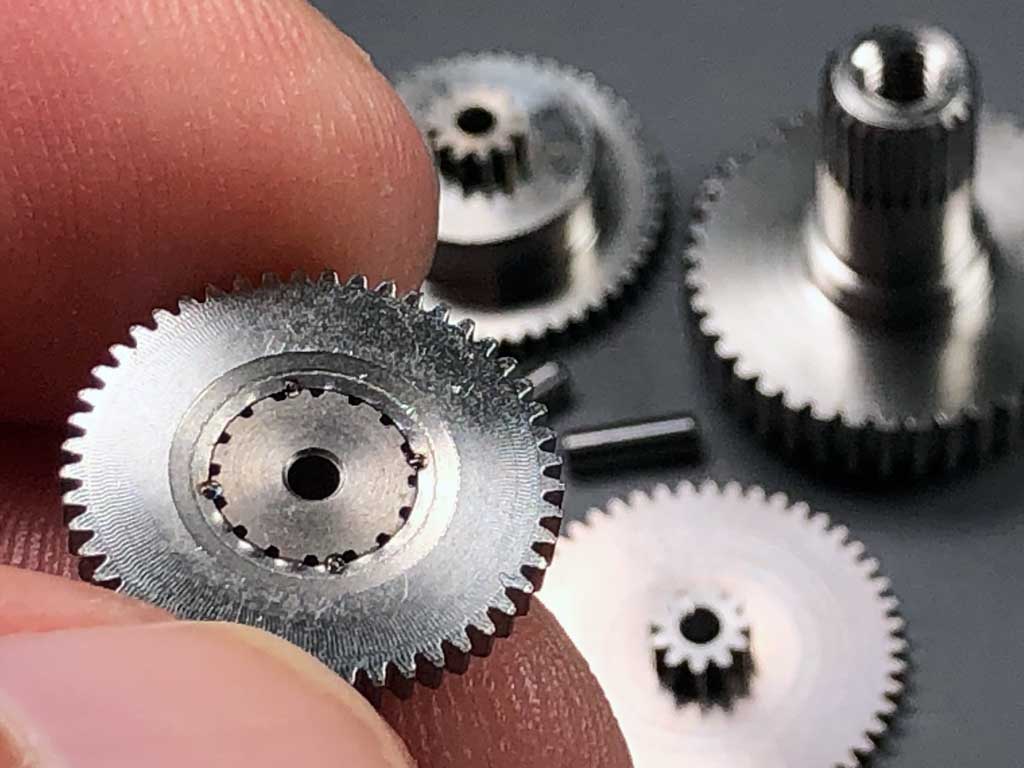
- Eyeball the four tiny spot welds between pinion and bull gears
Better - servos and arm
- 1) DS255BLHV - throttle
- 1) DS90DLHV - choke (optional)
- 2) DS505BLHV - ailerons
- 2) DS505BLHV - elevators
- 1) DS630BLHV - rudder
- 1) PDRS105 - Anti-vibration throttle arm (plus another if using choke)
- 4) PDRS35-25T - aileron arms (1-3/8 inches vs 1-1/2 inches - IMAC vs XA)
- 2) PDRS45-25T - rudder and elevator arms (1-3/4 inches versus 2 inches)
- 1) PDRS75PP-25T - rudder pull-pull installation
So for IMAC we guide you into some of our all-alloy servos. This is how they compare when placed side-by-side with a hybrid case servo (hybrid meaning the case is comprised of both engineering polymer and aircraft aluminum).
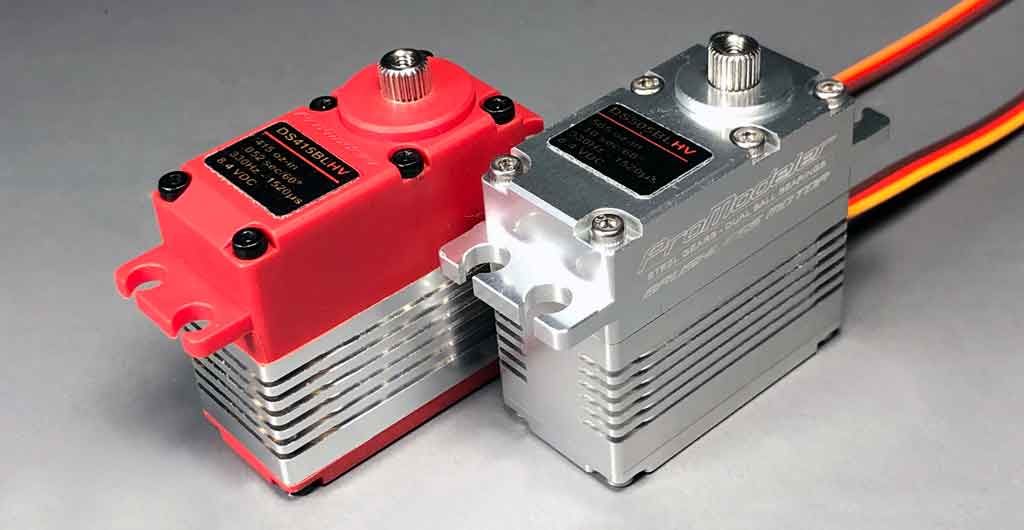
Note; another consideration (some would say 'the' consideration) is these servos use brushless motors.
Brushless motors are important when you practice several times a week (and because you're on the contest trail, you also fly on weekends). Reason being these motors last 5X longer than similar performance coreless motors because they don't generate dust internally as the brushes wear (due to pitting as they spark on the commutator ring).
To learn more, review this; About RC servo motors
So for XA, our 'best' set-up, what you're really paying for is raw speed. For example, take the DS630BLHV versus DS635BLHV (an IMAC vs XA-recommendation). While these have similar torque, just look at the difference in transit time. This is why we guide you to these servos for XA.
- 0.10sec/60° vs 0.042sec/60°
So the blazing fast performance is the sole reason we recommend these for XA. If you're performing reversing rifle rolls, and flicking the model into forward and reverse rolling harriers, then transit speed makes a huge difference. Moreover, if you run a gyro, then because gyros love speedy servos, you'll notice a more locked-in feeling.
Bottom line? Transit speed makes a world of difference. One, which you'll immediately notice compared to the more prosaic servo offerings someone with a focus on selling model airplanes has to offer versus what someone like us can pull out of our quiver of arrows for those with evil intent when you push on the left stick.
The old saying, it's hard to beat a man at his own craft, is true!
Best Servos and arms
- 1) DS255BLHV - throttle
- 1) DS90DLHV - choke (optional)
- 2) DS635BLHV - ailerons
- 3) DS845BLHV - rudder and elevators (if you aspire to godhood)
- 1) PDRS105 - Anti-vibration throttle arm (plus another if using choke)
- 4) PDRS45-15T - ailerons (1-3/4 inch vs 1-1/2 inch for the super aggressive)
- 2) PDRS55-15T - rudder and elevator arms (same 2 inches they recommend)
- 1) PDRS75PP-25T - rudder pull-pull installation
Let me be clear; before deciding these are best for you, be honest with yourself. If you're more of a sport pilot, or principally fly IMAC maneuvers, then our advice is save your money because it's pointless to pay for speed you either can't feel or won't use.
Now allow me to touch on something to do with actually getting this level of performance. The mechanical changes we discovered were a must to avoid servo arm failure.
25T vs 15T
One of our superb competitors is MKS. And just as they go from a 6mm 25T spline to an 8mm 25T spline on the output shaft of their line of high performance servos, we do the same with our super servos. Difference is due to our testing, which showed ours are so fast they can actually rip the splines out of 6061-T6 alloy arms. So because of this we opted for the same gnarly 15T spline we use with our 2680oz-in mega-class servos.
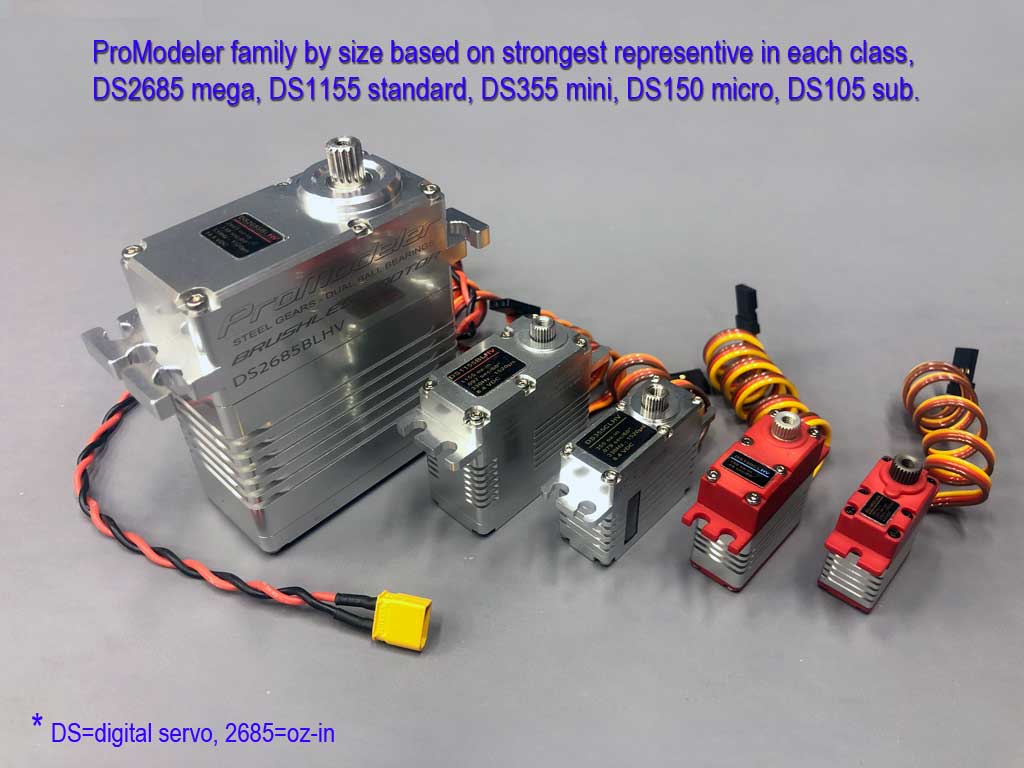
So like a 13 y/o with size 14 sneakers, these spines look out of proportion to what you've always seen. Eyeball the next photo for a gander at the output shafts and you'll see the massive difference between ø6 and ø8 (ø is diameter on a print, and we're dealing in mm).
Anyway, because we offer the same length arms in both splines, then you can get the same-same setup between our 6mm spline BLS1-series servos and our 8mm spline BLS2-series servos.
Note; BLS1 are DS505/630/930BLHV and BLS2 our DS635/845/1155BLHV series.
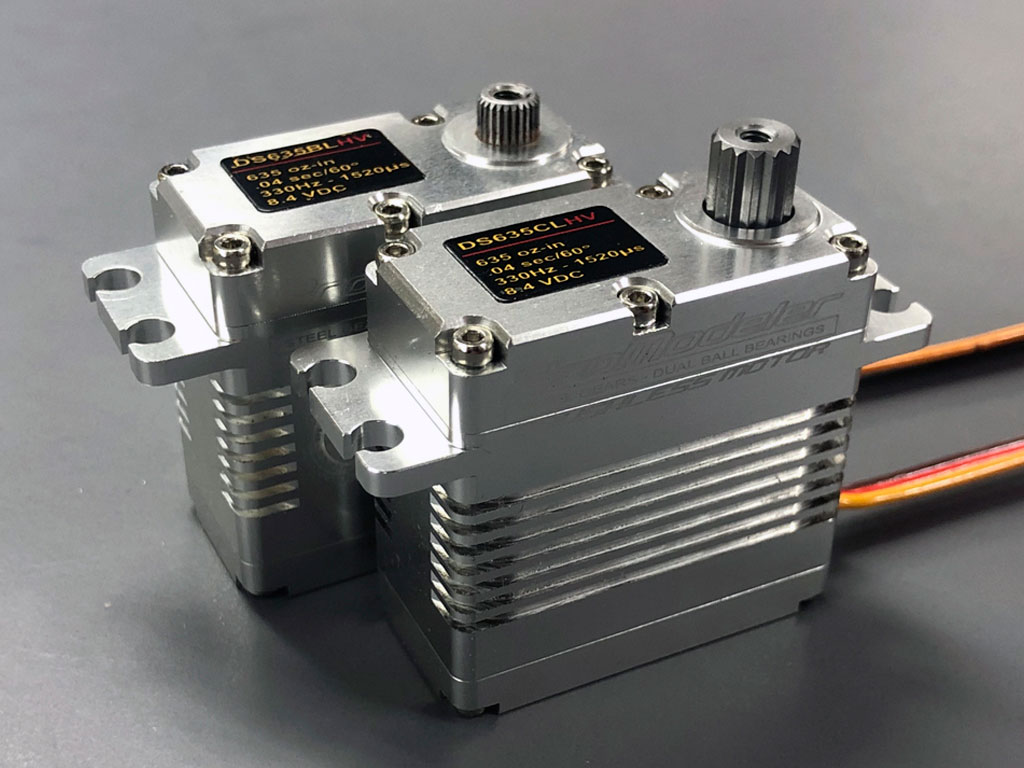
Meanwhile, if you're curious what the letter/number combinations mean with our servo part numbers, we get it. Everybody designates servos in their own way and sussing it out seems impossible.
With ProModeler you don't need to look it up to know what you have in your hand.
- DS = Digital Servo
- 635 = Torque rating in oz-in (a touch over 45Kg-cm)
- BL = Brushless Motor (CL = Coreless, and DL = Iron Core)
- HV = High Voltage (max of 8.4V)
Anyway, no decoder ring necessary to figure out our part numbers!
Now, let's touch on what else you may need in inventory when setting out to equip one of these beasts. I bring it up because when I get started on a project I don't want any surprises that may force me to scurry to the computer or hobby shop to keep building.
Figuring you may be the same, here are a few of the other bits and bobs you want to have on hand.
Servo arm details
As regards servo arms, we guide folks to aluminum servo arms for this model instead of our heavy duty polymer (plastic) servo arms, the PDRS101. Why? Principally due to the weight and speed of which it's capable. Basically, we stop recommending our heavy duty polymer arms once models get into the 18-20 pound range - unless - they're relatively slow (think 30-pound Piper Cub). Same holds for heavy duty plastic servo arms offered by others.
The key detail is don't use plastic arms because you're getting to the point where servo performance is sufficiently high the splined output shaft can strip the plastic. So because this model is in the range of 18 pounds, and because folks want longer servo arms than we produce in plastic, we guide to aluminum for flight controls.
And in our case, not just any aluminum but 7075-T6 instead of 6061-T6 (like we use for cases and imports use for servo arms). Why is this? Simple, because 7075-T6 is a shit ton stronger than 6061-T6 (shit ton is a engineering technical term).
In fact, when comparing tensile strength, the 7075-T6 at 572MPa vs 276MPa for the 6061-T6 is a touch over 100% stronger! 7075-T6 even exceeds the 370MPa tensile strength of mild carbon 1018 steel . . . so you get the strength of steel at the weight of aluminum!
Added to which, these are priced reasonably close to the east Asian imports offered by Extreme Flight. Means if you can budget for alloy arms, these are what you want. And you really should care about the servo arms because there's a lot of money riding on this recommendation. Remember, we all like squeezing a nickel until it squeals . . . meaning right up until it costs us big time. Heads up!
PHOTO OF MODEL ON FLIGHTLINE
- Gorgeous color scheme
So this is a typical ProModeler alloy servo arm. Eyeball how these arms feature an H-beam profile, (like an I-beam, but on it's side because of the direction in which it resists flex). Know where else you find this H-beam profile being used? In highly stressed connecting rods of automotive racing engines, like the ones produced by Carillo . . . and for the same reason!
Another thing is these aren't your typical flat import where you sleep better if you add a nut to the backside. It's because we ensure there's 2d depth-wise for the threads (two diameters). After all, details count.
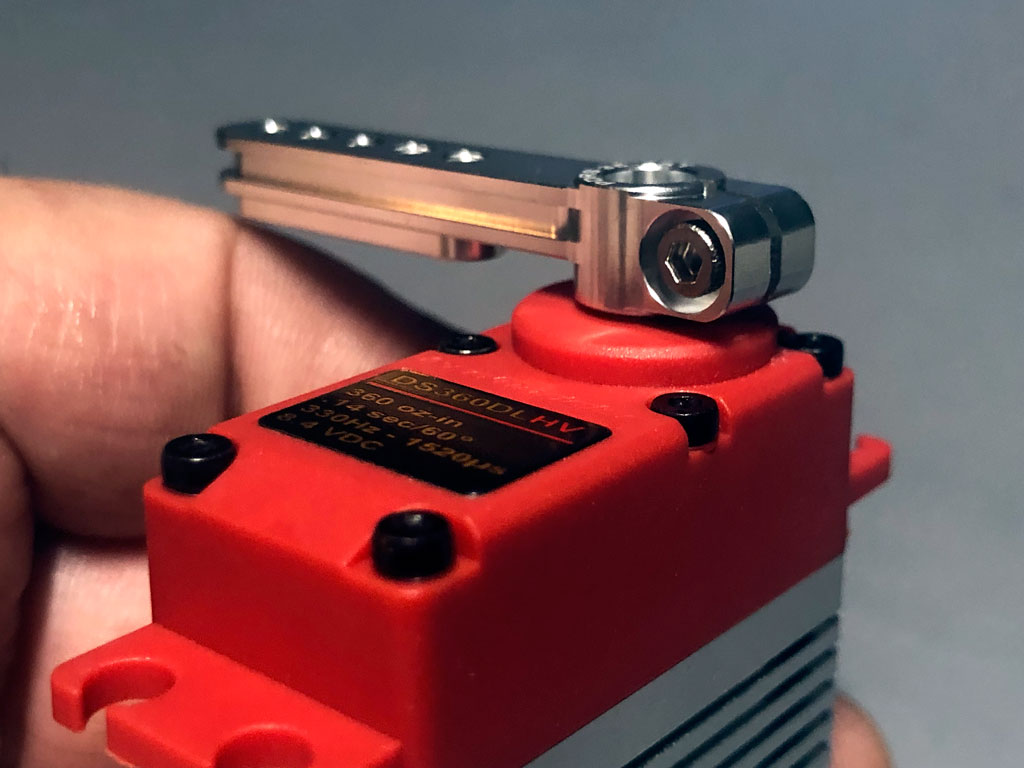
- Backlash compensation screw and thick enough to not need a backing-nut
Sussing out the best servos
So there's one problem I don't know how to resolve short of a conversation. It regards the answer to which servos are best for you. We're trying to guide you but sometimes there's nothing better than a chinwag to figure out what's best for you. And remember, the answer is always . . . it depends on how you're going to power the model, and how you plan to fly it.
By this last meaning it's one thing if you're a sport or club pilot, but another if you're more on the hot-dog end of the pilot range without actually being a competitor. For example, if you mostly fly circuits and perform the odd rolls or loop maneuvers two mistakes high, then it's pretty easy to guide you into a set of economical servos for such a high performance model with a reasonable certainty you're going to be very happy.
And we can do the same if you fly it like you stole it - but - we need to know this in advance!
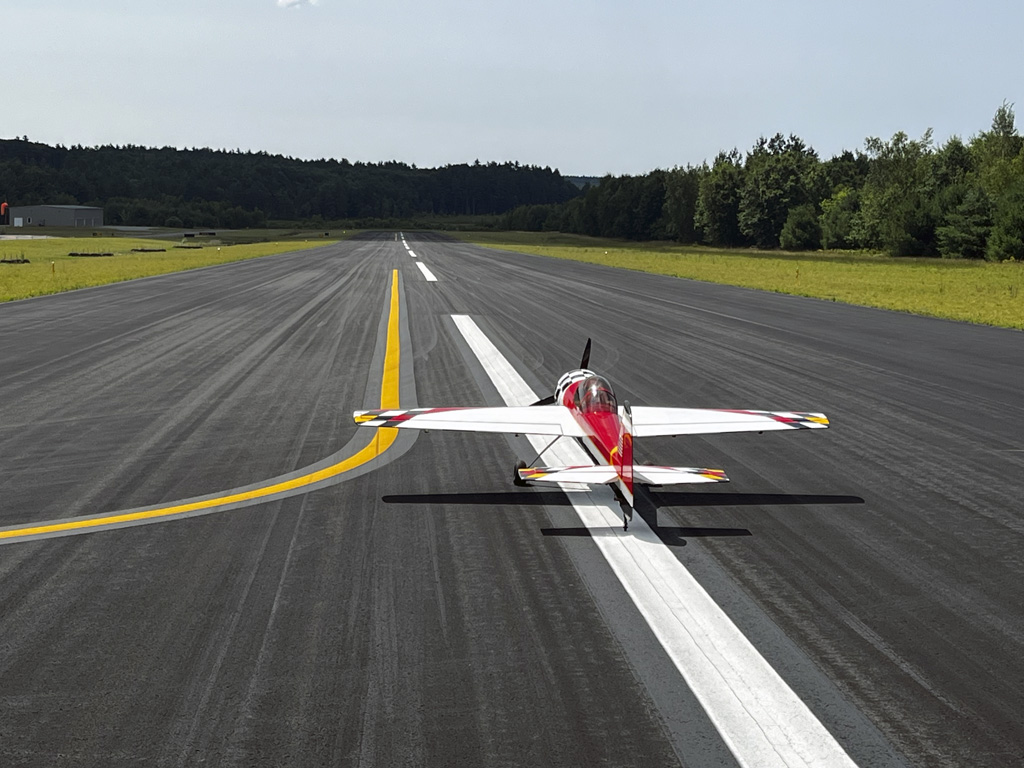
- Purposeful look . . . ready to take throttle up
Point being, it's a horse of a whole other color if you're a sport pilot who flies the model hard . . . like down low on the deck, then come in and pull up into a wicked Lomcovák or snap roll only to come around inverted - and to cries of lower - you get down and dirty a mere foot off the deck! Take my meaning about sport versus SPORT?
Especially considering this puppy goes every bit of 18 pounds. Added to which, it'll hit an easy 100mph in level flight (maybe more depending on the engine). So this ain't a toy! And what this means in practical terms is when you dive the model out of the sun and pull up at the end of the field and flash into a victory roll, the elevator servos, for example, are seeing some pretty serious G-loads. And at high speed, the ailerons and rudder, in particular, are seeing pretty high aerodynamic loads. Loads you don't want to play around with. Means if you're a hard flying pilot you may consider at least opting for some of the servos from the better group for elevator, capisce?
On serving two masters
Next, there's an issue between IMAC and XA maneuvers. Guy who kills me says, 'I fly IMAC, then pauses and adds, but sometimes I pull out the stops and perform XA-maneuevers, too.' This is a problem for the same reason we learned in Bible study you can't serve two masters. You really need to either set the model up for IMAC-maneuvers, which straight up is the purpose of the equipment list from the 'better' group, or XA-maneuvers, which is the 'best' group.
So just as you can't be a little bit pregnant, if you fly XA, then our best advice is to equip the model for it. Otherwise, don't bitch the servos aren't fast enough when your flight resembles a mosquito on crack. Speed is what you're paying for when you want our very best servos.
Anyway, the reason we're paid the big bucks is to tell you these things . . . and without sugarcoating the realities. Remember, the guy selling models wants to sell them to as many folks as possible. So telling someone their existing servos may not be up to the job only hurts their sales. Point being, an airframe vendor's incentives doesn't actually align with yours.
So we're trying to anticipate the 'what if' about flying these things when we put together our avionics list. Saying there are subtle differences between a given set of servos and the 'right' servos for your build.
Anyway, if you're unsure about the best course of action, then call us and let's chat! I promise, between us we'll suss it out. And besides . . . I always love talking airplanes!

- From the business-end it has that tough guy look
Extensions
- 2) 8-inch extensions (at receiver to mate wing)
- 2) 24-inch extensions - ailerons
- 3) 36-inch extensions - rudder and elevators
- 2) B2S2600 LiIon battery pack - one each for avionics and ignition
- 1) 20A Dual Illuminated Rocker Switch
- 1) 5A slide switch - ignition
- 1) RCEXL Opto-Kill Switch
Extensions - details
Let's touch on servo extensions. They're three-strands twisted together and made up of 20AWG wire. Basically, they're the thickest wire leads we can get crimped into the DuPont housing.
Twisted
Why twisted? To more strongly resist stray RFI (radio frequency interference). And this is a big deal. In fact, it's our advice to don't ever use flat extensions with ignition engines. Why not?
Simple, it's because 'if' the module or high tension leads begin to fail, then the ignition noise (these things are sending 40,000 volts to the plugs) basically swamps the receiver because it's act like a broadcast transmitter of pure noise. And the noise feeds straight into the receiver through the leads 'unless' they are twisted. Airplanes are expensive, right?
Anyway, you're the customer and thus, always right - but - our opinion is a few bucks saved on flat thin extensions is false economy. So heads up whether you add extensions to a servo order or get them someone else because these are basics! And it's not opinion, but physics.
Insulation
Speaking to the insulation, while there are several materials we could have select for the insulation, we opted for silicone (which is pretty much the same stuff used for fuel lines) because it's silky soft and supple, which makes it great for resisting abrasion as you pull it through wing ribs and such. Combine with high strand copper wire and you get a super flexible extension that's easier to route and doesn't get stiff when it gets cold.
Thickness
20AWG? Why such thick leads? Simple, because the thicker the wire the more it reduces voltage loss. So 20AWG is also the thickest which can be crimped into the DuPont connector. Want to know more about decisions made when using extensions, e.g. how to calculate voltage loss? This white paper discusses this, and more;
- Review to learn more: Servo Leads & Extensions
Note; these articles are free. Clicking the link opens it within a separate page.
And guys, yes I know all this info comes across as a sales pitch, but it can't be helped and it doesn't really matter where you source extensions. This because the servos only know if they're less than 20AWG, and twisted only matters if an ignition goes bonkers. Otherwise, insulation is more a matter of what's important to you.
And as far as important to us, it doesn't really much matter if you add extensions to your order, or not. Why not? It's because we live off the servos not the nit-noids! So this info is offered mostly to educate and inform what is important and watch out for.
Locking extensions
Oh, and heads up, if you order extensions from us, we offer locking ones, too (a drop down menu selection when ordering). Point being, these are the ones you want wherever you cannot inspect the connection.
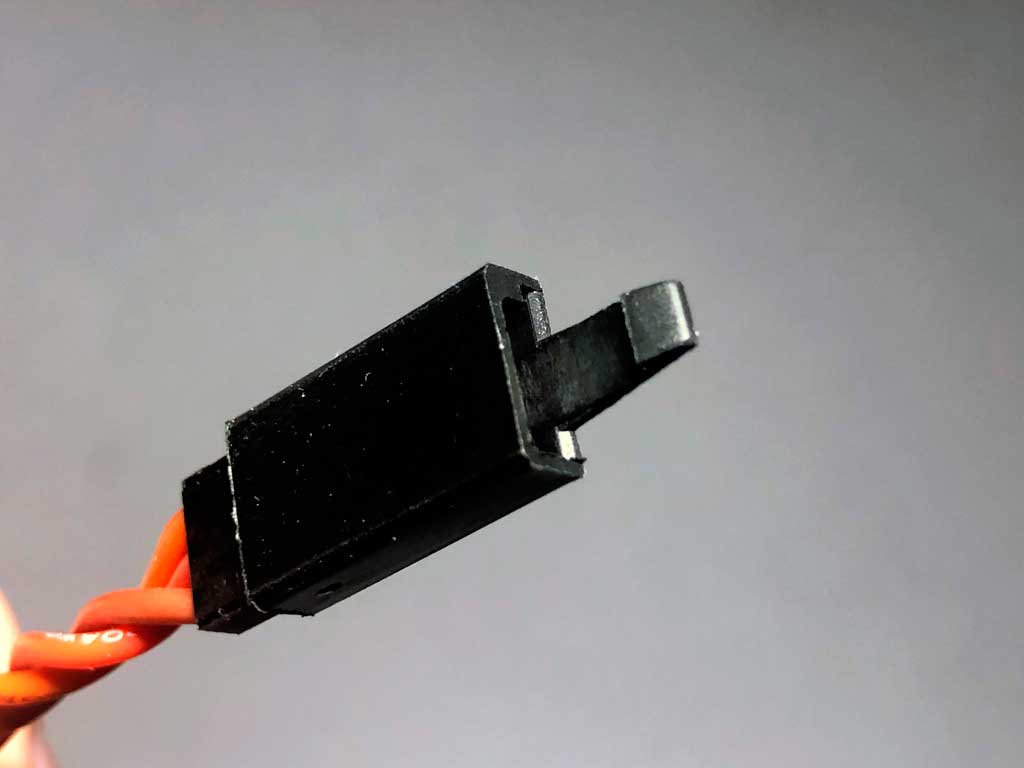
- Locking extensions are quick and easy to use
Capacitance
Also important thing as regards extensions is how the servo works at the end of an extension. Basically, the further away from the voltage source, and the thinner the wire, the worse the servo performs. Once you have the thickest wire, the only thing left to deal with any added length from the receiver is capacitance. So let's touch on this, next.
Folks, this is important; when servo extensions exceed 30-inch in length, it's time to add capacitance. First you've heard about this?
- Review this article; Why and when to add capacitance
Batteries
Batteries and switches
So as you may have noticed, in addition to servo and servo arms, the 'other' list included extensions, batteries, and both radio and ignition switches. Two in fact. One a manual slide switch and the other an Opto-Kill switch. These last two are for your battery-powered ignition module-equipped engine.
Also batteries is plural meaning there are two packs onboard. One for the avionics, the other for ignition. We'll circle back around to this in a bit. So most guys equip their model with two switches, one for the receiver, the other for the ignition. Me? I use four, instead. Let me explain, but heads up, we're going into the weeds with this, so hang with me.
And before we plow on, let me back up; while the model may be powered by an engine, or a 12S electric setup, if it's with an engine it's almost to a certainty one burning gas/oil premix. These days almost all of these are relying on an ignition system instead of a magneto. And engines can hurt you really, really badly. Means a way to shut it off in an emergency is wise.
What's developed as common practice is to have two ways two ways to do it. One being to close of the carburetor, and a switch to cut off the power to the ignition module. So one relies on a manual switch and the other happens via the radio. Think I'm going over the top by discussing this?
Review this if you have a strong stomach; Regarding props - heads up!
Switches
Engine switches
These last two switches on the above list - specifically - are so you have the means to shut the engine off both manually from outside the model 'and' via the radio in the event the throttle servo goes teats up. And of course, you know while we make the best servos possible 'and' our hope is a throttle servo never fails - but only God is perfect.
So for the rest of us, what General Baden-Powell wrote in the Boy Scout handbook will have to suffice . . . be prepared!
manual switch
So we have this inexpensive 5A mechanical slide switch available. It's the fashion these days to poo-poo them in favor of magnetic switches, and so-called failsafe switches (supposedly fail-on as long as the magic bits are working).
Anyway, what recommends our mechanical slide switch it over a hobby-grade switches are two things. First, the small metal shield wrapped around it rejects stray RFI, e.g. from a failing ignition (important since they're mounted nearby). Second, the potting compounded serves to protect the solder joints from vibration. And this last is a big deal.
I mount this to the model - connected between the ignition pack and the module - such that I can flip the switch and turn off power to the ignition, thus shutting the engine down in an emergency. I make it a practice to confirm function after each flight and recommend you do the same. How?
Simple, manually shut the engine down with the switch at the end of the flight! Benefits are it keeps the switch exercised, you develop the muscle memory to use it, and it proves the switch works. After all a broken switch you rarely use and can't quickly reach in an emergency isn't of much use, agreed?
Note; it's not so much slide switches are inherently unreliable, it's using low-quality switches that exposes you to greater risk!
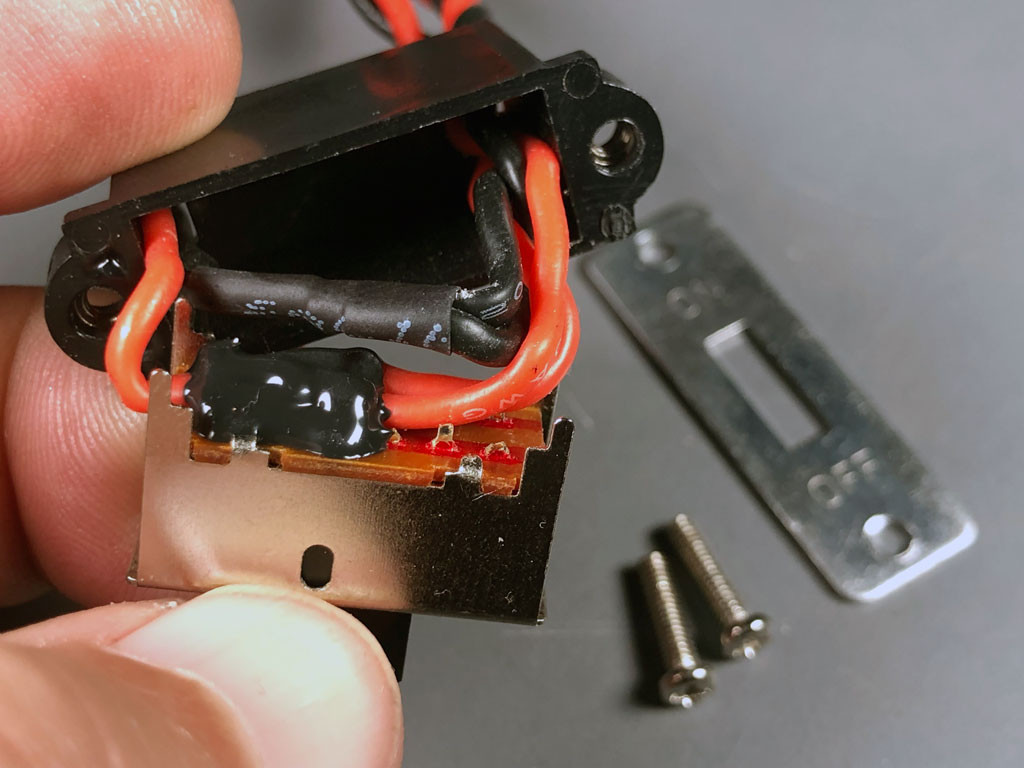
- Genuine Nobel 5A shielded slide switch with potting compound
Opto-kill switch
By the way, technically, there are four switches in the ignition-powered model recommendations. This is because I also rely on an opto-kill switch inserted in series after the manual switch. Reason, of course, being on the off chance the model experiences throttle servo failure. After all, we make good servos but only God is perfect!
If you still need one when you order, we offer these on the site. If you're unaware of the product, this is what it looks like installed.
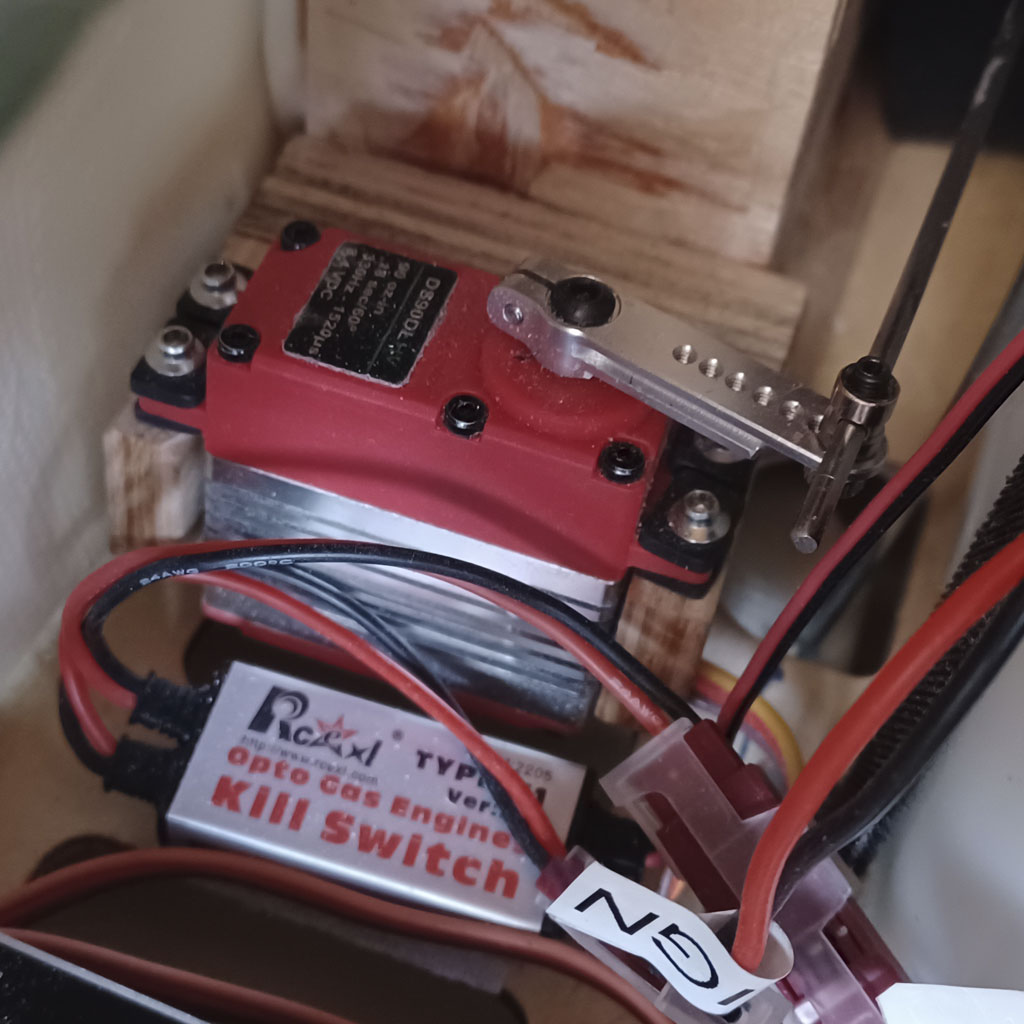
- Mounted with Velcro and on a switched channel
Regarding 1 pack and 2 switches
So here's the thing about using two packs. It's impossible to get the benefit without adding significant complexity.
Since statistically two of anything doubles odds of failure, now to the 2nd battery, add a widget with 50 more components and instantly, the failure chain between your model and a smoking hole in the ground just got a lot longer! 'Simpler is better' isn't just a trite saying.
Another reason I'm a hard sell on using two packs (despite as a modeler wanting to believe the hype) is this; where's the proof? Are models are crashing due to battery packs failure common at your field? They sure aren't at mine! Moreover, 90% of models are electric, all using lithium packs for propulsion . . . and for sure those packs aren't failing, either.
Meanwhile, there are several downsides beyond a few hundreds bucks for the widget;
- 2X the expense for a pack
- 2X the work to charge and maintain
- Dead weight of a 2nd pack
- There's no test function
. . . this last is important; how do we test it's working before flight?
Anyway, we could put these things on the website (they're an easy sale) and if you already have one and need two packs, then the businessman in me says, yippee! But what 'this' engineer recommends, instead, is one pack.
Want to get something to add real safety? Buy a 2nd switch.
Switch
Most guys building this models use two switches. One for the radio, another for ignition. Instead, I use three . . . two for the radio.
So the 2nd radio switch is connected in parallel. In fact, if you know how to solder you can add a 2nd lead to an existing pack. Remove the heat shrink, and solder red-to-red and black-to-black. Presto, you're in business without buying another pack! You gain two benefits.
- Odds of both switches taking a crap on the same flight are astronomical.
- Automatic load balancing
This last is a nice added benefit since the connectors are rated at 3.5A continuous. So using two leads cuts the load through each exactly in half, or put another way, instantly means you can discharge the pack twice a ttwice the rate. This is important when flying a model with 8 servos.
Note; since a 10C pack with 2.6Ah cells can be safely discharged at 26A, the connectors are the choke point - not - the battery pack.
Anyway, you don't need fancy switches. What protects your model isn't a $50 switch, it's mathematics. Means even ordinary slide switches (like ones we've used for decades) are perfectly fine so save your money and buy good quality switches instead of buying the snake oil about failsafe switches. They're only fail safe as long as all the components that make them work actually functions. Bottom line? Switches fail. Plan for it because it doesn't take expensive switches to do the job.
So with a large model like this, specifically because of the load of 8 servos, I'd rather use 10A switches, instead. Yes, still uses connectors rated at 3.5A but this isn't a limit, so it'll flow 5A. However, because in the real world the servo loads are intermittent, they're easier on the contactors inside.
This is why we offer this dual switch (two individual switches mounted for convenience inside one housing).
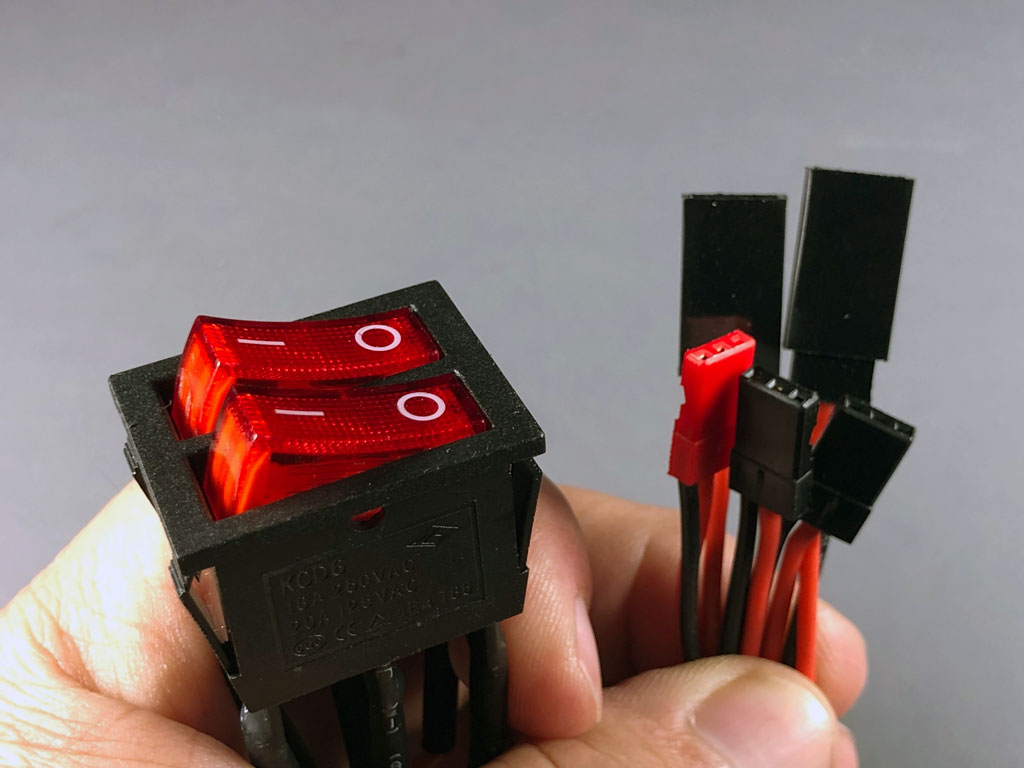
- Charge without disconnecting through the red plug
So in actual use, because these switches are large, folks don't just chop a hole on the side of a fuselage and install it like you would a smaller model. You need to find a place.
For example, here's all three switches installed in my 1/5th scale Ziroli Stearman where the front cockpit floor worked out perfect.
Note: this model has one of our 15A over-center toggle switches for the ignition because it's supplying a 9-cylinder module.
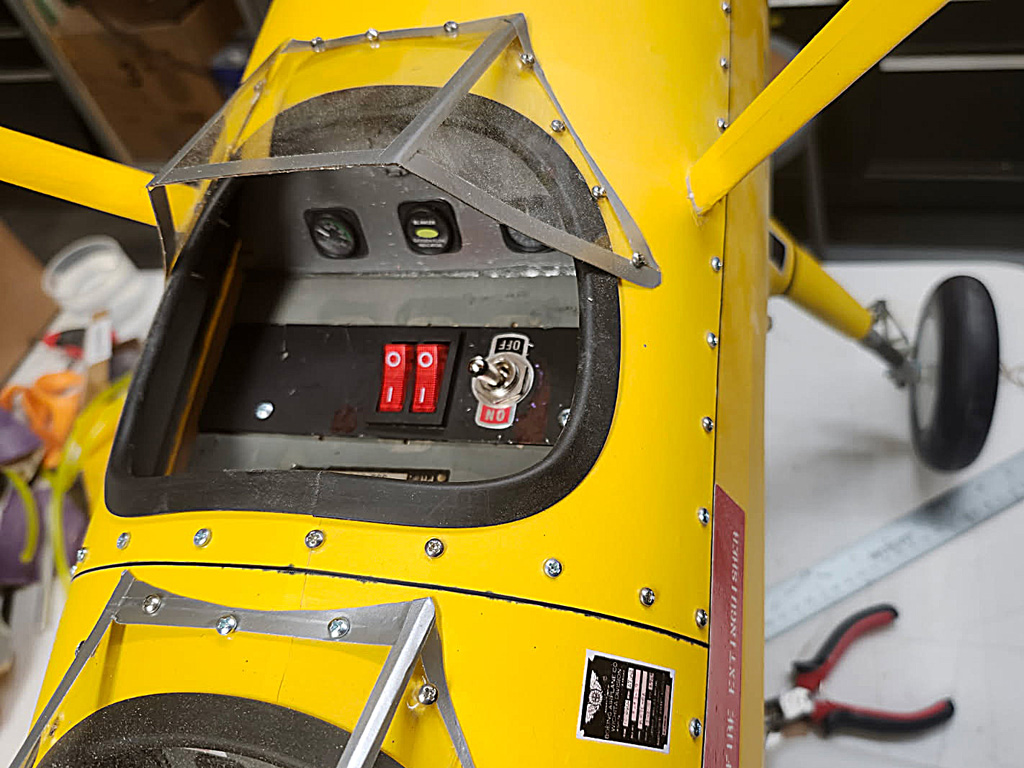
- Finding the perfect spot is key
So because these are illuminated switches, if you forget and leave the model powered, it's easy to suss out. Allow me to share this photo as an example. It's of a pal's TopRC Zero he equipped with a pair of the dual rockers.
Two switches for two batteries; one for the avionics, the other two switches for the ignition pack. The latter, incidentally, also supplies juice for the electric-powered retractable landing gear system.
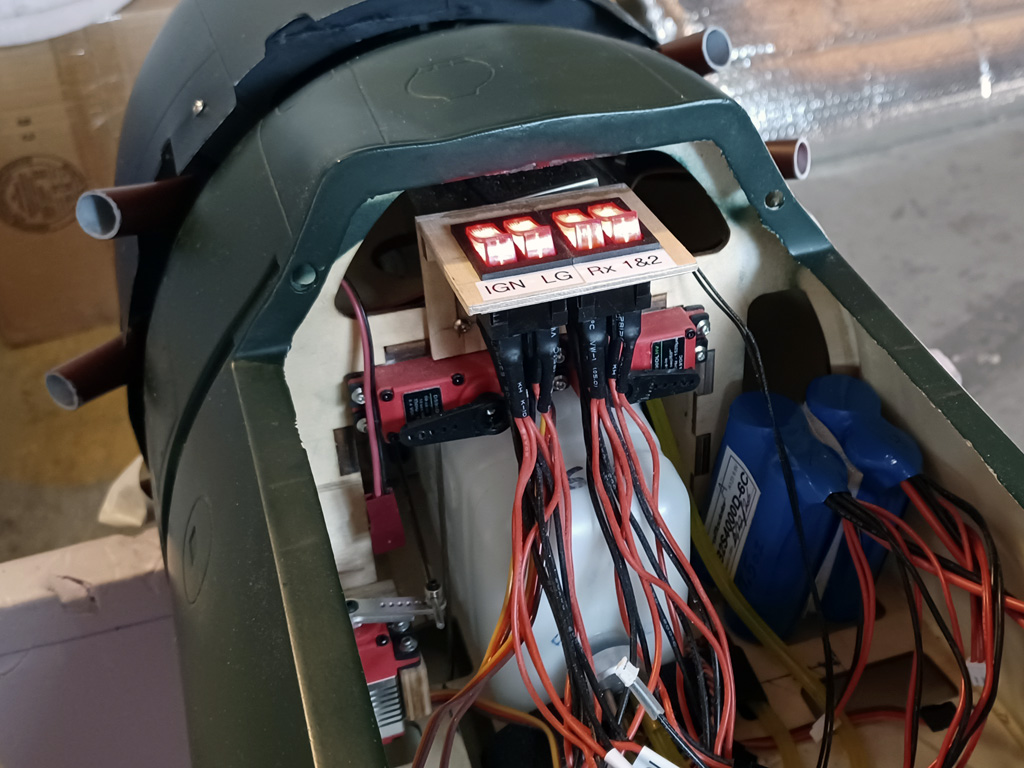
- Bright illumination makes it easy to confirm function
So next, let's get going and wrap this up. Here are details regarding equipment installation. No surprises for any experienced giant scale pilot. And if you're new to large acrobatic models, maybe you'll maybe see details that help you.
Servo Installation
Aileron servo installation
Extreme Flight favor what we refer to as a pocket mount system of installing wing servos. Just connect the extension, drop the servo onto the mounting rails within the hole (what we call the pocket) and drive home the four screws.
Next, make up the linkage and Bob's your uncle . . . move on to the other wing panel.
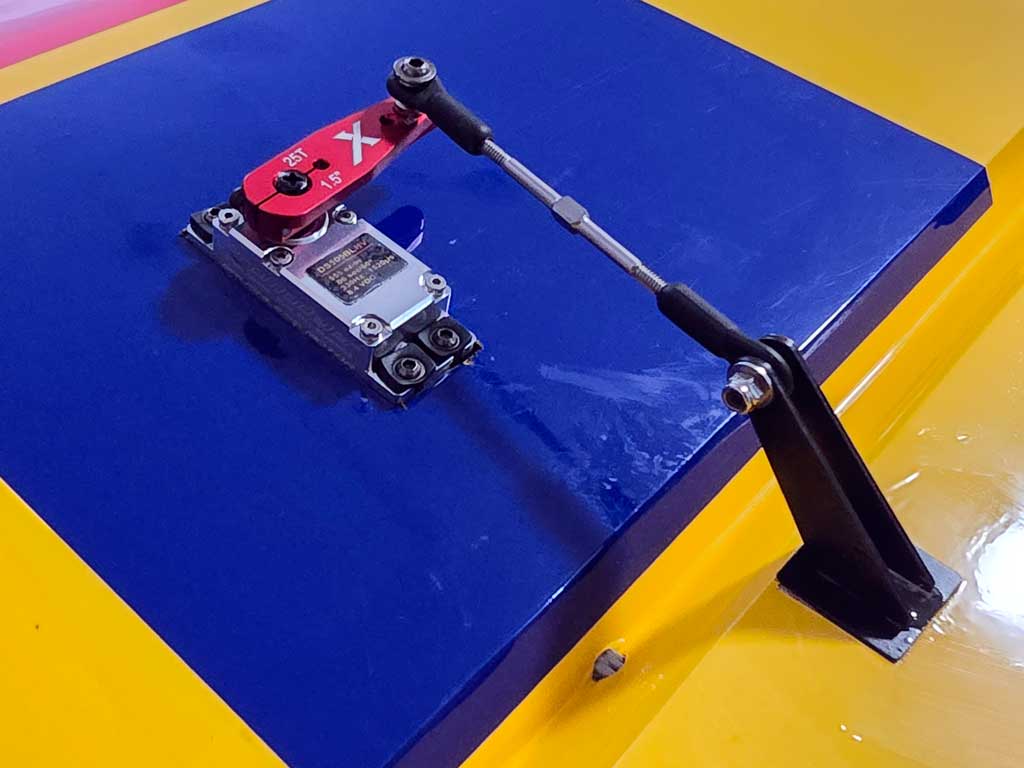
- Single aileron servo per wing panel
Elevator servo installation
The elevator servos are bit trickier. These install through the root of the horizontal stabs. I quite honestly wish they'd adopt a hatch type mounting system for these because installation would be easier. Especially when slipping on the servo horn. That said, nobody at Extreme Flight gives a hoot about what I think. Point being, it's on you to deal with it.
NEED NEW PHOTO IN FOCUS
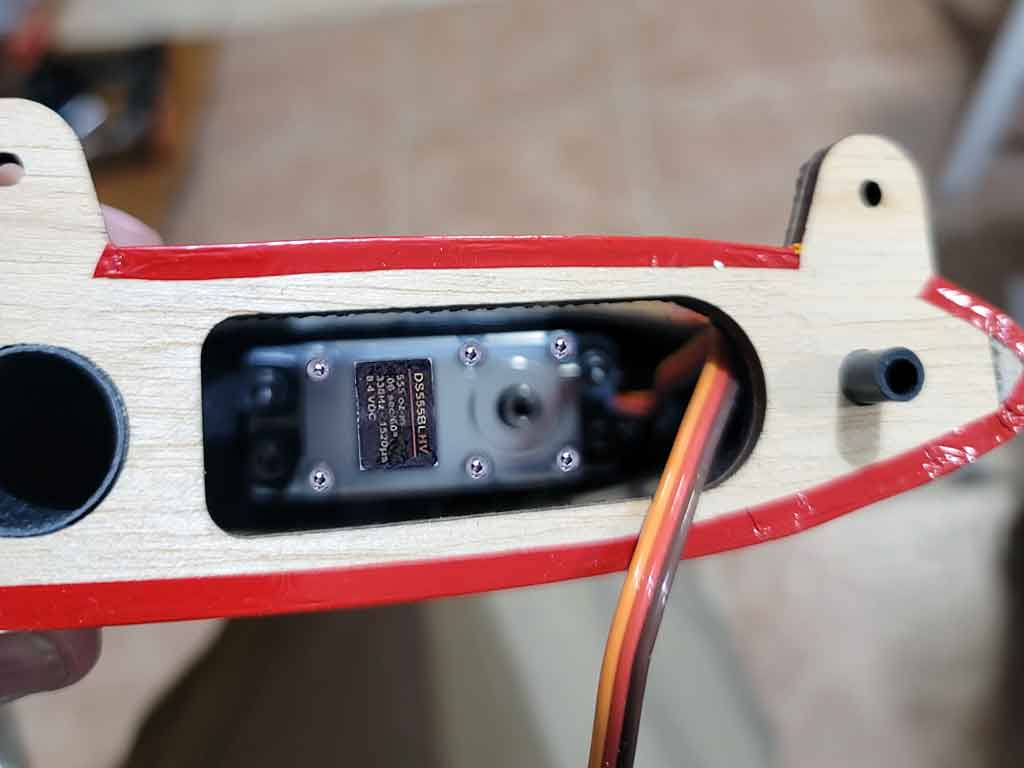
- Servo goes straight into the rib mount and is secured with screws
Rudder servo installation
The rudder servo install is simplicity itself. Just mount in the fuselage and drive home four screws and you're done. In this photo a tiller arm has been used for the pull-pull cables. We think we have a better way of skinning the cat, using the same thin sailors discovered centuries ago when dealing with ropes . . . a pulley!
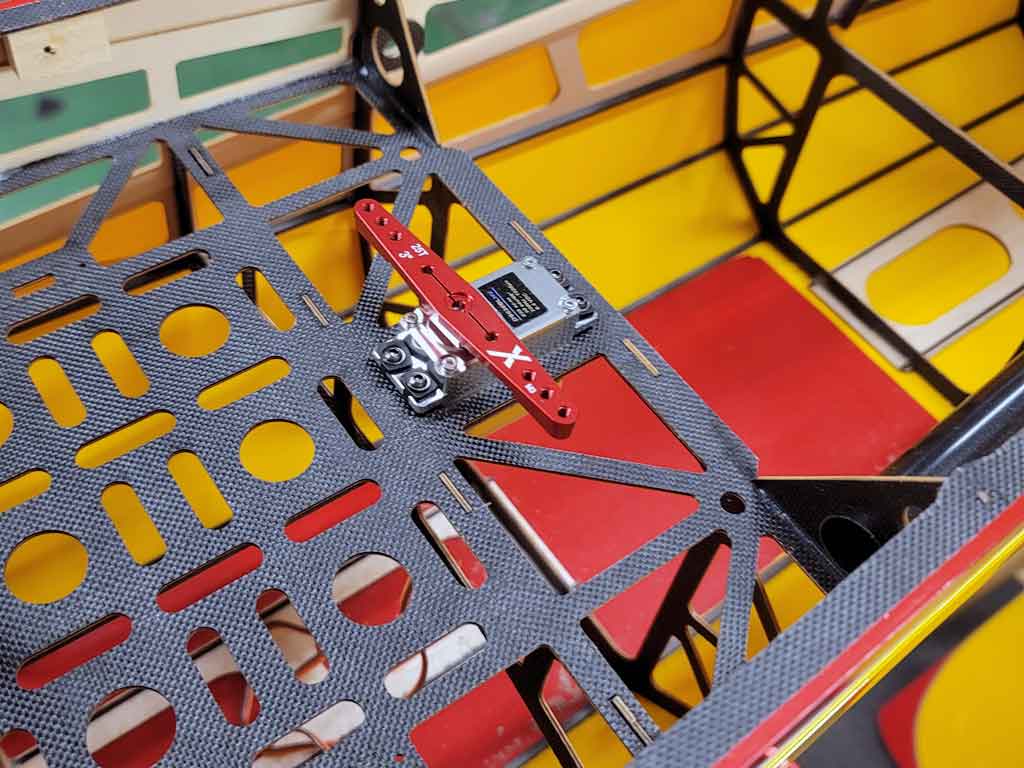
- Rudder servo installation is duck soup
So if I recommend a pulley instead of a tiller, why is this? Review this article to learn more;
- Why a pulley beats a tiller: Advantages of pull-pull via pulley
And by the way, we produce these in 34mm diameter, 50mm, 75mm, and 100mm (the latter being about the same as the 4-inch arm and much too long for this model).
For most sport, the 50mm pulley we recommend is all you need. And I'd bet a doughnut it's plenty of throw for IMAC, too. Thing is, it's our experience the IMAC guys want the larger 75mm pulley we recommend for the XA-folks. If that's how you feel, then get that one because it's your toy. So how can you tell if the 75mm is too long a radius and should have stuck with the 50mm pulley?
Easy! If you give the model full rudder and it's way too much throw (meaning you're forced to reduce ATV to maybe 80% each way), then you'd be better off with the 50mm pulley. Reason being using ATV to dial things down effectively gives up a TON of the resolution of your servo. Don't say nobody told you.
Anyway, we're just making a recommendation based on experience - but - the feel you prefer is strictly up to you.
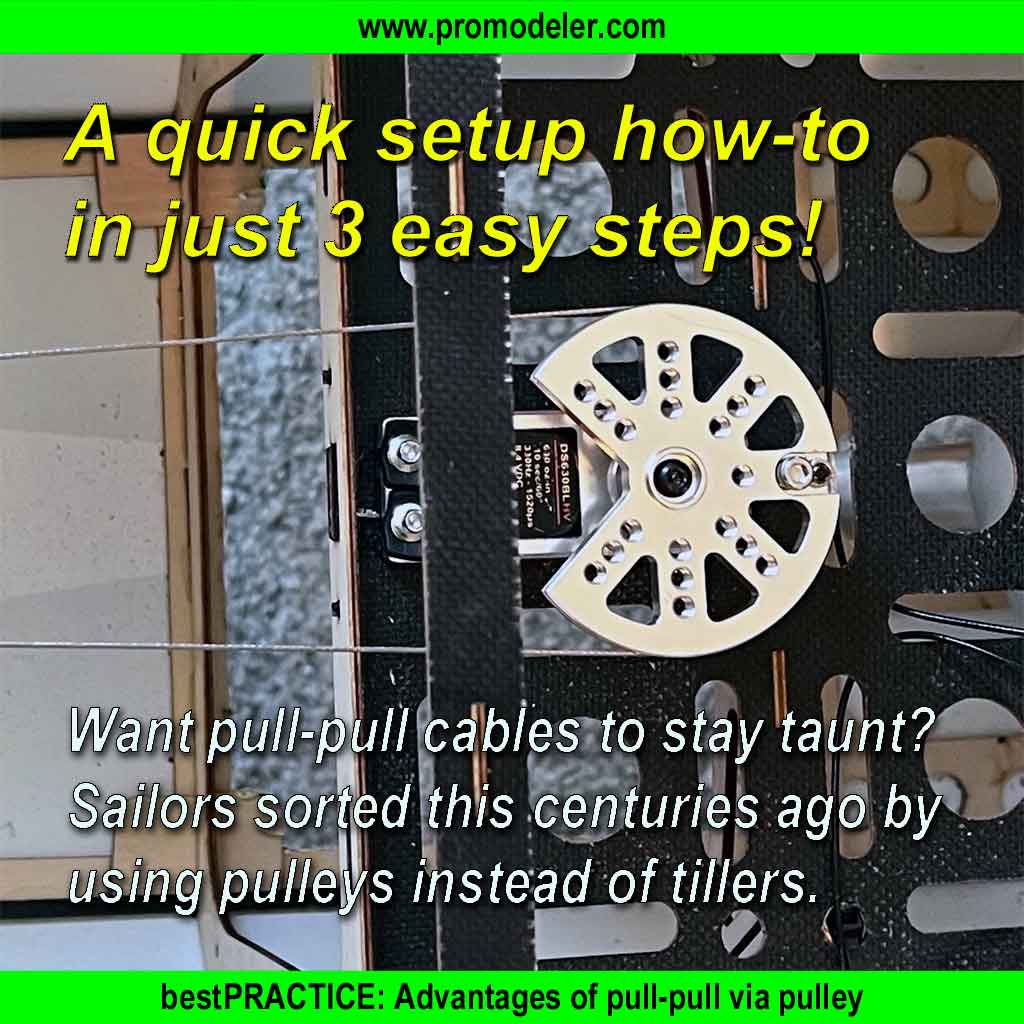
Throttle servo install
NEED PHOTOS
Ultra-light setup
Ultralight setup
So we've told you about sport, IMAC, and XA setups. We held out until now to tell you about this other setup because it requires a bit of lateral thinking.
Some of you count grams. You know who you are. So what if you're flying electric and instead of standard-size servos, you installed minis, instead? Saves significant weight. And because our line up of minis range up to 110oz-in all the way to 405oz-in, then this may be of interest to you. So here's our lightweight edition setup guide when you want our best.
Note; I didn't invent this, I first learned about this from this savvy fellow.
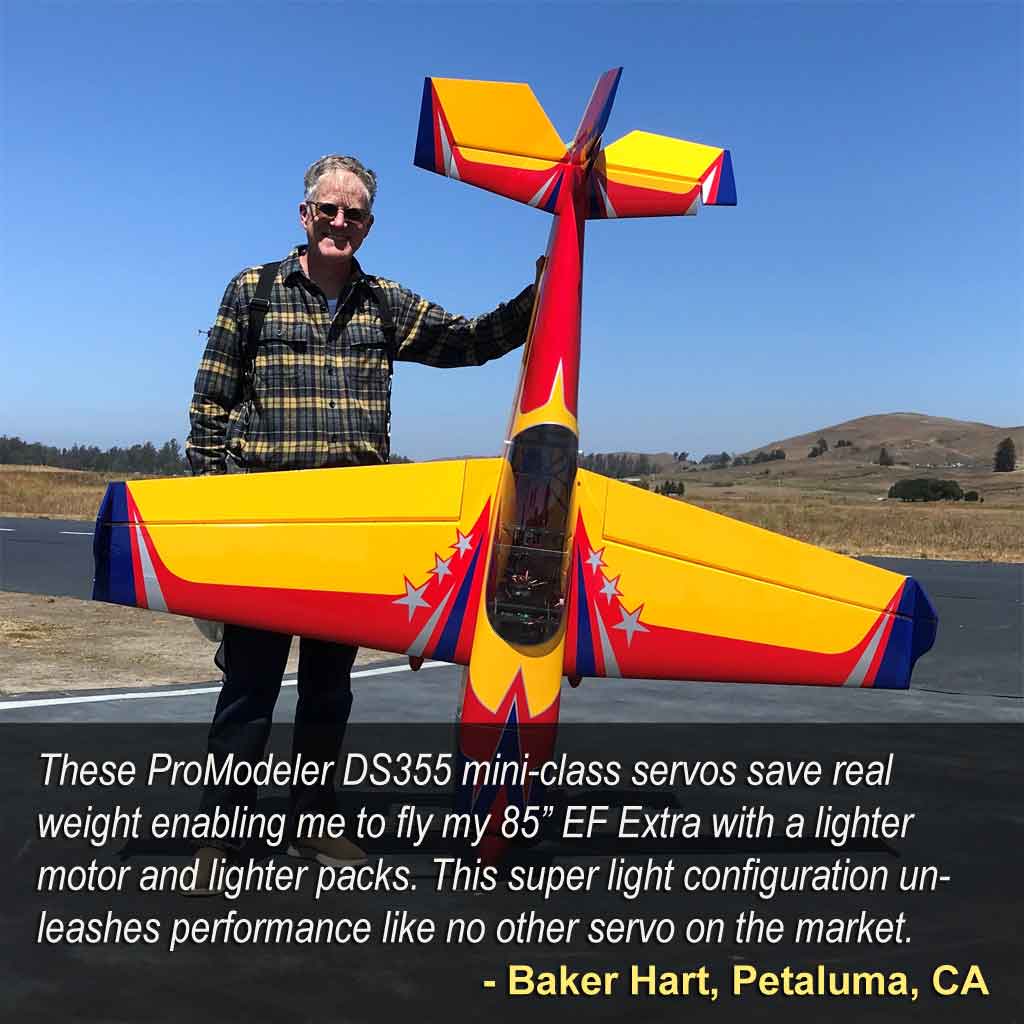
Best Servos and arms - lightweight edition
- 1) DS110CLHV - throttle
- 2) DS405BLHV - ailerons
- 3) DS405BLHV - rudder and elevators (if you aspire to godhood)
- 1) PDRS105 - Anti-vibration throttle arm
- 4) PDRS40-25T - ailerons (same 1-1/2 inch as they recommend)
- 2) PDRS55-25T - rudder and elevator arms (same 2 inches they recommend)
- 1) PDRS75PP-25T - rudder pull-pull installation
What are we talking about saving weight-wise? Simple math . . .
- 5) DS635BLHV (91g) vs DS405BLHV (53g) saves 190g
- 2) SMC HV3-4.35V 6S6400 packs (781g) vs 6S4200 packs (534g) saves 494g
. . . which adds up to 684g, or 24 ounces, which is rather a lot just for avionics.
And if you compare the motor and ESC to a gasser, tank, and servo, it's more dramatic as a DA60 goes 1410g vs an Xpwr 60 at 1168g, so another 242g (9.5oz) savings whilst ESC vs servo plus fuel tank amounts to a wash, but then you add two pounds for fuel.
That said, getting apples-to-apples is tough when you want to include electrons vs gassers but oranges-to-oranges is dead nuts easy with electric because it's the same-same motor and ESC.
Like just the servos and packs amounts to a HUGE difference. But in truth, the guys counting grams 'also' switch to a lighter motor and ESC because they're taking into account the reduced mass of the avionics and the propulsion packs. Effectively, then they save another 300g - easy! So 984g amounts to saving 34.6oz, or over two pounds. Saying we're talking about saving a shit ton of weight.
Best part? This strategy of lighter servos and lighter packs means all of sudden you're getting that same floaty behavior of a 60-inch model with an 85-inch, which is freaking awesome!
Wrap up
So here's where we wrap up this white paper. We've guided you equipment installations including a great sport setup that's super economical. Plus two other setups, one optimized for IMAC maneuvers, the other for the über serious XA-pilots amongst you. we touched on background regarding the full scale aircraft, and we explored what and why regarding the servos, arms, batteries, and switches.
So that's it. Any errors or omissions are on me.


