
Introduction
When Maurice first rang and said he was working on a 4.2m Cub (4191mm, actually), I did a mental double take. After all, what with Maurice being Canadian (thinks metric), and me being American (thinks Imperial, or inches and feet), this meant whipping out my handy-dandy desktop calculator for some conversion work.
So with simple math . . . 4191mm ÷ 25.4mm/inch = 165-inches. Then converting to feet (165in ÷ 12in/ft = 13.75ft), this informed me we were talking about a model spanning a whopping 13-feet 9-inches!
And folks, let me tell you, that's a big ass model airplane by pretty much anybody's definition (with the possible exception of Bill Hempel and a handful of Europeans for whom, believe it or not, this model is actually considered kind of dinky). More about this later.
So what's 165-inches work out to in % terms? Once again, simple math; since the full scale spans 10.46m (412-inches), then taking the model's span of 4.19m (165-inches) and dividing this by the full scale's span, and then multiplying by 100 to convert to percentage, I got (4.19m ÷ 10.46m) x 100 = 40%.
And doing the math in Imperial rather than metric to confirm my work (and expecting the same results), then (165in ÷ 412in) x 100 = 40%, also . . . so yes, it's a big fella by any measure!
Anyway, this is the 3-view of the aircraft it's modeled on, the CubCrafters Carbon Cub FX-3. More later.

 So Maurice called because he was wondering what we had in the way of servos to help customize his build. Said the manual showed the Spektrum A6310 (it does) but he'd heard good things about us.
That, and engine-wise, he said he had in mind a DLE170 on mufflers instead of pipes, but otherwise, he was wide open to my suggestion regarding avionics (servos, arms, battery pack, switch harness, etc.). And it's important to note, with this purchase, he'd be a 1st time servo-customer.
Added to which, not only had he never gotten servos from us - but - he was putting his trust in us for a pretty serious project. Moreover, he was doing it based 100% on the recommendation of his mates . . . so no pressure!
Anyway, I gave him the standard spiel. Standard spiel?
Standard spiel
Yeah, this is an abbreviated good, better, or best servo and arm recommendation list. I can do this on the phone with just a few questions because I can ask enough about you to determine who you are as a pilot. Important because we're all different in terms of our piloting skills, the maneuvers we intend to perform, and our budget. Basically, our hopes and dreams.
And our each being different means a customized approach regarding servos is better than one-size-fits all because it's our opinion there's no such thing as one servo, which is suitable for all pilots.
Anyway, after a few minutes chatting about how he flew, favorite maneuvers, budget, etc., I begged photos (as usual), and we hung up. Why the photos? As the basis of an article about this model, of course! Photos, which he faithfully promised to send (as does everybody).
So we hung up, and for my part, I promptly forgot all about it. Maurice, however, didn't. And proof he's as good as his word, scattered throughout this article are his build-photos. Ones, which led me to write this article!
And as an aside, Maurice is the only guy I know who can tote this thing fully assembled in the bed of a truck . . . with no part of it whatsoever hanging out. More later.

So from the above photo you see another name beside Maurice's. Facts are, articles like these come together with the help of many other folks, and Mike Feitinger shared both building and flying photos for this article. So have others because creating one of these things is literally a team effort.
So in addition to Maurice, the handsome fellow in our hero-photo, we also give our deepest thanks for additional photos and building tips to;
- Maurice Ducharme
- Bill Hempel - TeamEdge
- Dag Roppe
- Gaines Smith
- Henry Piorun
- Jackie Burch
- Kris Signore
- Mike Feitinger
- Tristan Twisselman - TwistAir Cinema
- Dan Bartušek - Badan Airplane Kits
- CubCrafters
- Piper Aviation Museum
. . . without whose helps and thoughtful commentary this article would be significantly less useful. Also, know this, as regards any errors, or omissions; they are 100% on me!
Anyway, the tabs below open and close manually. Click to open, click again to close. You decide what you want to read. This also makes it easy to come back and review details of special interest without having to dig too much.
Note; an article like this doesn't come together in a couple hours, it takes days, and no AI is involved - none!
As regards goats
Before we begin, let me be blunt, or as my deceased country boy Dad would have put it, let's put the hay down where the goats can get it! As of today, this is a $2200 model, plus shipping (big boxes, big money), call it $2500 on your doorstep.
Engine-wise, the DLE170 is about the most economical solution, and it's plenty good. These puppies range around $1450 with mufflers. Opt instead for that sweet DA200 flat four, maybe a bar-stock MVVS170, or if you're really feeling fancy and want a 4-stroke boxer, a Fiala FM280 B4-4T goes for a tidy $5500 . . . so it's easy to spend significantly more.
And with all of these, you're still needing to buy the ignition's battery pack and some kind of exhaust system. Call it another $600-1000 for that - especially if you want tuned pipes. Maybe more.
Smoke systems are a couple hundred bucks on top of this (if you're so inclined).
Miscellaneous goodies like those sweet ginormous tundra wheels/tires will set you back $250-300 before you have them in hand, plus a 40% pilot figure is an easy $100. And you still need a battery for the included lighting system.
And all this before we get to avionics, which if we're being honest amounts to $600 on the low end and closing on $2000 on the high end. My role in this involves showing you 3 avionics packages, which span the gamut price-wise. We refer to them internally as good, better, and best.
Saying all in, you can be staring down $5000 for one of these pups without breaking a sweat. And to be honest, forking over $10-12k isn't unheard of. Crazy days? Maybe, but then again . . . you can't take it with you!
My point? If you're the type who makes a decision with incomplete information, maybe you're in the wrong place. However, if instead, you devour information, then you've hit on the motherload because this article runs to 16,000 words. It will easily consume an hour of your life, maybe longer. Only you can decide if it's worth the investment of your time.
We hope you find it worthwhile. Enjoy!
The conversation
So what you won't get by reading this article is what we call the conversation. That's where you pick our brains regarding a servo solution. Do you have to?
Oh Hell no . . your money, your toy, your decision - but - calling us for an opinion costs nothing. That, and you're equally free to ignore us! So is a call worth making?
Dunno, but we once had a fellow inquire about servos for an Extreme Flight 85-inch Muscle Bipe model (actually, their Legacy Aviation brand). This, if you're unaware, is a magnificent XA-type biplane. Thing is, the fellow was attracted to the old timey look, but wasn't really wanting it for performing XA-maneuvers. Made for a problem.
See, when he called about servos, he was prepared to pony up a lot more dough for servos than what we felt he needed. This, based on how he intended to fly it. Why? Simple, it's because he'd been eyeballing the servos recommended on that model's page on their website.

So because the Muscle Bipe is meant for XA-pilots, they were guiding him into servos costing a butt-load more money just because to fly hard, you need more powerful servos. The harder, the more powerful, meaning more expensive!
- SAVÖX SV1270TG+ - 625oz-in
- SAVÖX SV1280SGP - 763oz-in
- SAVÖX SV2290SG - 972oz-in
Note; no matter the brand of servo, the more torque and the quicker they are, the more they cost - just like hot rods where the mantra is . . . Wanna go fast? How much money you got?
Thing is, since he didn't want to perform XA-maneuevers with his, and because he took time to ask our thoughts, we got to chat and learn a bit about him. End result? He saved a fair chunk of change.
And by the way, our three servos, which cross over fairly to those wanting XA-performance servos are . . .
- ProModeler DS635BLHV - 635oz-in
- ProModeler DS845BLHV - 845oz-in
- ProModeler DS1155BLHV - 1155oz-in
. . . and no, I am not saying these are recommended for the Carbon Cub!
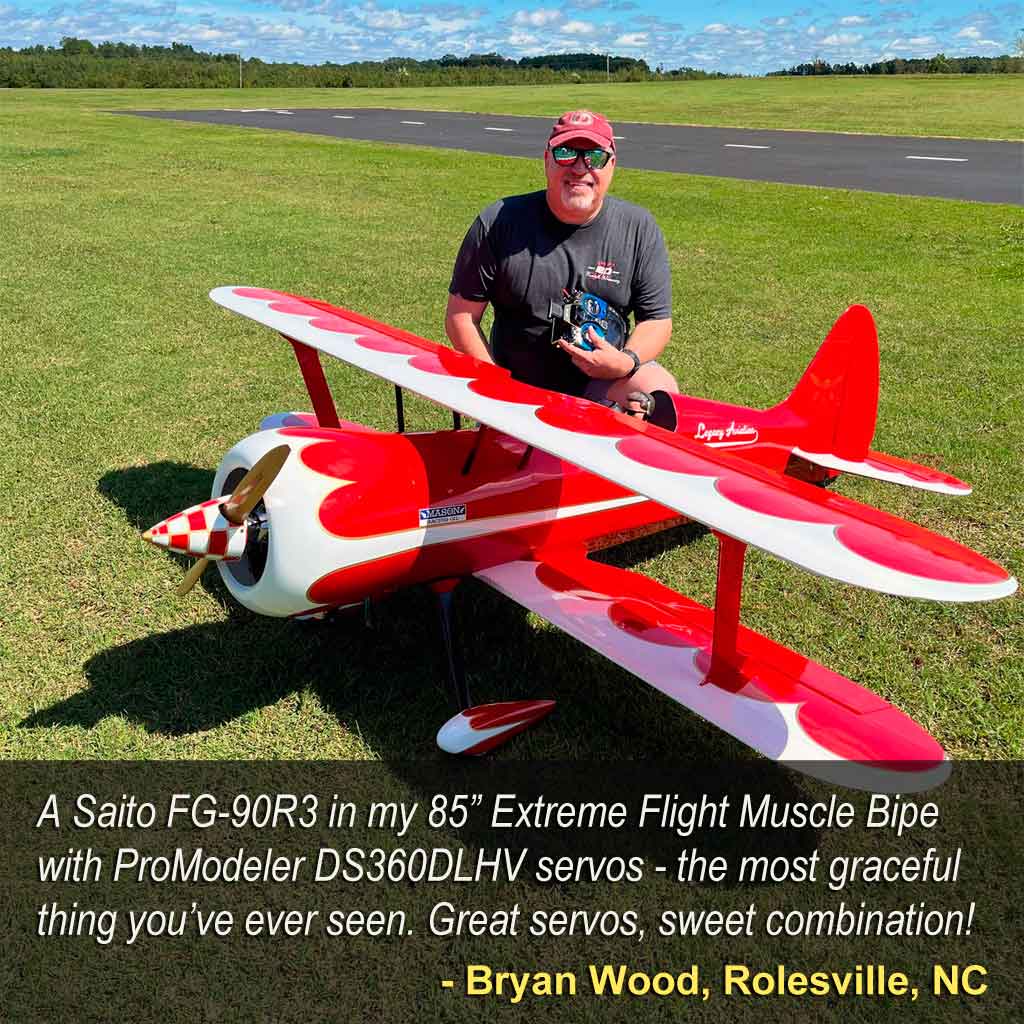
So because we chatted a fair bit about how he actually flew (his style) plus what he intended to use to power the aircraft (a sweet Saito radial), it was pretty clear we could help refine his servo selection to better suit his needs.
Thus, we guided him into spending a lot less money than what they proposed because our focus was on his requirements instead of those for some XA-god wannabe. And by the way, this isn't actually Extreme Flight's fault because they market what amounts to a katana in the model airplane world populated by machetes. Saying it would be silly for them to recommend anything but high performance servos.
Bottom line? One size doesn't fit all. So because this was the case with that fellow, it may be the case with you, too as you contemplate ownership of one of these superb Carbon Cubs. This is at the heart of why we share our thoughts.
So before moving on to discussing more powerful servos, know this; what - more servo - actual buys you amounts to how much more quickly your model begins and ends maneuvers. The snappiness of it. And you also get better durability with our more powerful servos. Why?
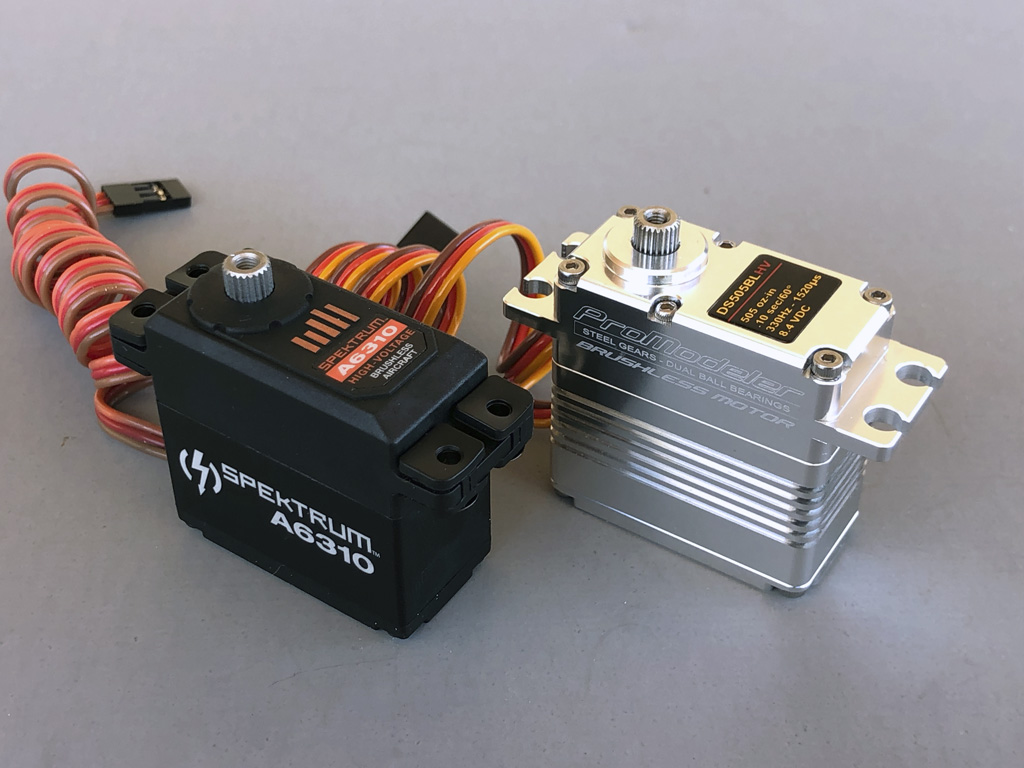
Simple, it's because the servos within our better recommended-group have an all-alloy case versus the hybrid case in the Spektrum A6310, DS360DLHV, and for that matter, the SAVÖX SV1270TG+ mentioned above. These three use reinforced polymer uppers (and alloy centers for better cooling).
Basically, an aluminum upper is simply more rugged, and thus better withstands the harder duty cycle that comes with more torque. In fact, above our 415oz-in servo offering, we abandon hybrid construction, altogether. How different is this?
Well, in this next photo are the Spektrum A6310 versus the ProModeler DS505BLHV, which absent Hangar 9 saying 350oz-in is good enough, would be what we'd be guiding you if we had our druthers. And FWIW, they're similar cost.
That said, and quite honestly, until you're pretty good pilot-wise, you probably can't reliably tell the difference in more powerful servos (other than in your wallet). So our advice is this; don't pay for our recommendation in the better level of servo performance unless and until you know - for certain - you will actually be using your model to perform harder maneuvers.
Not changing what I think regarding the DS505BLHV, just saying before forking over for our Better grade servos, you need to be someone who will be pushing the model harder than the average guy. Please trust me, because knowing the answer to this one question is what determines when it's time to get off your wallet.
Anyway, we're being as honest with you as we possibly can. Straight up, the DS505BLHV should be good enough for almost everybody unless you're flying harder. Be honest with yourself about how you intend to fly your model, capisce?
So please don't say, after the fact, you were never given a heads up!
Idle thoughts
As it turns out, everyone has an opinion on what's best servo-wise for this model.
For example, Hangar 9 have the opinion their 350oz-in Spektrum A6310 are enough. And maybe they're right - but - the real issue is this; where are they coming from, and why do they hold this opinion? Let's dig deeper.
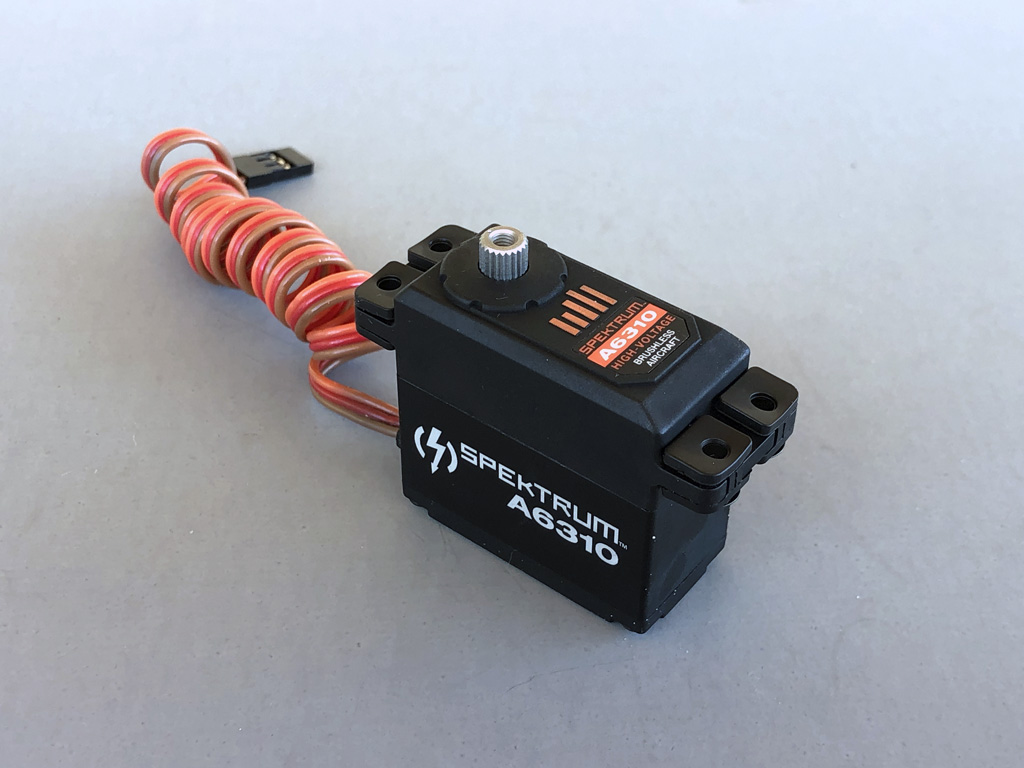
Point being, if you don't know why they feel 350oz-in is enough, then how can you trust if this is actually the best advice for you . . . take my meaning? Like isn't it worth knowing why they're making certain recommendations, and especially, how this relates to you? Like this is 100% why when we speak, we ask about your;
- pilot skills
- how you fly
- and, budget
. . . and it's not because we're just nosy, but because it's crucial information before we can guide you into a set of servos.
Put another way, without this info - as a bare minimum - then how can anybody possibly know how to make a servo recommendation customized to you? Like could it be 350oz-in is actually a minimum recommendation? Possibly.

Another thing is this; what criteria affects why they make their recommendation? For example, we all pretty much know a guy who loves Ford trucks is unlikely to recommend a Chevy, right? So it stands to reason knowing from where folks are coming in regards to servos is important, too. This, because it similarly colors their opinion (and nothing wrong with this, it's just a bit of human nature you need to be aware of before reaching for your wallet).
Like if, for example, on the one hand you judge the interest of Hangar 9 is to sell as many models as possible (duh). And on the other hand, because their corporate owner also owns Spektrum, then it's also reasonable to suspect this plays a role in guiding buyers into Spektrum servos, right?
Thing is, on the third hand (because they can walk and chew gum), could this also mean it's better to not guide folks into more capable servos because more costly servos may negatively affect model aircraft sales? Again, we don't know! But bear it in mind.
Reason I wonder is this; we have servos in that same 350oz-in class, our DS360DLHV (360oz-in), and maybe they're equally perfect for you (especially as they cost about half as much). So here's the fly in the soup, because we don't know anything about you, and because we also have customers for whom either their 350oz-in or our 360oz-in would to a totally inadequate, then we can't give you any helpful advice.
Anyway, helping figure this out is the plan, so keep reading!

Bottom line? The answer to what's the best servos for you is . . . it depends. On what? On you - your pilot skillset, how you intend to fly, and your budget. E.g. the three factors I mentioned above.
And by the way, earlier I mentioned some possibilities for why Hangar 9 recommends the A6310, but I'm not stating that as a fact. More like saying keep in the back of your head that they have an agenda and what matters to them and what matters to you may be two different things.
And let me be clear, we have an agenda, also! Obviously we want you to buy our servos, instead of theirs! Question is; can we walk that fine line between your interests and ours? Well, that's on you to judge!
Thus, our goal with this article isn't so much to tell you what to do, but instead, to try and teach you how to decide what's best for you such that - on your own - with nobody's further input except what's between your ears, you end up with the best servos for your model . . . even if it ends up being another brand! How do we pull off this trick?
In a nutshell? By showing you how to account for price and performance based on what's important to you!
If we succeed, then making the best decision for what you want to do (combined with also knowing how much money you have to spend) will give you enough information, such that deciding based on your needs is actually pretty easy!
How this works
Basically we divide our recommended equipment list into 3-categories. Why three? Simple, because we don't think one-size-fits-all. Saying no way the Hangar 9 recommended 350oz-in servos can be a reasonable metric for everybody!
So, because we can also walk and chew gum at the same time, then we have several servo ideas to offer you. And which is best depends 100% on you . . . but now we're adding a fourth consideration;
- your skillset
- how you fly
- your budget, plus
- your expectations
Think of the three categories (perhaps a little bit tongue-in-cheek) as guiding you toward good, better, and best. Or pilot-wise as sport, pattern, and wildman! And if right now money is your north star, then in terms of budget build, solid middle ground, and money is no object. Why these categories?
The reason is obvious . . . just as Hangar 9 doesn't know you, we don't either! Be a horse of a different color if we were mates at the club (so I knew to a near certainty not just how you fly - but - also a little about your hopes, dreams, and budget). So because we don't know you (nor have the hubris to blindly make a recommendation) we try to share enough info to help guide you.
It's why we try and touch on the factors you may find important so you can suss out what's best for you on your own. And FWIW, the last factor - budget - is almost always important because as the saying goes . . . money talks!
Anyway, our thinking is without waiting to speak with us (like maybe you're reading this in the middle of the night), then with just a little bit of help you can probably take the info within this article and figure it out for yourself!
This speaks to 'our' core, meaning we're serious that 'you' are the critical part of the equation, not us (and certainly not Hangar 9).
Bottom line? If you come away from this article able to determine the best setup for you and your budget based on how you fly, then we'll take it as a win . . . even if (believe it or not) you decide you're better off with Hitec or Spektrum servos because we're big boys and know you win some, you lose some.

So our real goal is teaching you to think about what you need servo-wise because nobody else has your best interests better than you, and you alone. So why do we want you thinking for yourself?
Ahhh, that's pretty simple, actually. It's because with enough information, we believe this gives us our best shot at earning your business. After all, it's been said modelers are amateur engineers, so it stands to reason offering up our data, e.g. showing you what factors matter, has more value than what marketing is trying to make you think.
So we're not hiding our basic tactic, which is interfering with marketing by showing you what's what. But we're getting ahead of ourselves. Let's delve into the model, itself.
Plus . . . advice
What else is in it for you beyond our offering up suitable servo alternative? It's that we offer a spot of advice. Advice?
Yeah, things like it being wise to use twisted extensions if your model is equipped with a spark-ignition engine. And how if they're loooong extensions (which for this model are a given), then how and why adding capacitance is wise. What's this got to do with servos?
Quite a lot because it's through extensions that stray RFI from a failing ignition module may affect the receiver and result in a crash. And without added capacitance, you're likely starving powerful servos for juice 'exactly' when they need it the most!
This is true whether you're using our servos, or ones from Spektrum or Hitec. And sadly, because we're not dealing with opinion but with physics . . . and it's stuff nobody bothers telling you about, it may be news to you. No worries, we'll clue you in on this stuff, also.
Note; this isn't a sales pitch for our leads. In fact, if you prefer to buy twisted leads or caps elsewhere? Honestly? We don't care because we eat from selling servos, not the knick-knacks you need to complete your build.
What else? Saying our idea for this article is maybe you gain insight you don't typically see in a Facebook post, or forum thread. Places where it's often fanboys justifying their purchase by putting forth their views (as if somehow what's right for them is also right for you).
So at heart, we offer this white paper from a focused point of view . . . if this isn't valuable info, then we suspect you won't ever again let us yak-yak about our servos. So because all deals have to be fair, we try to earn our keep in exchange for your time (meaning we don't just talk about servos). How? useful advice! Want another example?
In the engine section we discuss various engines. Engines? What have engines got to do with servos? Not much but sharing decades of experience is possibly useful on your path to owning one of these lovely models, and in turn, this info maybe opens the door toward making you receptive to us and our wares. So it's a trade where a spot of free info is like that baker's dozen, a bit extra!
Toward that goal, eyeball this next photo. And yes, we'll share it again later because of the subtle tricks used by this über experienced builder, which we don't want to take the time to get into right now. So showing the engine right now matters principally because it serves as a teaser.
This, incidentally, is an example of marketing as engineers feel it should be used (e.g. seducing you into reading further).

- Mike Feitinger's gorgeous bar stock MVVS175 engine with custom cooling shrouds
So because we're speaking about advice, have you ever given a consideration to aerotowing? This is so much fun Hangar 9 include the hardware with your model to do it. So by way of earning our keep, let's touch on this, next.
Aerotowing
As modelers we know you don't actually 'need' a reason for wanting something. But one special use for this model is aerotowing. It's an exhilarating experience from both ends, piloting the tow vehicle, and being towed.
Interestingly, Hangar 9 fulfill this desire by supplying your Carbon Cub FX-3 with tow-release hardware.
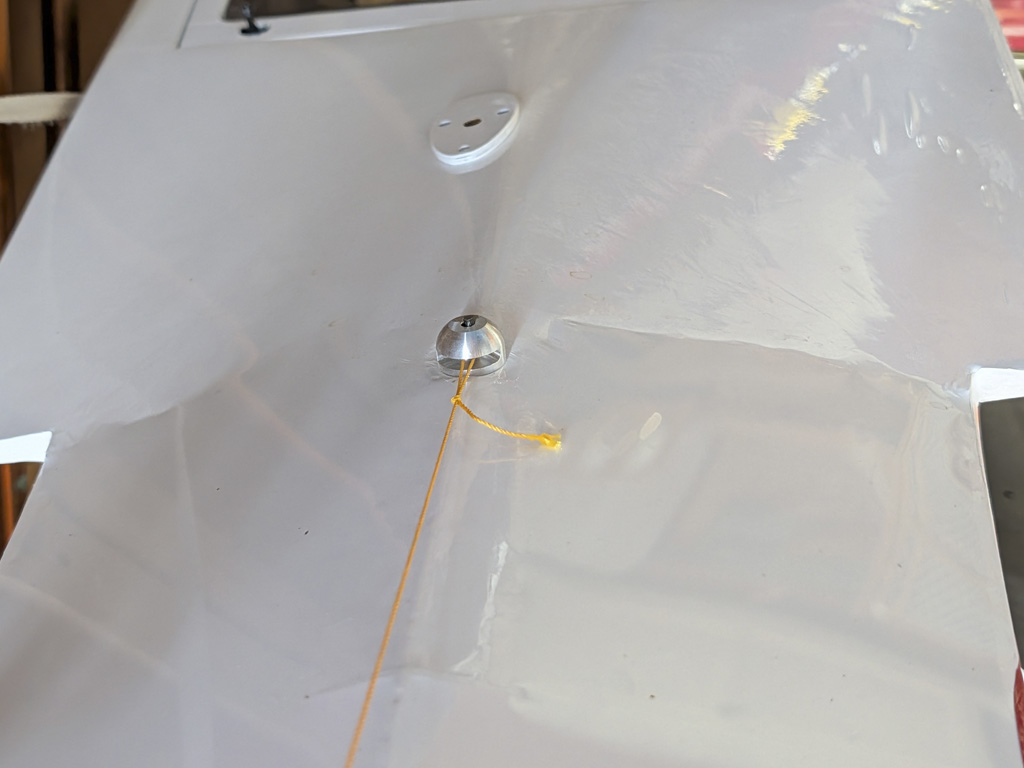
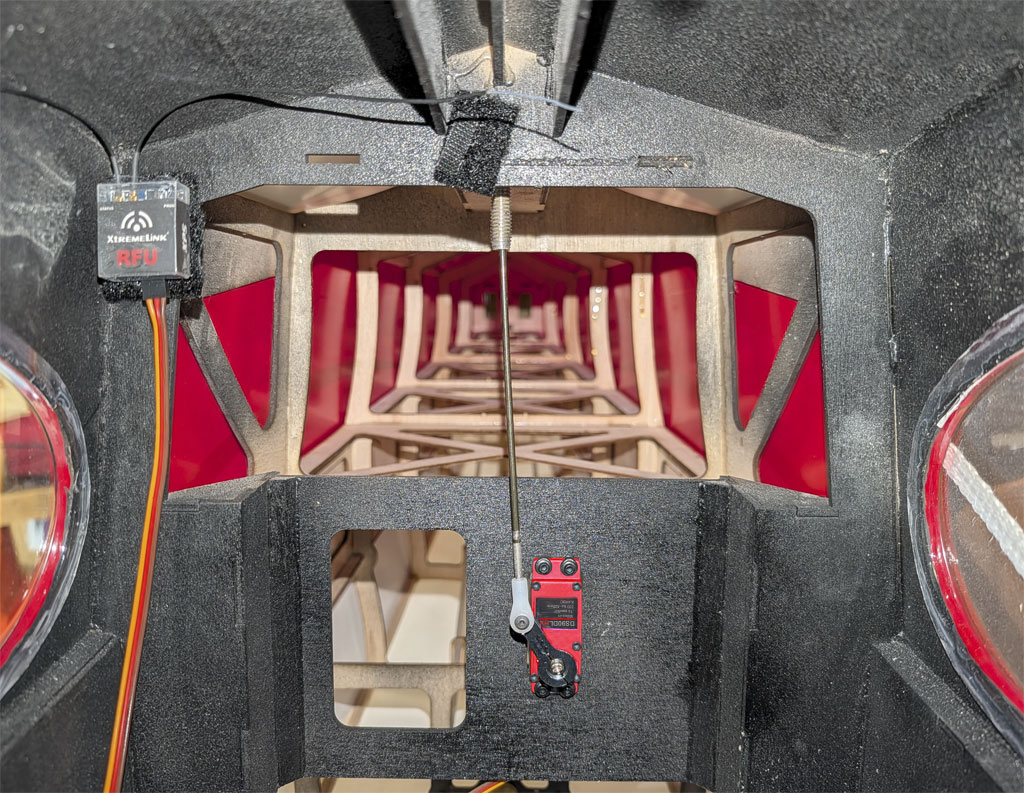
And inside the fuselage, the tow-release mechanism is simplicity itself. All you need is a standard-class servo to pull the pin, the line goes free and Bob's your uncle! And granted, while 'we' would rather this be a ProModeler servo, also, the facts are pretty much anything you have laying around will likely work just fine.
Anyway, this mechanism allows the tow plane to drop the tow-line independently of the fact the glider has a similar mechanism for release at it's end. And the reason this is handy is for if the tow pilot (that would be you) decides to abort the mission before the glider pilot acts. So it gives you more control.
In the real-world, this is how aerotowing works. And briefly recapping; the tow-line can be released by either glider pilot when the model is at altitude, or by the tug-pilot to abort the sortie.
So the two models are positioned on the runway one behind the other, and in close alignment, like in this photo, the first in a sequence of four shared with us by Dag Roppe of Mabel, MN.

As the tug accelerates, the expectation is the glider gets airborne first but in fact, the Hangar 9 Carbon Cub FX-3 is so willing to fly, it almost always gets airborne at the same time if not before the glider!

And moments later the tug really begins to climb as it adopts a more positive angle of attack. Note the glider following along pretty as you please!
And take into account in this photo, we're talking this is the DLE170 doing the pulling. Means those of you thinking of an even more powerful engine, perhaps the mighty ZDZ 210B2J boxer, or four-cylinder boxers like DA-200, or DLE222 are developing even more thrust!

And a side view of this same launch, note the aggressive angle of attack developing in the Carbon Cub FX-3 whilst the glider effortlessly floats up in a more level attitude because the work's being done by the tug.

Anyway, if you want to know more about aerotowing, Google is your friend. The engine section may also prove useful as we discuss optimizing the cooling.
So about now, someone may be wondering if this is the first ginormous Carbon Cub? As it happens, it's not. Let's touch on this, next!
When bigger is even better
Almost everybody who has been in the sport a while wonders how this Hangar 9 FX-3 model compares to the similar size Aeroworks Carbon Cub SS model introduced to the market ca. 2011. Theirs was a touch bigger, so let's see this one!

Well, as you'd expect, the Hangar 9 Carbon Cub FX-3 is 'very' much like the old Aeroworks version, with the latter spanning 3 more inches at 168-inches versus 165-inches. But, what's also important to take this into account is this; the Aeroworks Carbon Cub SS is a different aircraft altogether from the Carbon Cub FX-3 . . . even though both are CubCrafters aircraft.
Anyway, I swiped the above photo from a piece Flying Giants did about the Aeroworks model when it was introduced in 2011. Also, it's worth realizing clicking links within this article, like this one to Flying Giants actually opens within it's own browser window. This means you won't lose your place within this article (so feel free to click and circle back to the FG-article later).
By the way, if Flying Giants is new to you, most would tell you it's a forum site dedicated to larger scale model airplanes. Fair enough as far as that goes, but in fact it's more than that. It's really a news site. Anyway, it's run by Jim Graham and he's good people. I've been a member quite a long time - recommended.
Note; both this AeroWorks Carbon Cub SS and the Hangar 9 Carbon Cub FX-3 are both really large. But next let's touch on even larger models! This because earlier I mentioned really large Cubs and how both Europeans and a fellow name of Bill Hempel are into this, specifically.
So Bill is the guy behind Team Edge, who offer the world's largest ARF models. For example, if you think 40% is large, he offers one that goes 60%, instead! That means a model spanning an incredible 21-feet and which tips the scales well north of 100-pounds.
Point being, if your dream includes some day getting into really, really large models, then reach out to him because you haven't lived until you see something like one of his 60% models performing a slow knife edge pass with the wingtip about 3-feet off the deck . . . I kid you not!
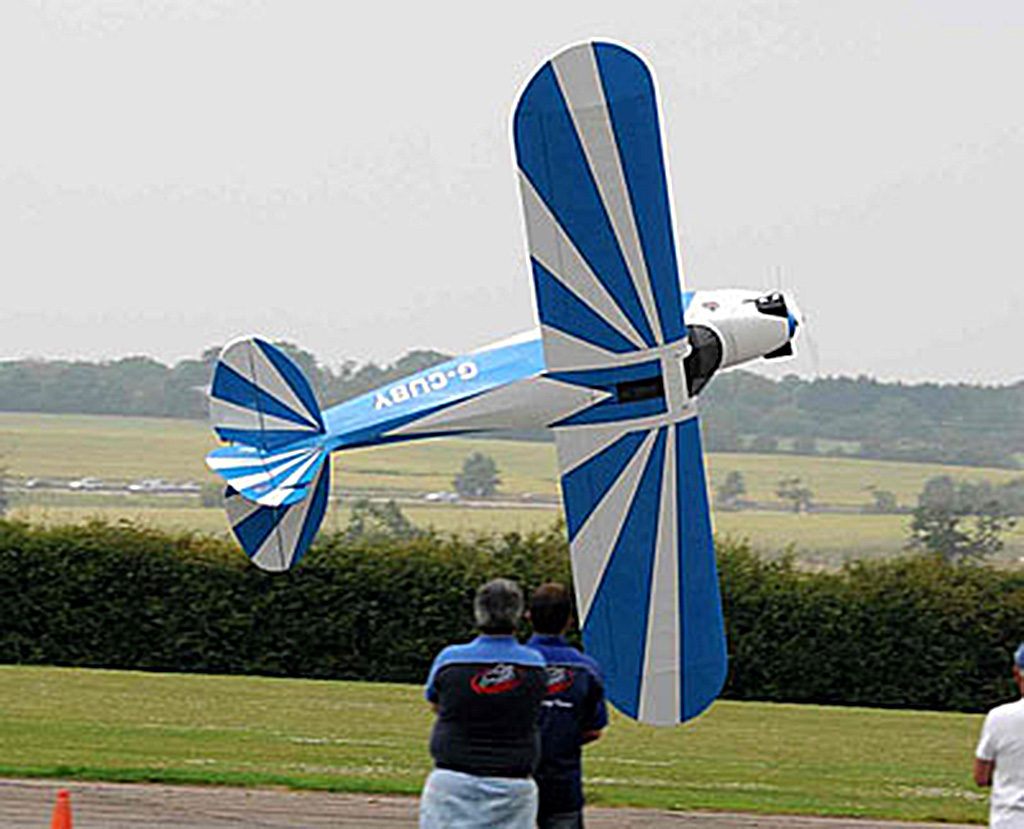
Anyway, Bill's a gifted pilot who has worked very hard to get where he is (saying nobody gave him anything). Moreover, he's a long time acquaintance, and one of my favorite people on this planet.
Note; Bill can be a bit hard to get hold of because of his professional involvement with the UAS world. Be patient, it's 100% worth it.
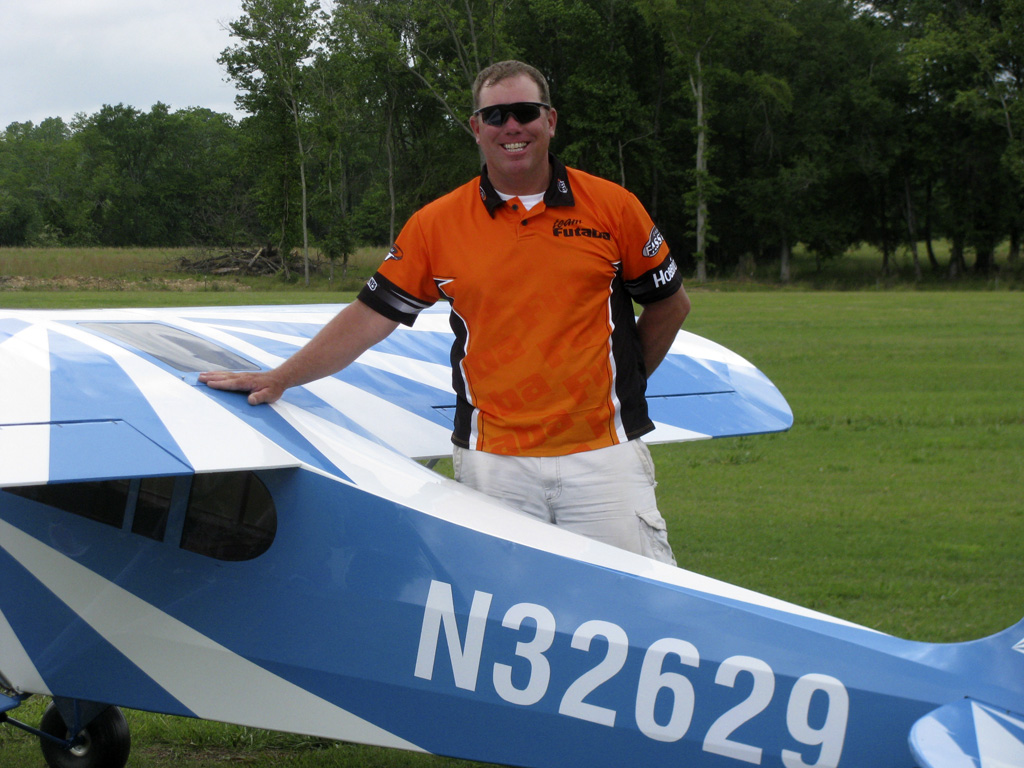
Now let's go across the Atlantic to see as regards our European cousins and their take on large scale models. This, because those guys also go over the top!
One of the nicest are models offered by by Badan Airplane Kits. These guys offer a 4.7m Carbon Cub (190-inches). And it's worth bringing to your attention, they do it both as an ARF and as a kit (below photo).
Moreover, they're also the source of 500mm tundra tires (more later).
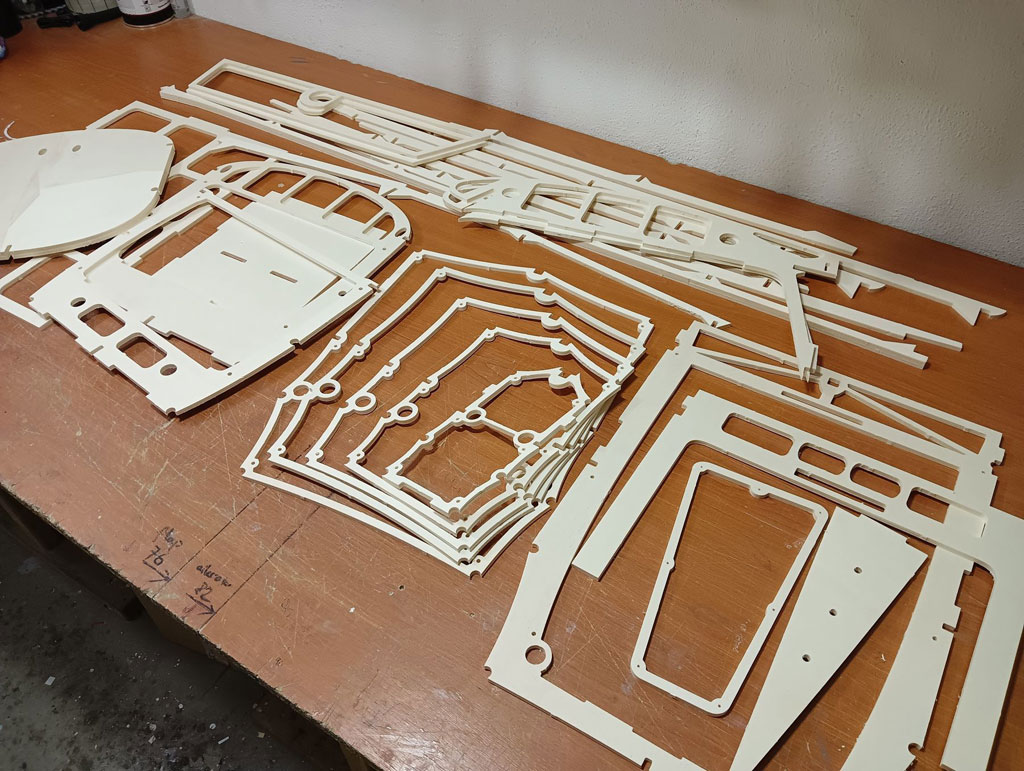
Added to which, when you clip the wings of their 4.7m models, you end up with a 4.3m version, which is still sports a wingspan of 169-inches (15ft-5in) so it's a big 'un also! So if this stuff floats your boat, then Dan Bartušek owns Badan Airplane Kits and if you reach out to him (
By the way, if this next photo doesn't get the juices flowing, then you've probably got one foot in the grave

And this brings us to what you need to do when models go north of 55-pounds. Let's touch on this next because the AMA has a special program expressly for this class of model.
AMA and the LMA program
Conversations about large models and weight brings us to the Academy of Model Aeronautics. If you're not a member, stop reading and sign up. And FWIW, I've been a member since 1972.
Anyway, the AMA is America's community organization (in FAA-speak). And they have a special LMA program for models that go north of 55 pounds. LMA stands for Large Model Airplane and once models go one gram more than 55 pounds (and less than 125 pounds), then they slot into this category. Follow the LMA-link to learn more.
Anyway, this opens the doors to the question of weight as regards Hangar 9's Carbon Cub FX-3. Like I hold the opinion that maybe if you busted a nut you 'might' get this model below the AMA's 55lb limit (the point at which the LMA program kicks in), but honestly? I doubt many (any?) of these things actually take wing weighing less than a good 60-65 pounds. Why is this?
It's because lots of folks often equip them with tuned exhaust systems (the model has tunnels because is designed to accept them). Also a smoke system, plus the added servo for aerotowing, plus the added battery for the included lighting system, a pilot figure, etc.
Leave all that nifty stuff out and maybe you get under 55-pounds. And I'm sure Hangar 9 worked hard making it so <55lbs is possible. However, in various conversations, nobody once mentioned theirs weighing 55lbs. Yes, this is data from an informal survey - but - I hear a lot of 60-65 pounds from folks. Small sample size? Yes, but there you have it . . . don't shoot the messenger!
So next, let's touch on how you're going to get this thing to and from the flying field because relying on a buddy is OK once or twice, but it's rarely a long term solution.
Transport
The FX-3 blows through the upper limit size-wise of models folks can transport without special means. Don't laugh, but this is a big deal for many folks considering the sheer size model.
And it's not just an issue of the added expense of a trailer because many folks live in an HOA. And this matters because few HOAs allow either a trailer or an RV to be parked in the driveway overnight. Kind of suck to find out after forking over the dough for a new trailer, agreed? So this is an example of the Boy Scouts motto playing out in real life . . . be prepared.
Added to which, don't forget to take into account recurring 3rd party interactions 'after' purchasing a trailer or RV (e.g. registration, tag, and insurance). These are all factors best overcome beforehand because nobody likes surprises. Take my meaning?
Just saying if you lust for this giant size model, then bear in mind there's the added complication of toting it to the field. Usually means a 14-16-foot box trailer because most family vans would be hard pressed to fit this thing inside 'and' close the doors. Heck, even a LWB pickup with 8-foot bed is going to leave part of the model hanging out the back. So heads up.
Anyway, sometimes instead of a trailer, the solution is an RV. These may be either store bought, or home made. Take, for example, Dag Roppe's converted school bus in the aerial photo below.

So these things get bought from school districts and are converted all the time. Dag's skoolie began life as a short yellow school bus complete with wheel chair access in back.
And FWIW, these things are often used by folks going to the races for camping in the infield, by off road guys toting motorcycles and quads, and entering the conversation, for large model transport.
Honestly? They're the perfect low-buck approach with which to camp out during fun flies. Note the solar panel on the roof.

Note; if you're interested in learning more about skoolies, then this link goes to a nifty forum dedicated to everything to do with converting buses for alternate uses. I've been a member for many years because I learn and occasionally share my experience. But it's especially useful for latching onto the ideas of others, to repurpose for my own application. Recommended!
Anyway, to get an idea of how the converted skoolie relates to the Hangar 9 Carbon Cub FX-3 size-wise, then in this photo you see the fuselage stashed inside for transport. Isn't it amazing how this short bus swallows it in one gulp!
And take note of the countertop with sink (with dorm-type fridge below), plus a couch that folds out to become a bed. Add a dry toilet (composting-type), think Jenkins-type Loveable Loo, and you're waaaay ahead of a pup tent and sleeping bag - without - forking over big money. Food for thought!

Carbon Cub background
Getting to the CubCrafters Carbon Cub FX-3 from a Piper J-3 takes a bit of doing. So as all stories do, let's start from the beginning!
And fair warning, we're going to do a brief bit of birdwalking by discussing building your own full scale version.
Taylor E-2
The tale of how Gilbert Taylor designed an airplane called the Taylor E-2 in 1930 with the financial backing of William Piper, of Bradford, PA has by now entered aviation lore.
Also, how whilst Taylor was out sick on extended leave, an employee name of Walter Jamouneau (encouraged by Piper) did some redesign work, which resulted in the J-2.
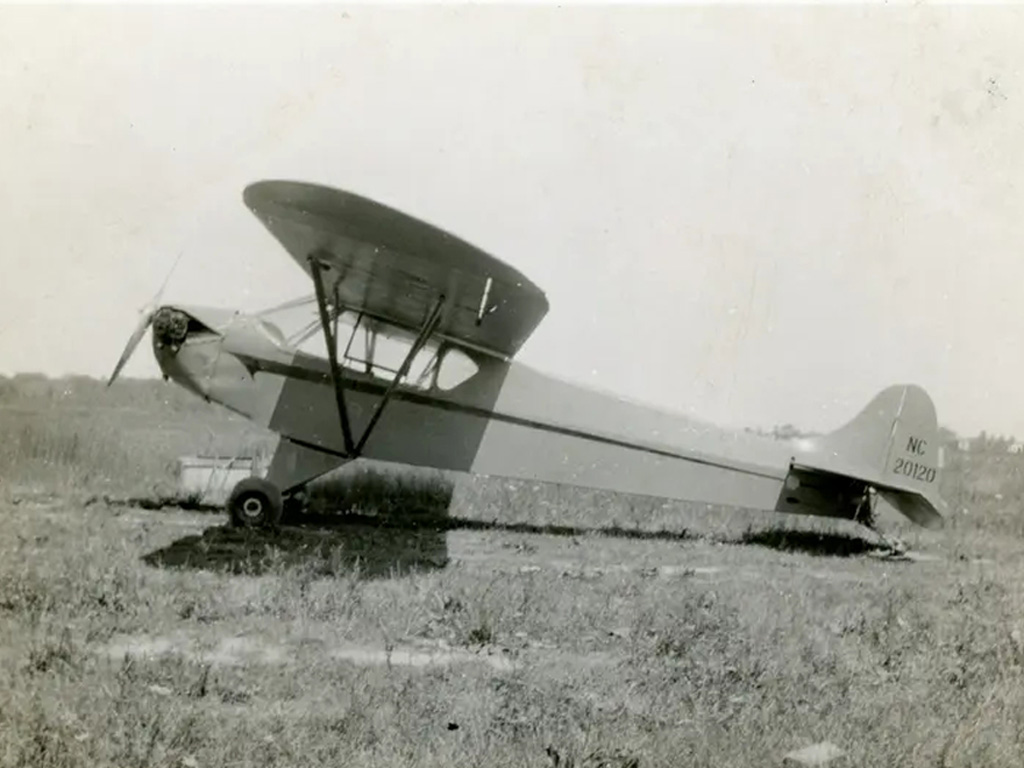
That this, in turn, lead to the drama of Jamouneau being fired by a furious Taylor (upon his return). And how this subsequently led Piper to hire Jamouneau back and then (effectively) firing Taylor by buying him out for $250/month for three years only for Taylor to use the money to start anew as Taylorcraft could, quite honestly, be the subject of a Hollywood movie!
And note, in 1938, $250/month was $5850/month in present day US Dollars, a.k.a. pretty decent money. Especially considering we're talking about all this happening in the mid-1930s, e.g. during the depths of the Great Depression!
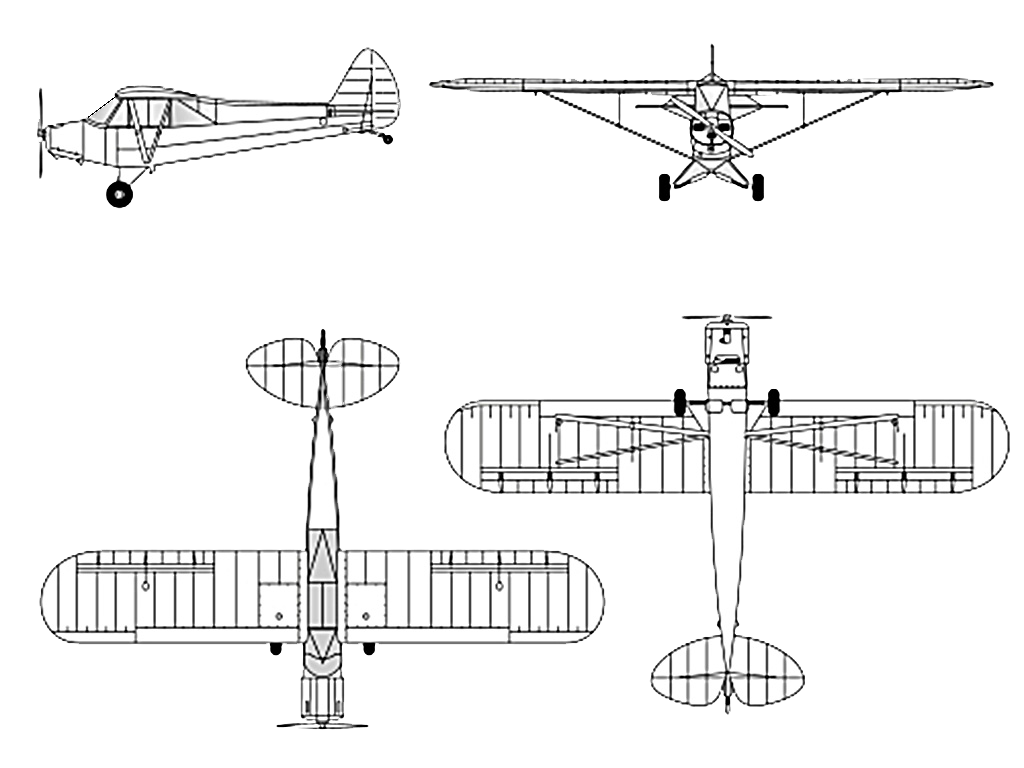
Anyway, the J-2 to J-3 evolution (once again led by Jamouneau) led to the vertical fin being enlarged and covered in one piece as part of the fuselage sides, resulting in that gorgeous drape in the fabric we have until today. That, plus a redesigned curved rear side glass, plus the addition of a tailwheel in place of the skid to improve ground handling.
By the way, back then these things sold for the handsome sum of $1000, or about $23,000 in present day US Dollars. And here are the outline views of the J-3 Cub with, as is immediately obvious, a significantly enlarged vertical fin and rudder compared to the E-2 in the above photo.
On when a dollar really meant a dollar and red tape
And for context, Ford was by then selling the half-ton Model 67 pickup truck. This was a development of the Model A, and it started off (base price) at about $480. This is a touch under $11k, today.
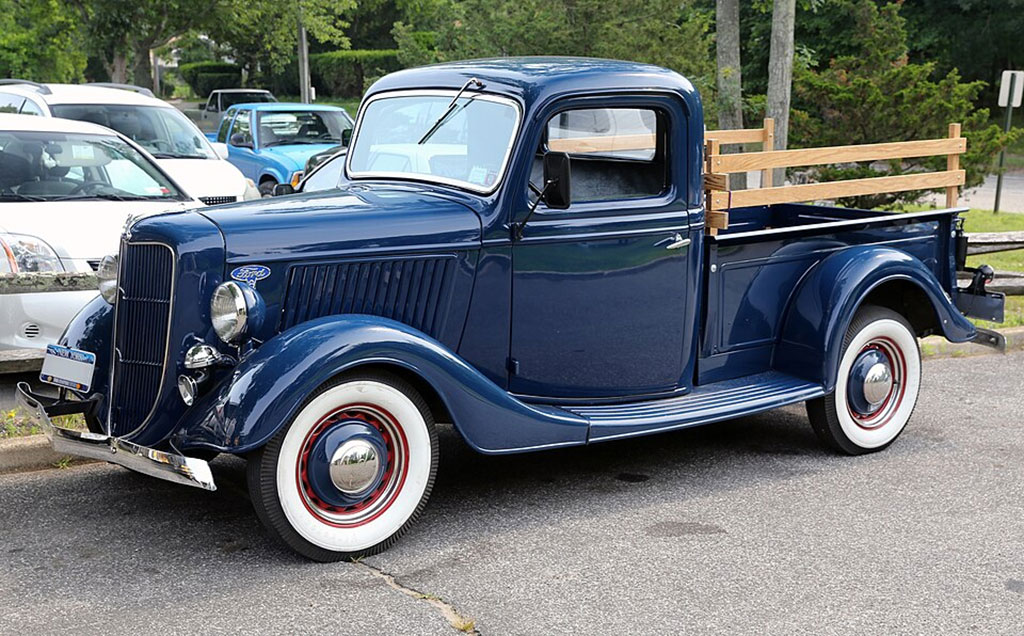
And inflation is why the base price of a new Ford F-150 goes for $39k versus $480. But if you wonder why it is you could buy 2 trucks for the price of one Cub back then, but these days even a 2nd hand Carbon Cub FX-3 ranges around $350k and a new one approaches $400k, or 10X as much as a truck?
For this we can thank the FAA. The FAA?
FAA - Federal Aviation Administration
Yes, the FAA (all by themselves) are responsible for effectively killing off good paying civilian aviation jobs. And along with it, a solid tax base. How? Via a level of red tape the auto industry never had to shoulder. Let me give you an example in case you suspect I'm exaggerating.
I'm a private pilot, and each time I fly I am responsible for following all the regulations of the current FAR/AIM. FAR/AIM?
Yes, FAR/AIM is an acronym which stands for Federal Aviation Regulations/Aeronautical Information Manual. This is my 2024 edition, with tabs added to identify sections because learning 100% of it is mandatory for pilots.

Yes, you read that correctly. I, as pilot in command, am responsible for understanding and following all the regulations, which FAA-bureaucrats are paid to sit on their ass and dream up. So many rules and regulations it's resulted in 1152 printed pages!
Like, imagine if drivers had to follow all the regulations a bureaucrat could invent in a wet dream. Do you seriously believe Detroit as we know if would still exist?
Anyway, this is why civilian aviation basically ceased to exist once Congress abrogated their responsibility and authorized the FAA to oversee itty-bitty airplanes. They gave us the Boeing treatment.
In short, the FAA alone ensured there was no possibility for the state of Kansas (once home to a thriving industry) to remain standing alongside Michigan as a manufacturing powerhouse. It's a shame, really, for bureaucrats to have crippled an entire industry without a single vote. Especially as once that happened, all those jobs went to Europe, instead.
So while it could be fairly said I am digressing far afield, quite honestly? Let's get real. That the Carbon Cub even 'exists' today is not a testament of government paper pushers, but to very strong willed individuals and visionaries who wouldn't give up.
Anyway, just remember, Americans invented the whole light aviation business. And it's our bureaucrats, also Americans, who took it away. And in the process, there went hundreds of thousands if not millions of good paying jobs, all gone poof! Sigh.
Back to the story; over time, the J-3 eventually begat the PA-18 (by then a fire in Bradford, PA resulted in a move to Lock Haven, PA).

The PA-18, if you're unaware, is basically a J-3 equipped with flaps, plus a much more powerful (and cowled) engine. Its creation resulted in a generally more capable aircraft. Yes, we're talking about the famous Super Cub!
And for the curious, the lineage actually traces from E-2 to J-3, then to the PA-11, before getting to the PA-18 ca. 1949.
Anyway, that's where things largely stood for more than 30 years. Until, that is, 1980 when a fellow name of Jim Richmond entered the picture when he founded CubCrafters.
CubCrafters
So now let's fast forward a bunch of years from Piper's early days, to the founding of CubCrafters (the real hero of our brief birdwalk). Basically, when Jim Richmond formed CubCrafters in 1980, few could have imagined what was to come.
This, because Jim's company, which began as just another of many Piper Cub tube and fabric repair and restoration shops across the country, was slated to evolve into something more. Something rather special. This, because as an inveterate tinkerer, Jim not only took the ball, he ran like Hell with it.
Basically, Jim viewed the tube and fabric Piper Cub construction as archaic. As if from the dark ages compared to formed and riveted all metal aircraft being produced from Beechcraft, Cessna, and Piper themselves. Building aircraft this old school way was almost akin to hand building prototypes one-by-one. Then doing it over and over, again. Basically, it was a slow and labor intensive process.
And while this next bit involves supposition on my part (a.k.a. I'm making it up), I wouldn't be in the least bit surprise Jim had Henry Ford in the back of his mind. This, because over the years, he worked to develop a thoroughly modern updated and groundbreaking design. One relying on modern manufacturing techniques to speed up production.
Recapping, as a gifted engineer and skilled A&P mechanic, Jim Richmond saw possibilities in modernizing the production of the iconic Piper Super Cub and marched forward with his vision. How? By relentlessly focusing on using contemporary materials and manufacturing techniques.
These include CNC machining, hydro forming, and vacuum bagging. Like we're talking about totally foreign concepts to what workers knew in 1949. But let's get back to the Carbon Cub and CubCrafters' nifty builder assist program.
Builder assist and the Major Portion Rule
Take for example the innovative idea of owners (every day people like you and me) having an opportunity to go to where the aircraft are actually built, and participating in enough of the build to qualify for an experimental amateur-built airworthiness certificate. How's that strike you? Appealing?
So here's how this works. You travel there - and right on the factory floor - you get to work on the build of 'your' own aircraft. Afterward, imagine what it must be like to open the hangar door and roll one of these puppies out into the morning sun!
Sounds appealing, doesn't it? Maybe exciting is a better word! Anyway, next let's look into the actual how-to.
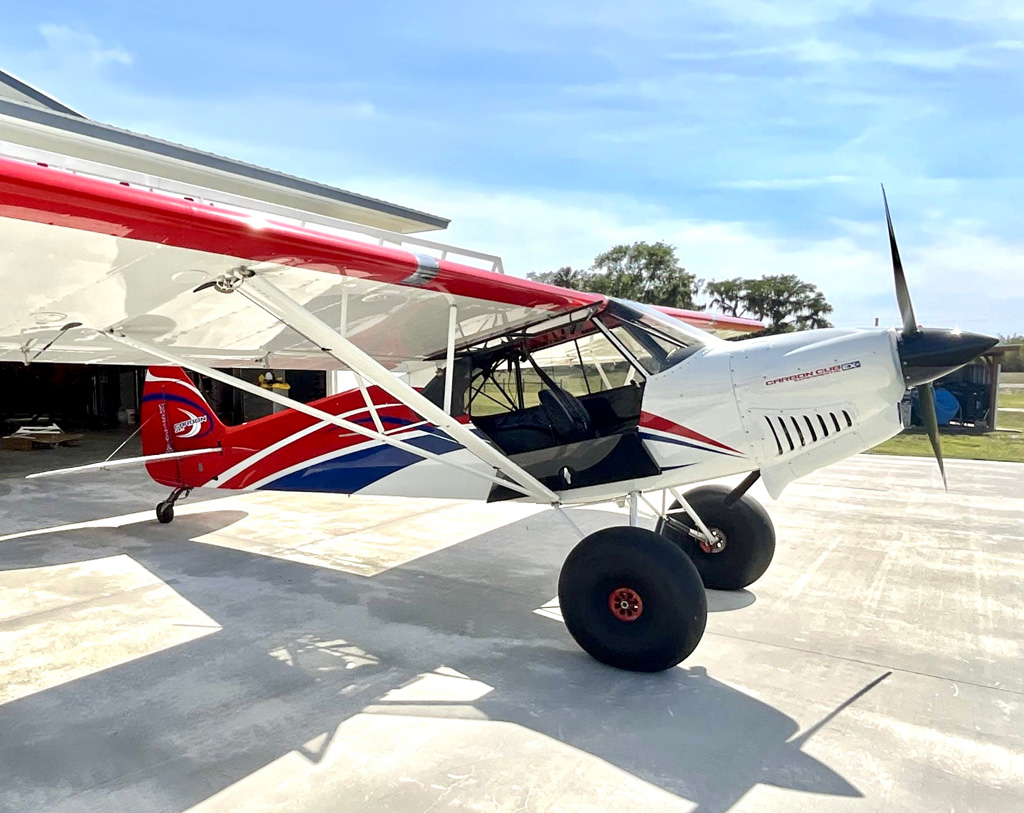
So getting to the airplane in the above photo means either breaking open the piggy bank to buy a factory FX - or - as an alternative, building your own EX. Same aircraft, but for the latter, it means beginning from here - this next photo.
And yes, this means saving a bunch of money in exchange for your skilled labor!
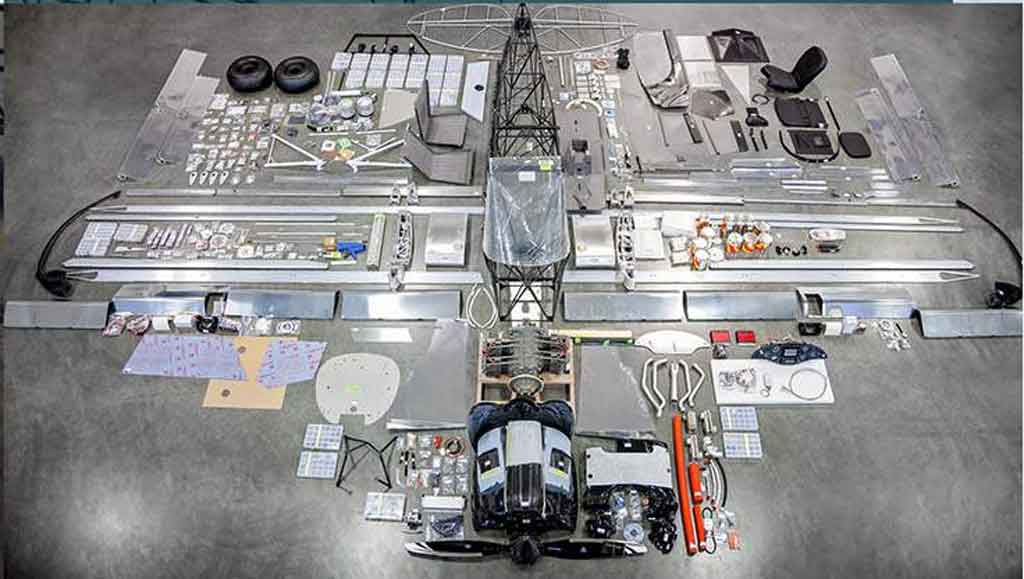
Note; as regards the actual difference; a Carbon Cub EX-3 is an experimental amateur built (E-AB) kit, and the Carbon Cub FX-3 is the FX (Factory eXperimental) builder assist version. Basically, same end result, two approaches!
But wait, I know what you're thinking. Something along the lines of . . . 'I know how to build a model, and I have a certain set of building skills, but I'm not an A&P! Can I really do this? I really don't even know where to begin!'
Well, as it turns out, you're in luck because of the Major Portion Rule. It means there's an intermediate step between buying a full-on kit like the one above, and buying a ready-to-fly airplane. It's one where the 51% designation comes into play. How?
Simple, by going to the factory, and participating in the build. Means as long as you do a mere 1% more than half the work, then the regulations allow you to both learn and save money. Put another way, this factory assist program means relatively quickly (matter of a week, or so) getting you to something more like this next photo, instead of a full-on kit!
Think of it as on the job training . . . on steroids! And actually, you end up a bit further along than this because you'll also cover your plane and get it ready for paint.
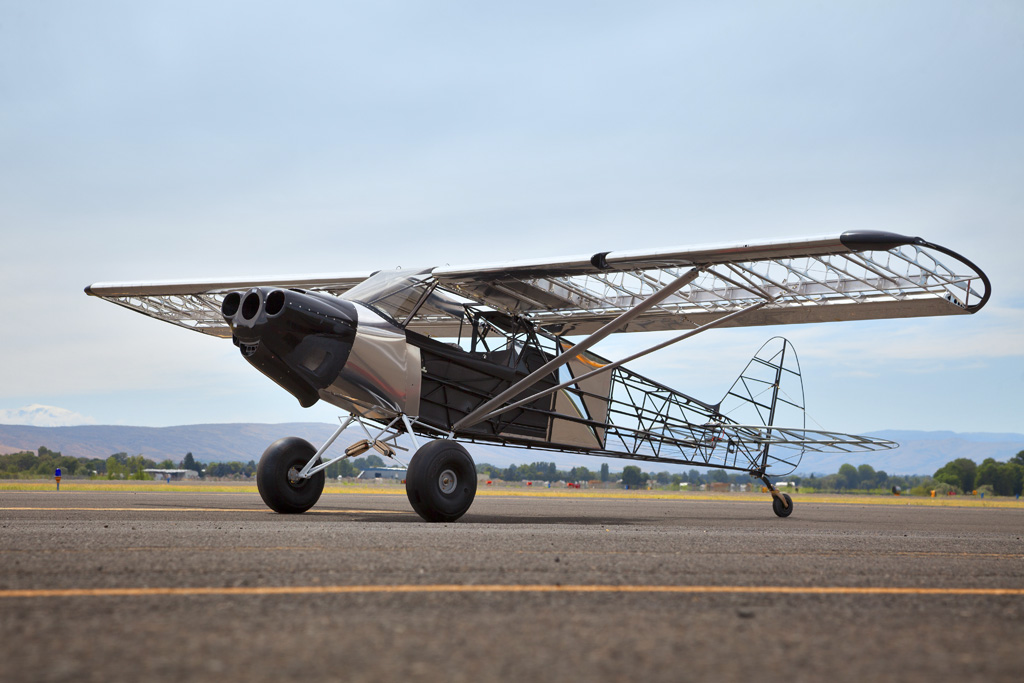
Seriously, as model builders, who amongst us hasn't dreamed of some day building a full scale aircraft? I know I have. What about you? You betcha!
Major point being, if you've ever thought of building full-scale, then with this cutting edge program, CubCrafters offer you an incredible opportunity. They call it the Builder Assist program. Why should you care?
Well, for me, the interest is in earning an experimental amateur-built airworthiness certificate. Reason this matters is because with this certificate in your grubby little paws, you may subsequently apply to be certificated as a repairman. And no, this doesn't mean you're an A&P - but - for your own aircraft (the one for which you earned an experimental amateur-built airworthiness certificate), then you're who signs it off!
And believe me, as a private aircraft owner, let me tell you . . . this is a big deal. So let's touch on this a bit further and then we'll get back to the model because honestly, it's pretty easy since there's a program for this express purpose.
Builder Assist program
Anyway, before going on, take a moment to learn a bit more about what the FAA calls the Major Portion Rule (a.k.a. as the 51% rule). Review this one-page EAA article. And as usual, clicking this link opens in a new window (so you don't lose your place in this article).
Also, since we're on the subject, kindly allow me a bit more leash for this birdwalk. Oh, and as usual, if you're bored to tears, the Page-Down key is your friend.
So as it turns out, you don't have to be some über experienced aircraft builder to participate. For example, take this photo of Jackie Burch (a private pilot participating in the Builder Assist program). Here, she shows off a hydro formed rib she made herself - yes - she ran off a bunch of these!
And yes they taught her how at the factory - but - the real story here is 'she' made these ribs, herself! And you can too.
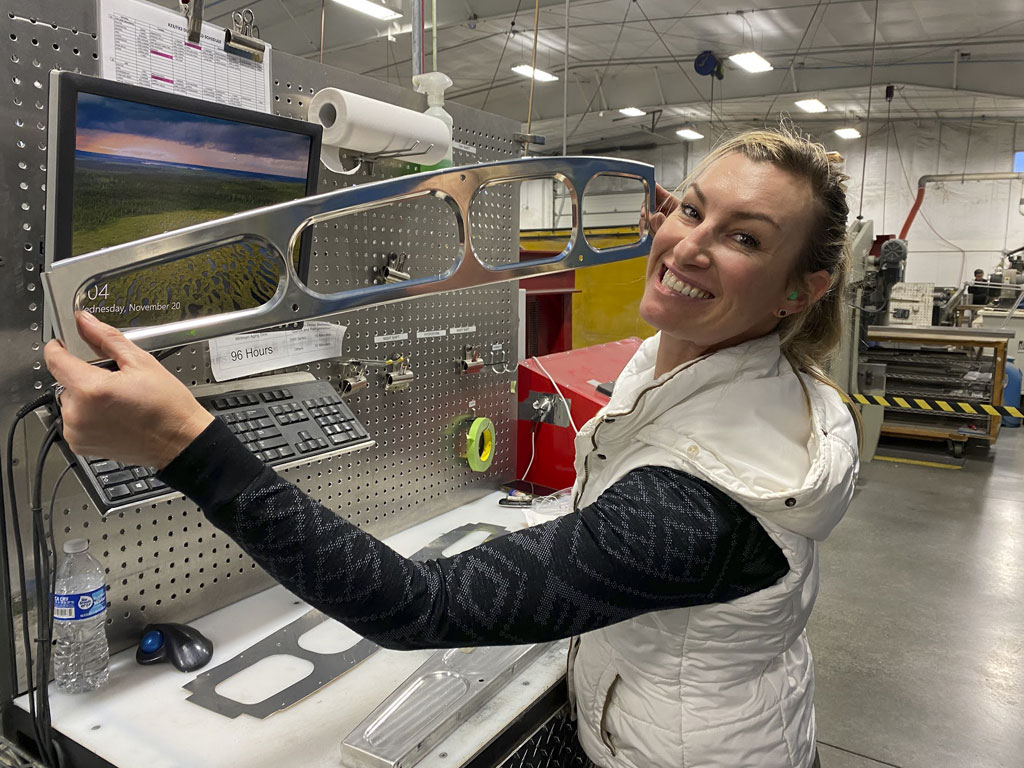
And as background, ribs were once upon a time riveted together from a bunch of itty-bitty pieces. So hydro forming ribs in one go is a big time innovation because it saves a ton of labor.
Yes, it's their machine and their dies, but you run the machine. Means you (as the operator) are responsible for properly inserting the raw piece of 2024 sheet metal into alignment. Then you close the doors, and press the button to form it (just like a CNC operator runs a part and is responsible for the job).
Anyway, this is what ribs looked like back in the day.

But it gets better - brazing!
So the fuselage is made of 4130 Chromoly tube. While this can be welded, for these aircraft the tubing isn't welded together. Instead, it's brazed. Thus, in the program, they also teach you how to braze this cold drawn, seamless, steel tubing.
Means today, almost 100 years later, you'll still be doing something the old fashioned way, e.g. just as in was back when Taylor's E-2 first came into being. This, because sometimes you can't improve on the old ways! Anyway, and please don't take this in a sexist way, but I figure if Jackie can learn how, then so can I. And maybe you, too!
So in this next photo, longeron components are clamped into the jig. Then after heating and applying flux, Jackie brazes parts together, herself! Here she's preheating the tubing, first.

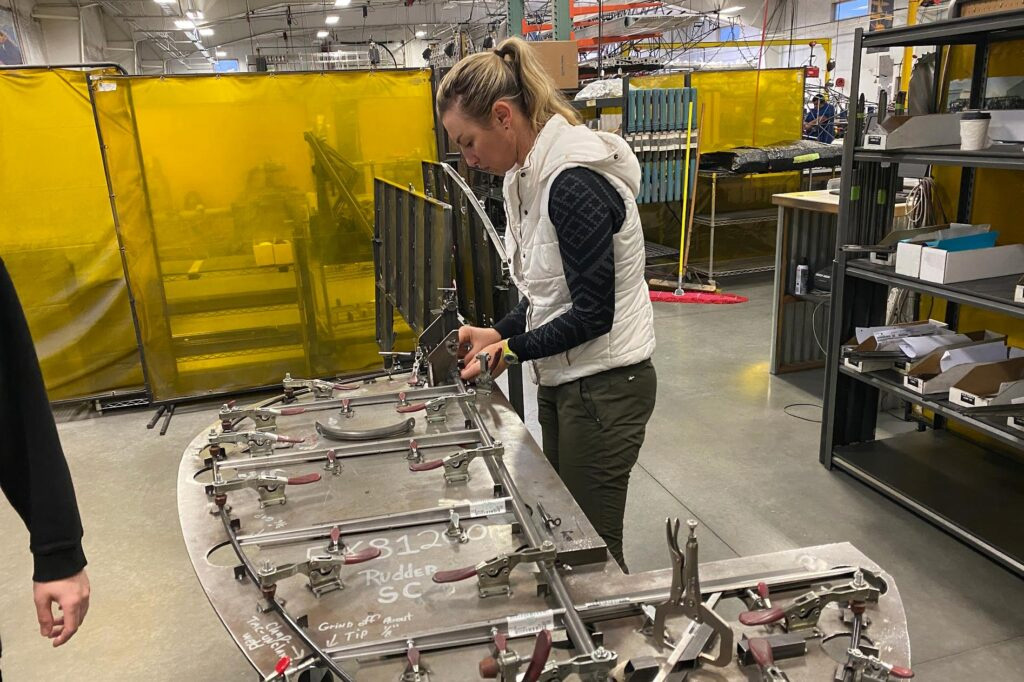
What else? The stab surfaces and flight controls (rudder and elevator halves) are part of the builder assist program, too. So in this photo, Jackie's working on the rudder, which is in the jig and clamped in place to ensure it comes out perfectly aligned and airworthy.
And it's worth noting, this is a week-long thing, so you don't play at building. Talking about long days of real get-your-hands-dirty, work. The FAA is involved so it's not pretend.
What else? How about the cowl? This gets laid up in the mold using carbon fiber prepreg - exactly - as for a model. Afterward, it gets vacuumed down until it cures. Same-same as with our models, just slightly bigger parts!
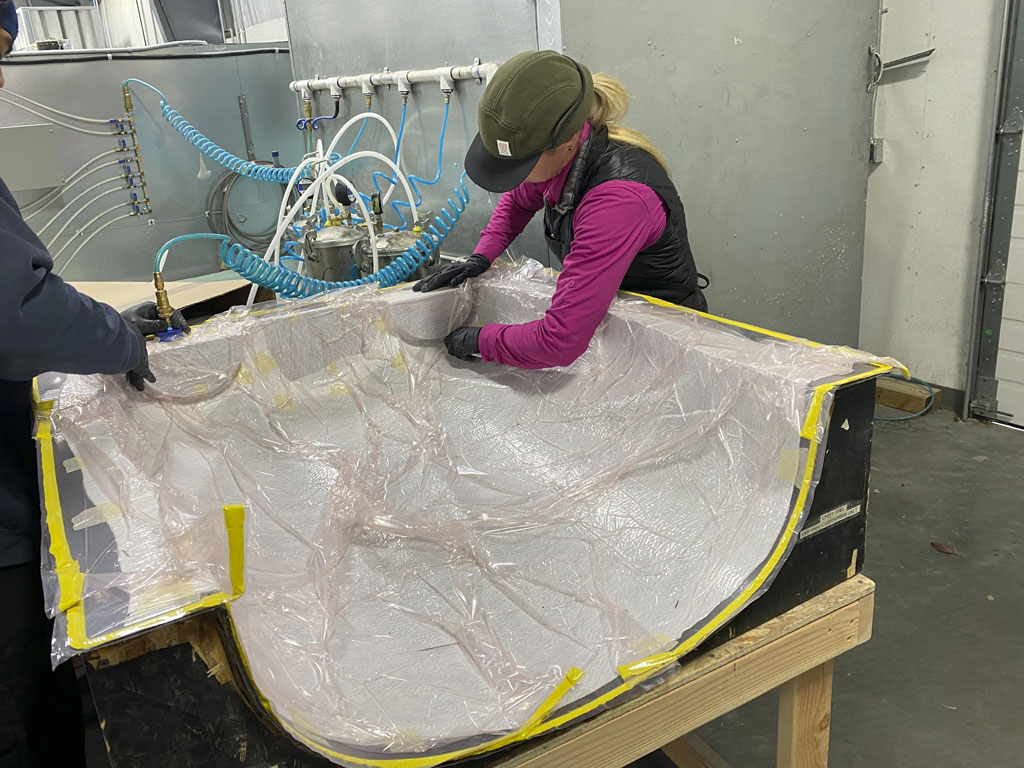
And that's not the end of it. Why not? Simple, because afterward, you get to pop the mold, trim the pieces and fit the cowl to your airframe! And if it's not right, then they don't do it for you. Instead, they patiently work to help you get it right.
After all, you're working on your airplane, so the incentives align!
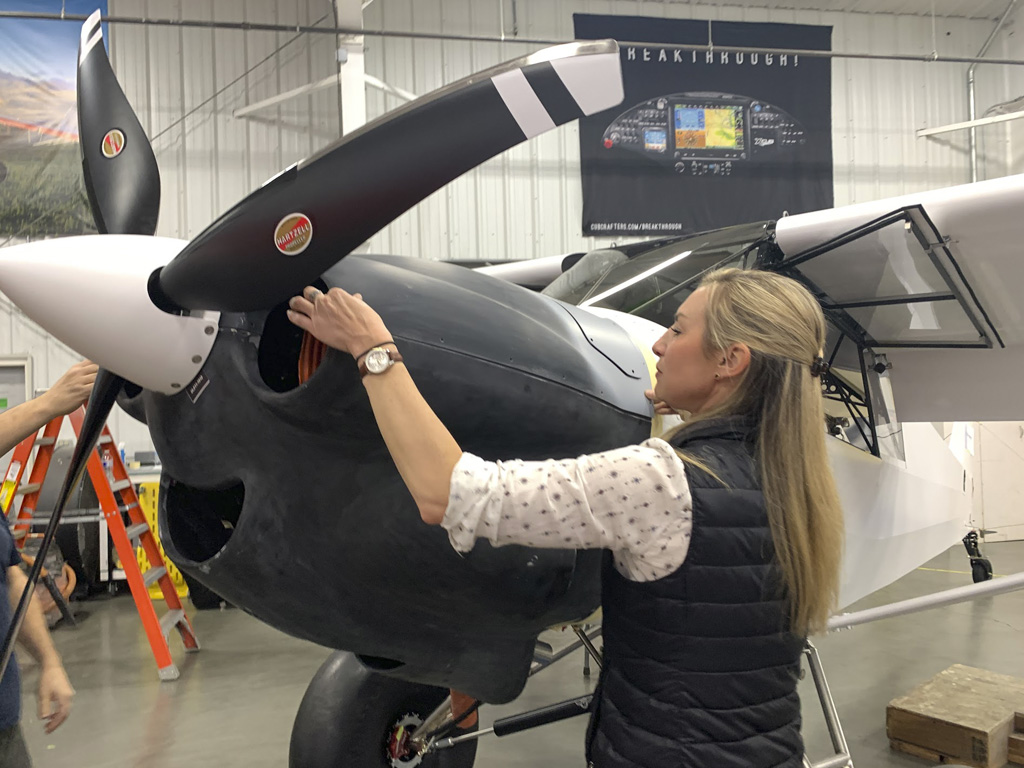
And once you're done, you end up with something like this. Dog not included!

OK, so the dog is optional. But as for getting your own full scale Carbon Cub, then this is the basic story. Believe me, if you want it, you got this!
So now back to Hangar 9, and our story about building your own 165-inch Carbon Cub FX-3, which doesn't look quite so large now, does it? First up, let's look at a budget build avionics package.
Good - servos and arms
Cutting to the chase, these are servos and arms we're going with for the Good group.
- 1) DS90DLHV - throttle
- 1) DS90DLHV - choke
- 1) DS90DLHV - tow release
- 2) DS360DLHV - ailerons
- 2) DS360DLHV - elevators
- 1) DS360DLHV - rudder
- 1) DS90DLHV - tailwheel
- 3) PDRS105 - anti-vibration throttle arm (plus choke and tow hook)
- 4) PDRS25-25T - aileron arms (they guide you to 50% longer 1-1/2 inch arms)
- 2) PDRS35-25T - elevator arms (1-3/8 versus the 2-inch arms)
- 1) PDRS75PP-25T - rudder pull-pull installation
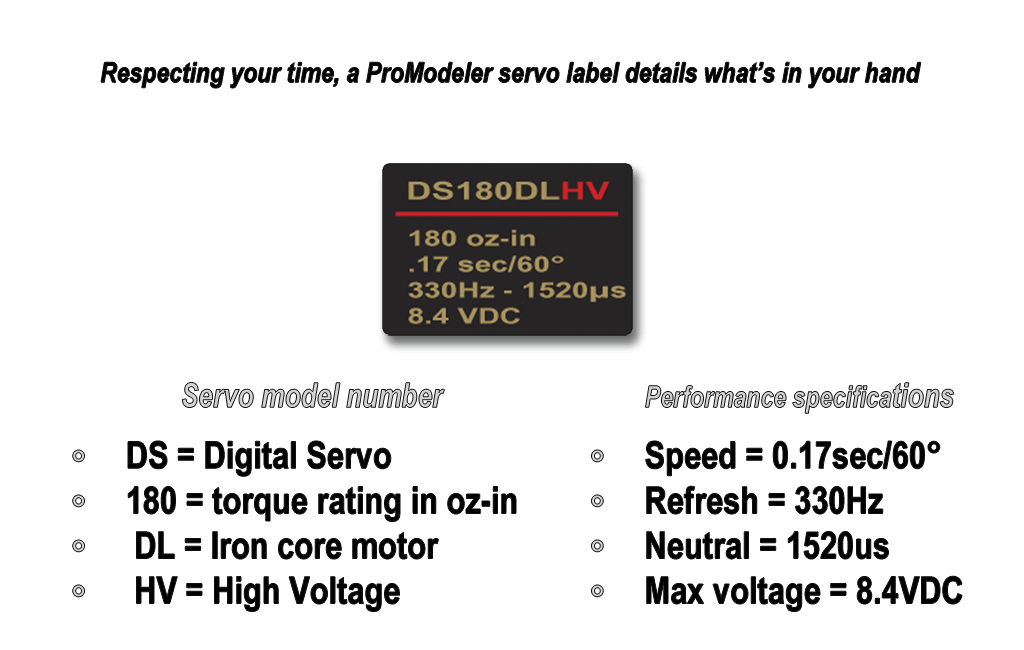
Let's get a couple things out of the way; first, we disagree with the Hangar 9 recommendation of a 350oz-in servo for this model. Second, we're delighted to have you as a customer whether you buy our most expensive servos, or not.
Point being, if you judge this class of servo adequate for your needs, then by selecting ours instead of theirs (360oz-in vs 350oz-in) you're going to save a fair bit of money. That said, if we had our druthers, we'd be guiding you into something a fair bit more powerful and rugged for this aircraft. Heads up.
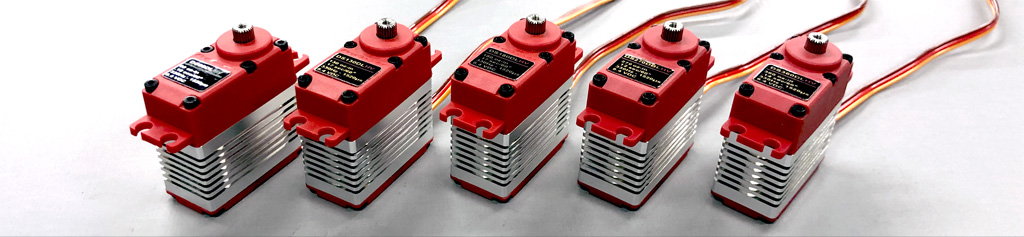
Anyway, our good servos for this build all come from our DL-series. As background, there are 5 servos in the series and they're built as alike as peas in a pod. By this meaning whether you look inside a ProModeler 90oz-in, a 180oz-in, or a 360oz-in, once you've seen one, you've seen them all because they're built the same-same. Differences coming down to gear ratio and motors.
And straight up, depending on who you are as a pilot, the maneuvers you like to perform, and your budget, then these may suit you perfectly. So first, a little bit about them, and then we'll help you figure out if you're a candidate for a set.
What this isn't about
To begin, you need to understand this is not a servo flex article. There are real world constraints that matter in the servo world. A world where the only thing worse than spending a good chunk of change on your dream is realizing afterward you really should have ponied up for better set of servos. So let's see how to avoid the situation.
Remember, Hangar 9 said 350oz-in servos were recommended. It's what they show in the manual. Honestly, while we're a bit hesitant because we believe +500oz-in is more like it for such a massive model, we're going to reluctantly concur because it's their model so they should know what they're talking about.
However, we're going to quantifying this with guardrails. By guardrails we mean we'll guide some sport pilots into our similar torque DS360DLHV (360oz-in) for the flight controls, but it's only because they say so. The 360oz-in and the DS90DLHV, a sister servo (and our least expensive), for throttle, choke, and if you like, for the tow-release mechanism.
What's important to know - for damned certain - is this; these will only be right for you (in our opinion) if you're what we will refer to as a club level sport pilot. Here they are side-by side so you can see what we're talking about.
Sport pilot
In a nutshell, if your use of this model involves scale maneuvers for a Carbon Cub, e.g. to include aerotowing, cruising upright or inverted, plus basic aerobatics often performed 2-mistakes high instead of near ground level (because you're not the club's hotdog pilot), then maybe you're a candidate for 350oz-in standard class servos.
Honestly? If you are, it makes the DS360DLHV perfect for you, especially if money is tight. Why? Simple, it's because of how much dough you can save with our servos versus theirs. Anyway, the real question is this; does this sound like you pilot-wise?
What I'm really asking is this . . . are you disciplined enough to only perform basic scale maneuvers? Seriously, try and be sure because that's how you avoid regretting your servo purchase after flying a while (because you subsequently determine 350oz-in servos aren't strong enough for how you fly).
Note; this will be true whether it's our 360oz-in, or their 350oz-in because the 10oz-in amounts to a difference, which simply that doesn't matter (not in the slightest).
Scale maneuvers
Interestingly, scale maneuvers for a Carbon Cub - in the right hands - would also include maneuvers with more vertical components to them like loops, rolls, Stall Turns (a.k.a. Hammerhead), Chandelles, even some military maneuvers like Barrel Rolls, Immelmann turns and Cuban-8 (if you have enough horsepower to pull them off).
It's with these where I would reconsider whether more powerful and ruggedly built servos wouldn't be better. Why? It's because coming out of some of these, the G-forces will build up significantly. It requires more servo to pull out and more rugged construction to survive more than a season or three.
Anyway, recognize what's not in this list? Violent maneuvers like Rifle Rolls, Walls, Snaps Rolls (or whips), reversing Harrier Rolls, or pretty much anything that could be referred to as aggressive or XA (extreme aerobatics). Why not? Principally, in a word? Torque.
Honestly, to perform aggressive stuff with a 60 pound model with any semblance of repeatability means you're going to want more capable servos. Talking into the 600oz-in range.
This, because - and make no mistake - it's not just about starting the maneuver but stopping it too. The servo must have the grunt to predictably arrest the motion of such a heavy ass model.
Point being, if aggressive stuff is on your schedule of maneuvers, even just occasionally, then think twice before signing off on the idea of 350oz-in servos in this puppy. We actually think it will be more reasonable to opt for more powerful, more rugged, and faster servos. In different word? Something that spells money. A fair bit more more of it, too, maybe twice as much more per servo than what our DS360DLHV goes for. More later.
But look, we're not here to argue, or tell you what to do. This is our opinion, which like belly buttons is something we all have one of . . . and this is ours. But it's your decision so we're going to just try sticking to facts.
Let's begin with the internals, which we're not afraid of showing . . . how they're built. If you're interested, click the Build tab to open the accordion.
Build
Torque-wise their 350oz-in recommendation and our 360oz-in are close enough to the same to say they are the same. Talking about differences you can measure in the lab but never in a million years feel in the air.
What we're getting into next, is how do they compare build-wise? Well, because nobody likes being told what to do, let's take a quick look (so that you may compare and contrast with your own eyes).
Moreover, let me get this out of the way; if you think I'm going to suggest theirs are junk, you're mistaken. The Spektrum A6310 is a very well built servo. What's more, it's one we're honored to be in the same conversation, with.
Anyway, as is immediately obvious, both have all-metal gear trains. Is this good enough? Well, all-metal includes aluminum, brass, and steel. Some brands may resort to cheaper aluminum and brass gears for this class of servo. Like us, they Spektrum opted for steel. This is better.
However, within each type of metal, there are different grades. Some better than others. For example, we like stainless steel gears. No, not saying their steel is bad, saying we opted for stainless.

So with both Spektrum A6310 and ProModeler DS360DLHV you get steel gears, but a consideration is the durable and rugged nature of stainless steel gears in the DS360DLHV. Look, if you're willing to give up stainless, it's no sweat because this is what it means when folks say everybody is different. Opinions matter and now you have ours! Saying we go to the added expense of stainless for good reason. What else?
I'm fond of using the terms rugged and durable. Granted, these are marketing-terms instead of engineering-terms. Thing is, this isn't a real technical paper because the math is minimal. Engineering-speak would see us delving into the math behind modulus, yield strength, and elasticity, e.g. the strength of materials. But I have to assume folks reading this aren't engineers.
So without going into the weeds math-wise, we'll use photos to show what your eyes can see and leave it to your common sense to suss out which is better for you. Let's begin with assembly techniques.
Assembly
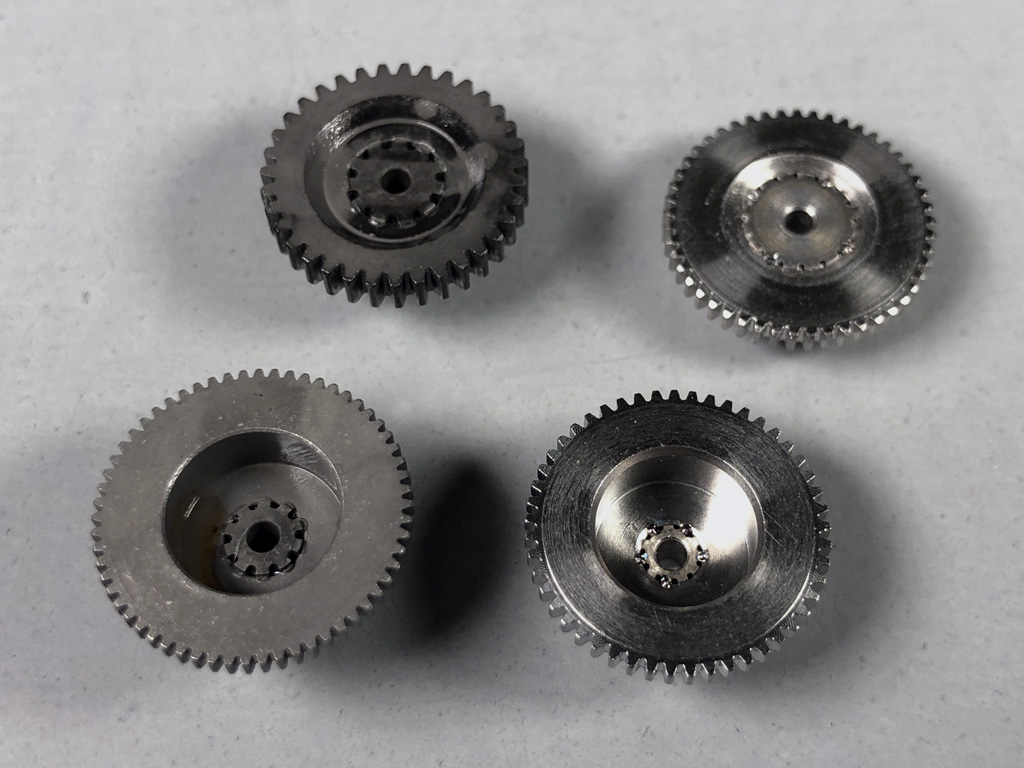
This includes more than how things are bolted together (though we'll touch on this in a bit). Instead, let's show how with ProModeler you get spot-welded gears.
For example, both the gears in the Spektrum A6310 and ProModeler DS360DLHV use what are considered to be compound gears. In this instance, compound just means two gears. They consist of a pinion gear (the small one) and a bull gear (the big one), which are pressed together to make one gear. Hence, compound.
Also, as a rule, pinions always drive bull gears - never the other way around. So where assembly matters, and why folks believe ProModeler go the extra mile is revealed when you eyeball a small detail. We spot weld the joint between bull and pinion gears. Speaks to ruggedness.
Costs a lot more to spot weld the gears, too because it adds an operation. Question is, is this better for you? Like, is this important? We think so else we don't bother, but now we're back to something that's on you to decide, not us.
On it ain't bragging if you can back it up
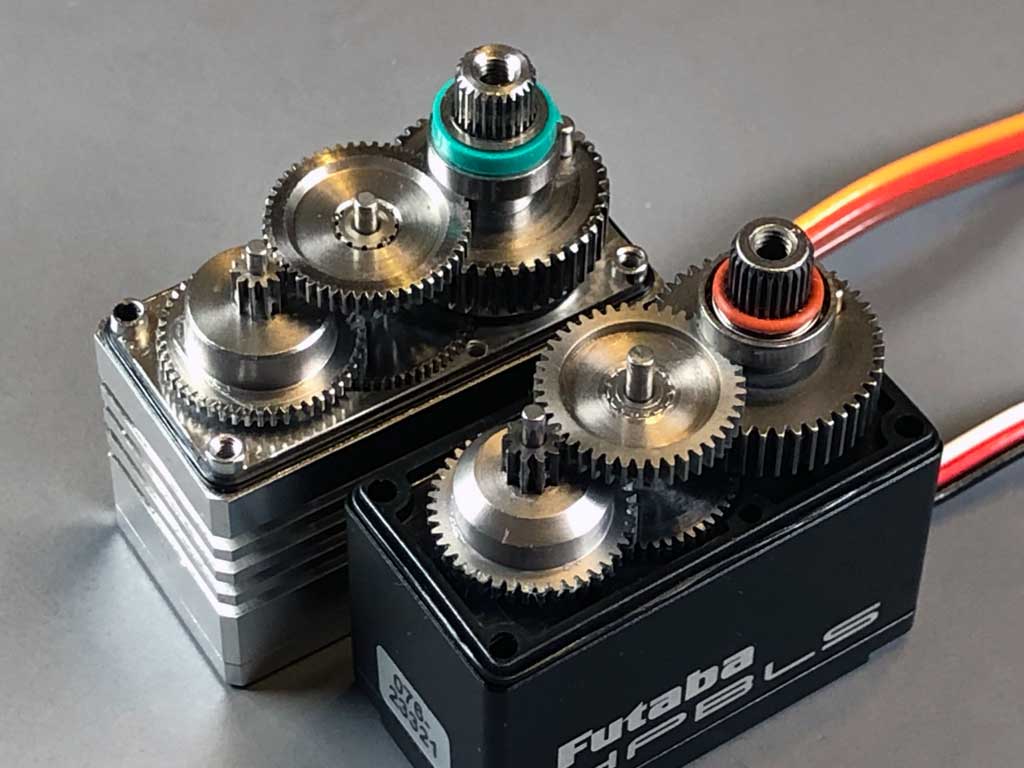
Now let me put my thumb on the scale. Know who else spot welds their gears? Futaba does it for their HPS-A703 standard class servos (and that bad boy sells for north of $300 a pop). I know because we bought some, stripped them down alongside our DS930BLHV for a match up article. Link if you're curious;
As you'd expect, we took pictures. Specifically look at this next photo. Look close and you'll see theirs and ours both spot-weld the bulls and pinions. Know what else? Their bad boy, just like ours, also uses stainless steel for the gear train.
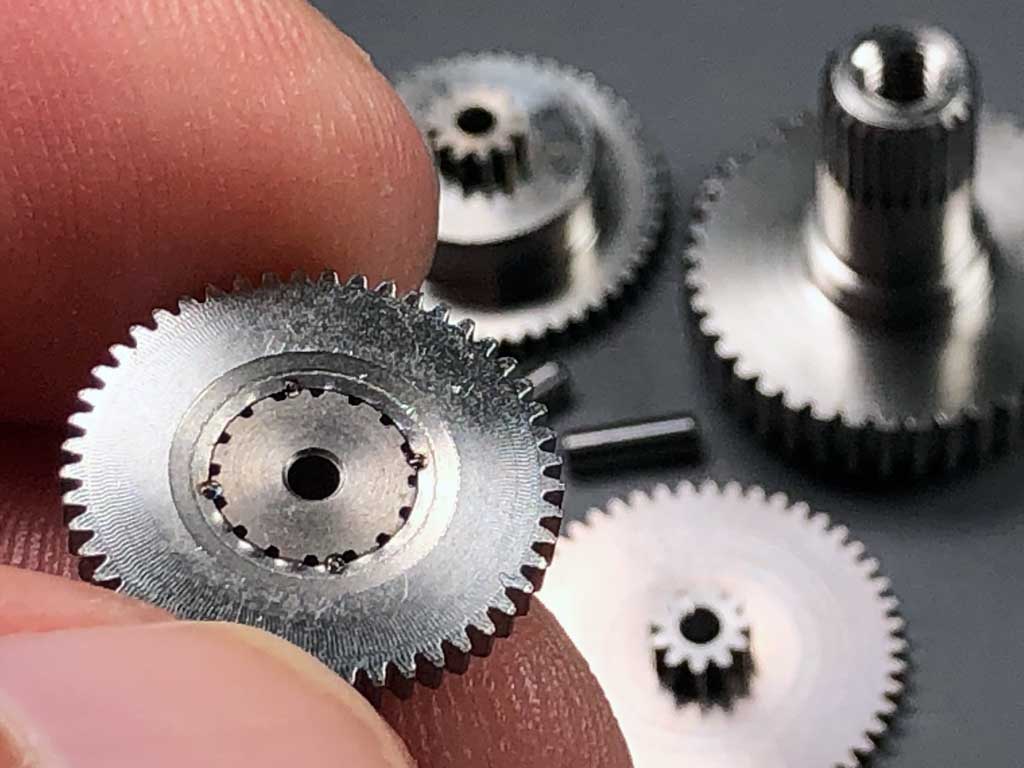
Can't quite see the spot welds? OK, we know they don't show up great. So here's an extreme close up photo so you can better see what it is we're talking about as regards spot welding.
The four tiny dots are where metal is melted together thus making the joint more permanent. Required? Nope. Better? We think so. What really matters? What you think!
Note; some gears use 5-spot welds, others use 4-spot welds. In this photo, there are four.
O-rings and seals
Do you have any thoughts regarding smoke? If you do, then sealing the servo against environmental intrusion becomes as important to you as for our G&I customers (unless the thought of smoke oil inside your servo doesn't bother you). And yes, I know this comes off as snarky but the point is to get your attention and make you think beyond this week.
About what? Simple, about what's important when you're investing in servos (not just now, but into the future). And investing is the right word because we're talking nine servos for this model whether you buy our DS360DLHV or the Spektrum A6310. Ain't chump change, no matter what! That, and they can both deliver decades of utility.
Reason this is important even if you have no intentions of installing a smoke system is this; what's true for this model today may not be true for the next model into which the servos get installed. Anyway, the DL-series servos (all of five) meet these eight MIL-STDS.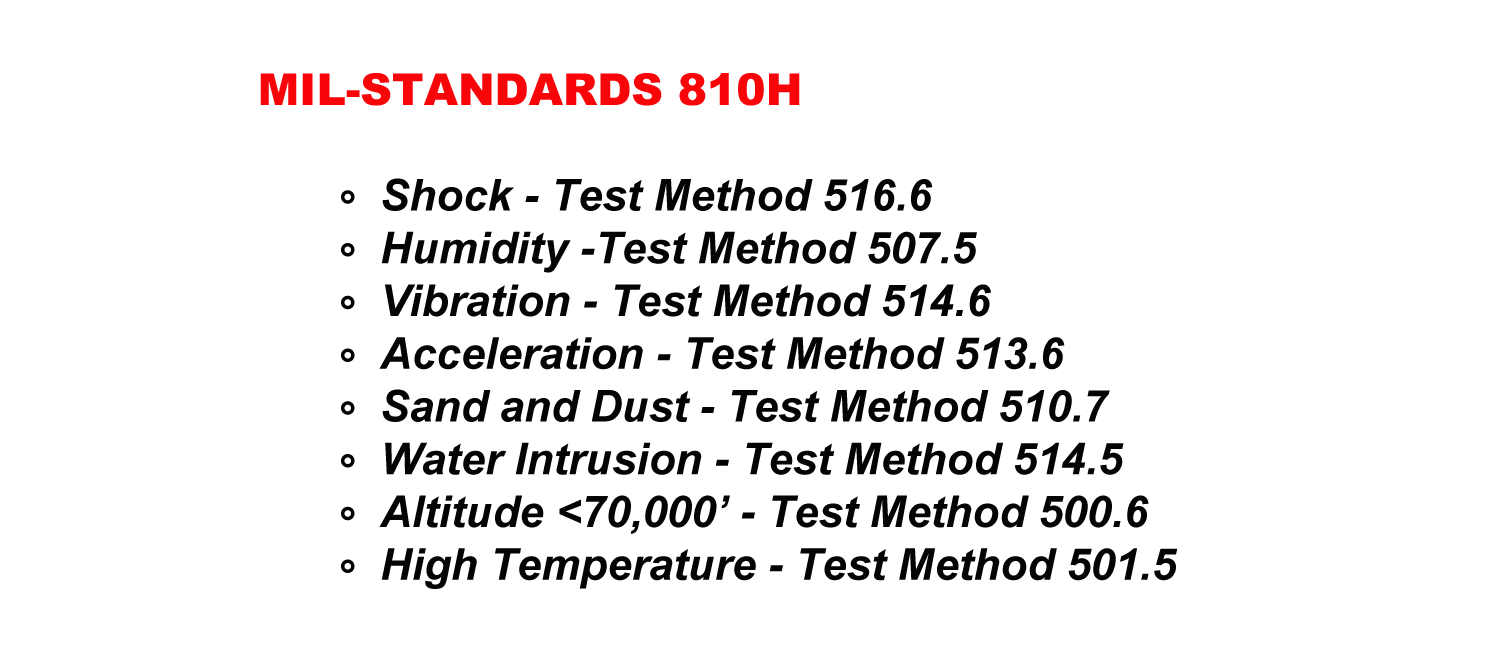
So this gets to be important because both their servo and ours use two o-rings between the three case sections. And we both use o-rings beneath the heads of the assembly bolts.
However, while they use an o-ring at the output shaft, we use a custom molded Viton seal, instead. Let's look at this more closely.
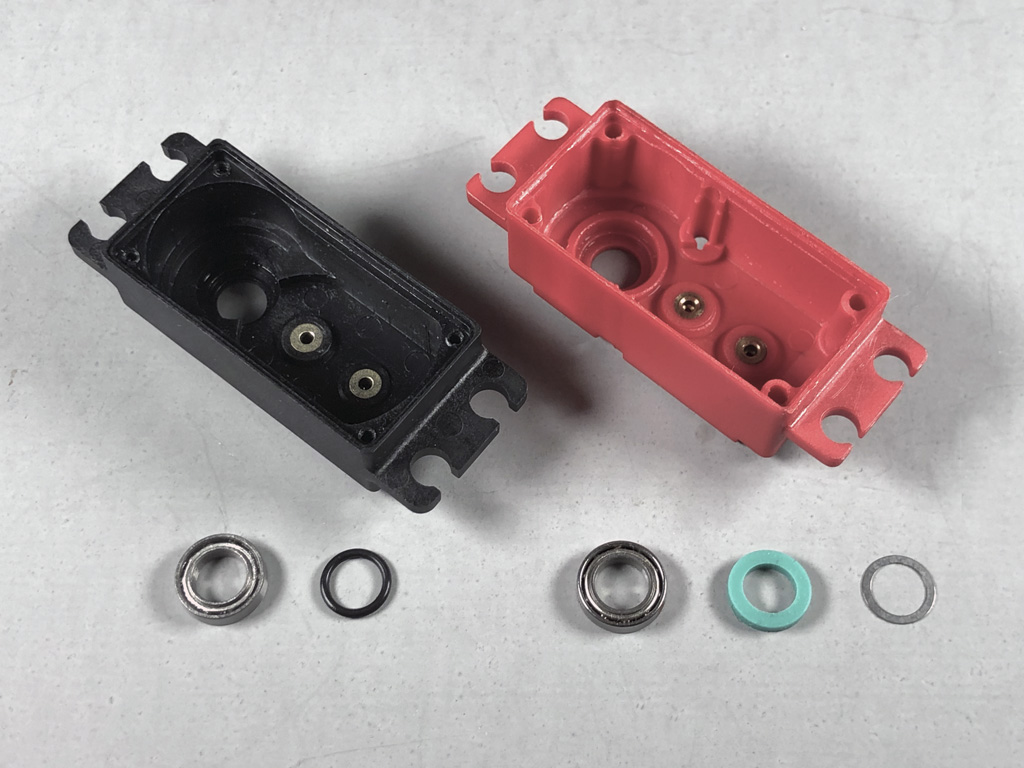
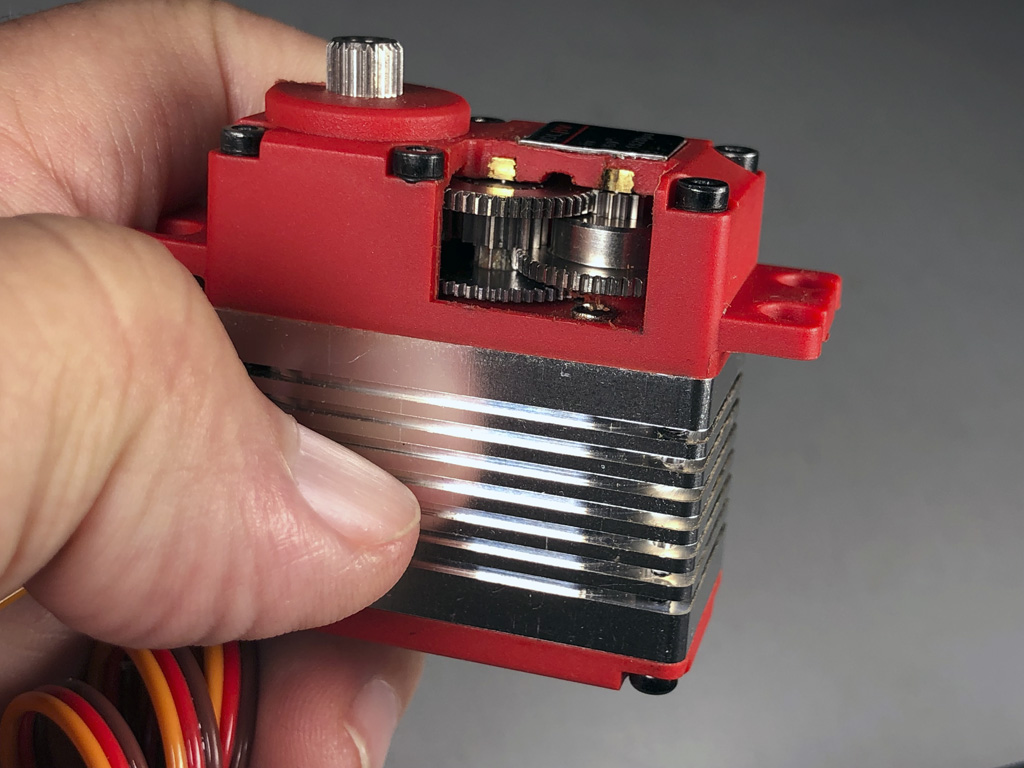
And briefly birdwalking, if you don't grok the importance of the bronze hard points within the polymer case components, these are there to keep a gear-shaft from resting directly in the plastic (basically to protect against deformation under load). So what the hard point does is it increases the surface area for spreading the load whilst at the same time, providing a harder material surface against which the gear shaft rides.
This cutaway photo, one where we created a window into the case, shows these hardpoints nicely. And while the Spektrum A6310 does this, also, I didn't feel like mounting that servo into a mill and windowing the case. So instead, I'm just showing you ours because they both do the same thing.
Major point? Beware of servos, which leave the bronze hardpoints out of their polymer case components. Minor point, when I said the A6310 is a good servo, I'm wasn't kidding.
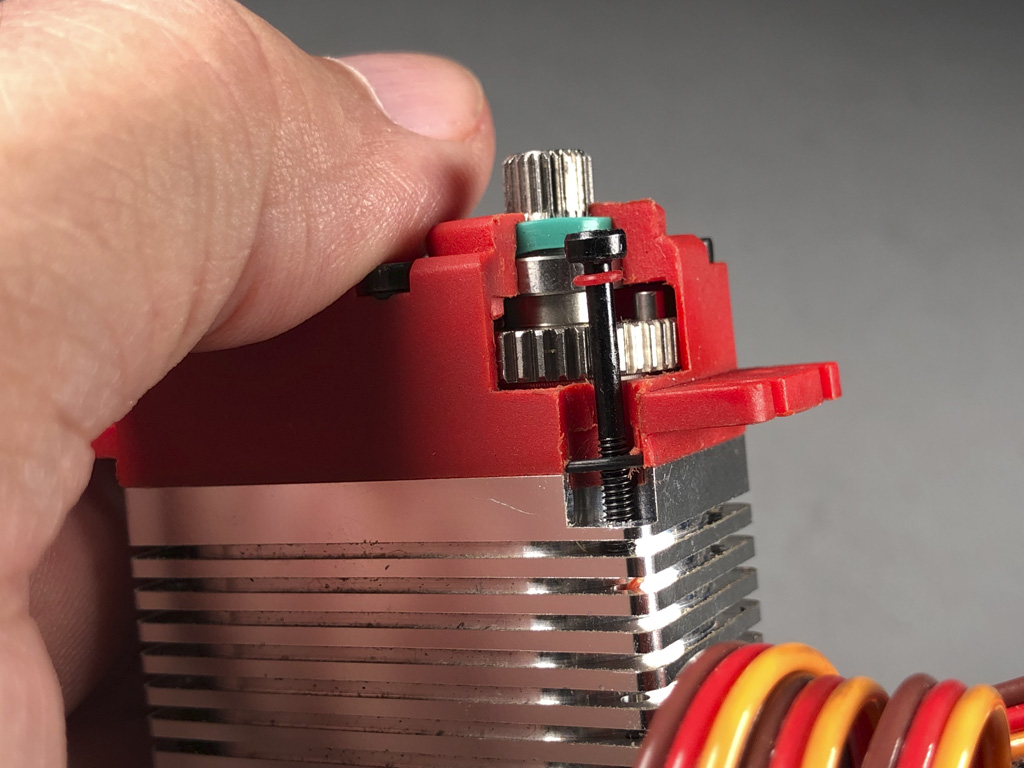
As for how the seal at the output shaft fits in the greater scheme of things? Well, the old saw about a picture being worth a thousand words comes into play, just look!
In this extreme close up photo, note the huge difference between a bog standard o-ring (the small black one) versus the custom Viton seal (green). That, plus the stainless shim required to properly preload the seal. The Viton costs significantly more than an o-ring - but - we feel it's worth it because it does a better job.
Real question is; what about you . . which do you think would be better for you?

In this next photo we've milled away a different part of the upper case section. This time creating a window making it easy to see where the seals fit in relation to the output shaft and the upper case section.
Only thing is, it's a bit hard to see the shim because it fits between the bearing and the Viton seal. But this shim is critical because it ensures the proper preload for the Viton seal. Leaving it out means it won't pass the test. Anyway, an o-ring lacks a shim, altogether.
Note; without the Viton seal/shim, like back when we used just an o-ring, we couldn't earn MIL-STDs for both water and dust intrusion.
So before closing this section, two things, to do with servo arms, plus the throttle servo.
Servo arm math
In regard to the arms; first, within the manual they guide you to 1-1/2 inch arms. In this regard, we suggest 1-inch arms, instead. Why is this? Simple, it's because if you're not throwing the model around aggressively, then you don't need the longer arms.
If you want the long-winded explanation, click these tabs about throw and math.
Throw - mechanical vs ATV
And proof comes when you fly and discover there's so much throw it makes the model uncomfortable to fly. And this is when folks jump into the radio programming and reduce the ATV (electronic throw, or travel volume). Problem with this is, you instantly give away a butt load of the servo resolution you've paid for!
Far better in this situation (and by a country mile) is to just move the control ball inward (toward the center of rotation), instead. End result of moving the linkage rod ball is it reduces control surface throw mechanically whilst preserving the servo's resolution. If afterward, you feel you went too far and need more throw, now go into the programming and increase ATV from 100% to 110, 120, 130, or the maximum, for some, this is 150%, if needs be.
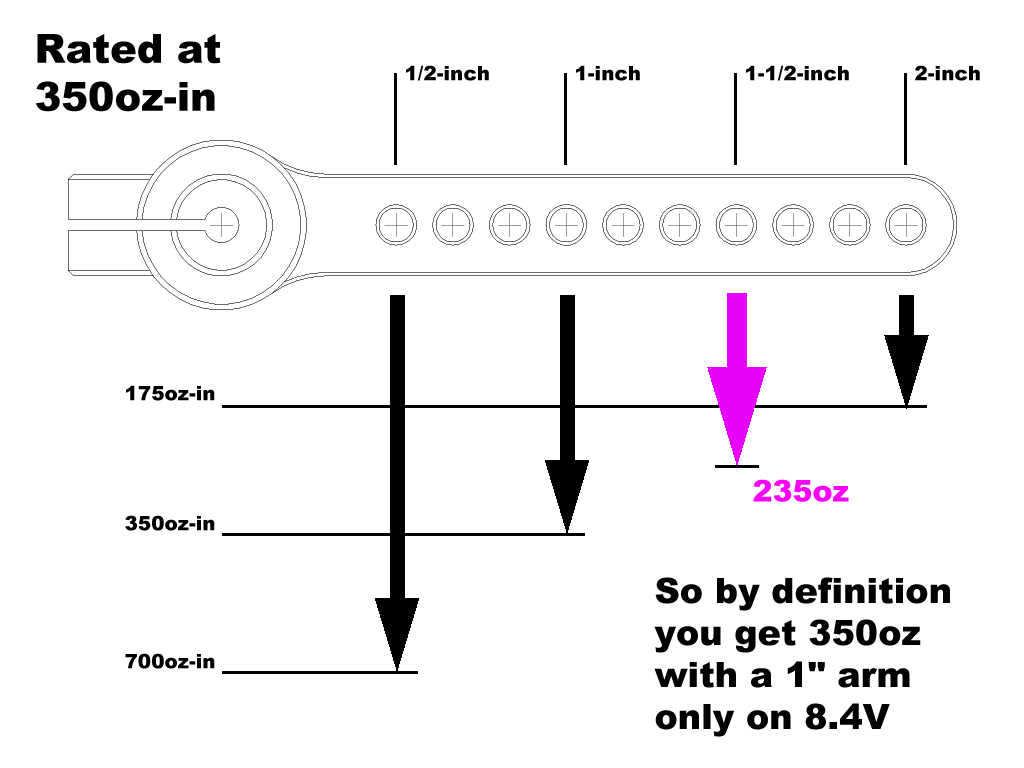
Second reason you're better off with the shorter arms is to do with physics. Let's put numbers to this. Servos, all servos, all brands, not just ours or Spektrum, are rated on a 1-inch long servo arms. So at 8.4V, the 350oz-in of torque you get from the Spektrum A6310 results in 350-ounces of force on a 1-inch arm.
However, with a 1/2-inch arm you get twice as much, or 700 ounces of force. Similarly, on a 2-inch arm, you get half as much, or 175-ounces of force. So on the 1-1/2-inch arm called for, you're only getting 235-ounces of force. And that's on 8.4V so if you prefer LiFePO4 packs because they're easier to live with, since they're 6.6V packs, you're getting even less oomph (highly technical engineering term) out of the servos.
Math - for the curious
So here's the math (middle school level) as regards leverage. Torque is a function of force (F) multiplied by distance (D) and it equals torque (T) in ounce-inches, or written as F*D=T where . . .
- T(ounce-inches) = F(ounces) x D(inches)
. . . so applying numbers you can do in your head, if you get 100-ounces from a 100oz-in servo with a 1-inch long arm, then you get 200-ounces out of the same servo when the linkage point is as 1/2-inches from center. Or, if the linkage point is 2X further from center (2-inches), then you only get 1/2 the force back out of the servo, or 50-ounces.
So let's put the above into numbers, where the distance is X, then let's solve for F. Thus, using the F*D=T formula when X=1, 1/2, and 2 we solve for F and get . . .
- 100oz = T(100oz-in) ÷ D(1in), or 100oz being applied with a 1-inch arm
- 200oz = T(100oz-in) ÷ D(0.5-in) or 200oz being applied with a 1/2-inch arm
- 50oz = T(100oz-in) ÷ D(2-in) or 50oz-in being applied with a 2-inches arm
Minor point being, from the exact same servo, what you get out is related to the length of the servo arm. So with a 1-inch arm, a 350oz-in servo gives you 350-ounces of force at 1-inch. But you get 700-ounces of force with the linkage at 1/2-inch. Similarly, you only 175-ounces of force back out with the linkage point at 2-inchws.
So with a 1-1/2-inch arm, that 350oz-in servo will only be delivering 233-ounces of force!
Major point being, keep the linkage point as close to center as you can. And if you need more control surface thrown, it's almost always better to increase ATV to get the added throw than to move the linkage point further from center.
And because this is physics, this works the same as a teeter-totter where mom (bigger and heavier) sits nearer the fulcrum on one side to play with a smaller lighter child. Or when you put a shovel in the ground, and put your foot on the heel of the spade, you get more lifting force when you pull on a longer handle versus a shorter one (though with servos, because we're going the other way around, you get more force out of a shorter handle, or servo arm).
Otherwise, since a picture is worth a thousand words, this graph explains it all visually, quite nicely.
Throttle servo
So because we mention the DS90DLHV as suitable for throttle, choke, and tow release, let's briefly touch on this servo.
Earlier we mentioned the DS90DLHV, along with the rest of the servos in the DL-series, is built the same as the DS360DLHV. Since you've seen the guts of the 360, the DS90DLHV is just more of the same. Basically, they differ in gear ratio and motor, not their construction.
Meanwhile, since it's reasonable to wonder if you can use something from a similarly lower torque-class (servos which are, as a rule, less costly), then we offer this tidbit of information. We'll turn to yet another match up article; this one comparing and contrasting one of ours, the DS180DLHV, against maybe the world's most popular standard class servo.
And with this, we wrap up our thoughts regarding servos and arms for the Good recommendation. However, before jumping to the Better and Best recommendation equipment list, let's touch on something we view as important.
We call it the conversation. And no, it has nothing to do with the birds and the bees!
Better - servos and arm
If you're into a bit more aggressive flight than the average guy, like maybe you perform snap rolls on take off, or you're the club's hot dog pilot and perform knife edge loops, and especially if you like the finer things in life, then this is the servo group for you.
You'll be opting for all-alloy cases on the flight control servos for improved ruggedness and enhanced durability. When you need high performance and still want to be smart with your money, then these are for you.
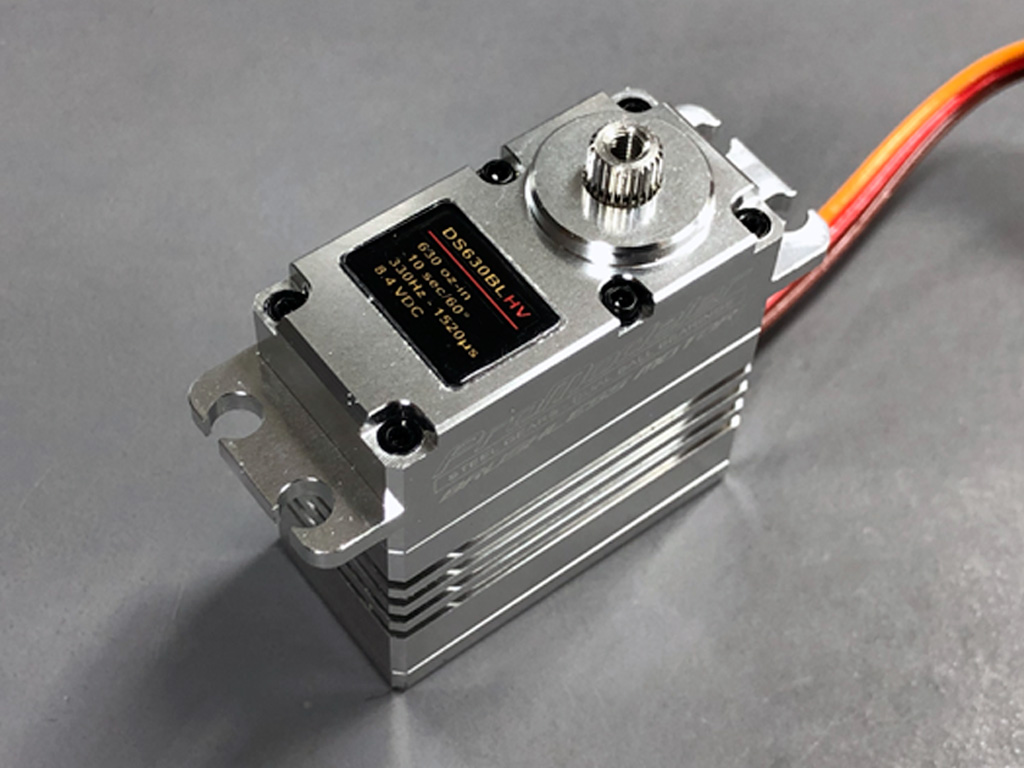
From the part number, you can see we're guiding you to 630oz-in servos for the flight controls except rudder where if you do knife edge loops then you'd be wise to get the DS930BLHV (otherwise, just get another DS630BHV, instead).
And for throttle, choke, and tow release, we guide you to the same DS90DLHV as with the Good group.
- 1) DS90DLHV - throttle
- 1) DS90DLHV - choke (optional)
- 1) DS90DLHV - tow release
- 2) DS630BLHV - ailerons
- 2) DS630BLHV - elevators
- 1) DS930BLHV- rudder (or another DS630BLHV)
- 1) PDRS105 - Anti-vibration throttle arm (plus another if using choke)
- 4) PDRS35-25T - aileron arms (1-3/8 inches vs 1-1/2 inches - think IMAC vs XA)
- 2) PDRS45-25T - rudder and elevator arms (1-3/4 inches versus 2 inches)
- 1) PDRS75PP-25T - rudder pull-pull installation
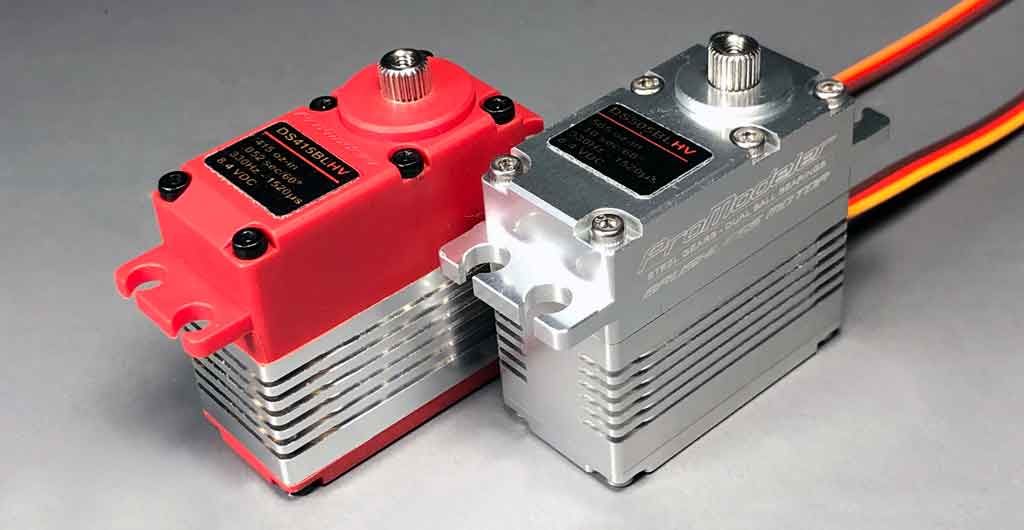
As with the Good group, these are also standard class servos - here placed side-by-side with a hybrid case servo we guided you to earlier. Hybrid, of course, meaning the case is comprised of both engineering polymer and aircraft aluminum. Basically, an all-alloy case is more rugged and will survive more abuse.
That said, both are handsome rascals, aren't they?
Note; another consideration (some would say 'the' consideration) is these servos use brushless motors. Honestly? I doubt most folks fly this model enough for this to matter, but it's a factor because the servos may be repurposed in future into another model. Moreover, brushless motors are very important when you practice several times a week (IMAC pilots, for example, because they're on the contest trail).

Reason in favor of brushless is the motors last 5X longer than similar performance coreless motors. This, because they don't generate dust internally as the brushes wear. Wear, which is inevitable due to pitting as the brushes spark on the commutator ring (basically, just like connecting a battery in an electric model generates a spark). So brushless eliminates this wear altogether.
To learn more about RC servo motors, these two articles use detailed close up photos of the internals;
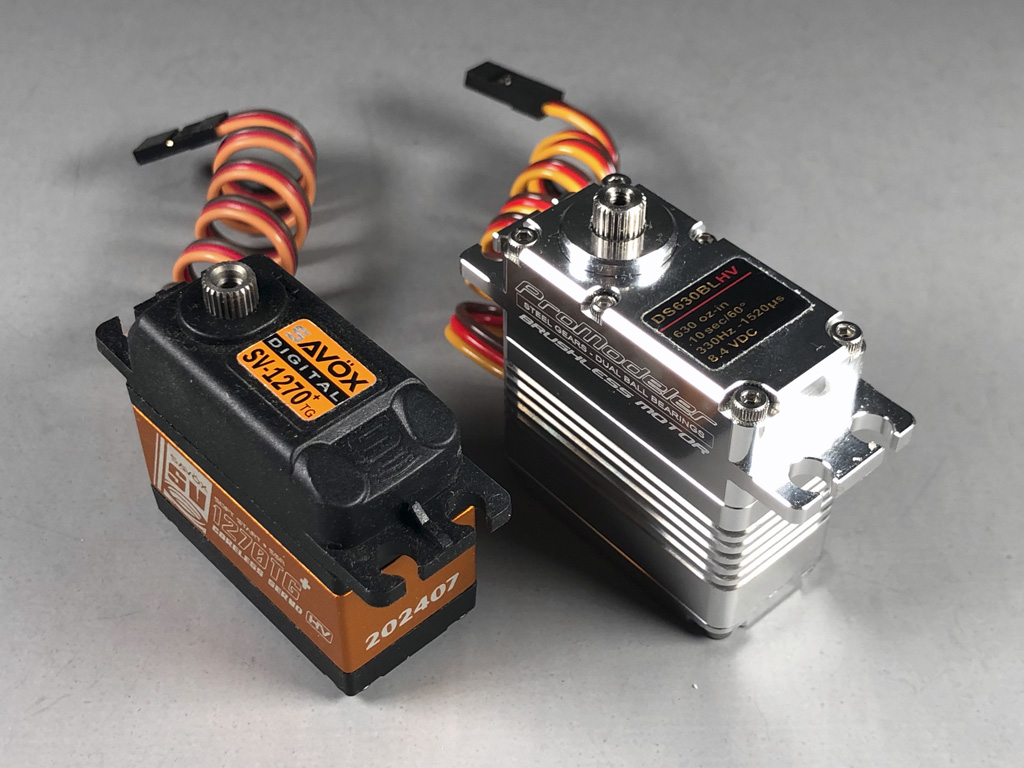
Anyway, a comparable servo performance-wise to our DS630BLHV is the SAVÖX SV1270TGP
Note; this servo has been offered with suffix TG, TGP, and TG+ (these seem to be variations on a theme where the principal difference being latter models added the soft-start feature). Otherwise, they're mechanically similar.
Speaking of soft start, we (cough-cough) are who introduced soft start to servos back in 2019 - and you get this benefit with every servo in our line up, even our least expensive models!
So where we believe we have it all over the SAVÖX is theirs, a) relies on a plastic upper case, b) is reputed to use titanium gears, c) resorts to a coreless motor, and d) lacks protective potting compound. And with similar performance (and money) between theirs and ours.
Click this link if you're curious to see what they have to say about theirs.
- SAVÖX SV1270TG+ - 625oz-in - 0.10sec//60°
- ProModeler DS630BLHV- 630oz-in - 0.10sec/60°
However, it's our opinion ours are just built better. And we're absolutely not afraid of the comparison, else we don't mention them, right? Anyway, to see them up close side-by-side in greater detail, then this link is to a match up article where we take both apart and show you what's what with loads of detailed photos.
Speaking of photos similar to this one.
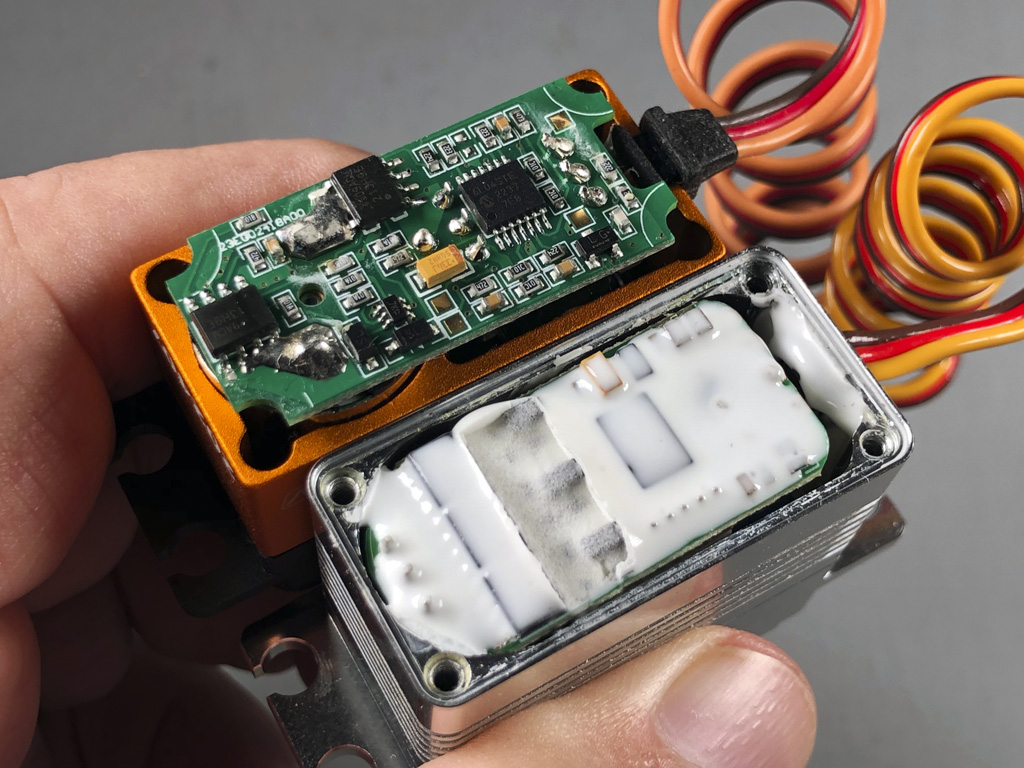
Bottom line? For the savvy who realize a set of servos may be in use a decade, or longer, then durability is a big deal when making a servo investment - and investment is the proper term considering what a set cost - then when you invest in the good stuff, you surely want to be certain you're getting your money's worth, right?
Means all-alloy and brushless make sense. Stainless gears for enhanced durability and superior ruggedness also make sense. Ditto potting compound! Point being, you should favor MIL-STD servos like the DS630BLHV for the same reason it's a top seller with our G&I contractors.
No offense but these factors are is really something of a no-brainer. However, added quicker transit speed versus servos in our Good group (speed which makes a world of difference during snap maneuvers), and the DS630BLHV are a great choice.
Anyway, if you're curious what I mean about durability and build quality, then review this article. It's actually about the DS505BLHV but since it, the DS630BLHV, and DS930BLHV are built the same (they're all three within the same BLS1 family), then it's useful information for use when considering our servos.
The old saying, it's hard to beat a man at his own craft, is true! And if you get the sense we're proud of the DS630BLHV servo, then you'd be 100% right.
Servo arms
Last thing before moving on to our Best recommendation; let's touch on servo arms. Unlike imports made of only God knows what alloy, we CNC machine ours from a solid billet of 7075-T6 alloy. And if you're unaware, 7075-T6 rivals 1018 steel in strength. This is the good stuff!
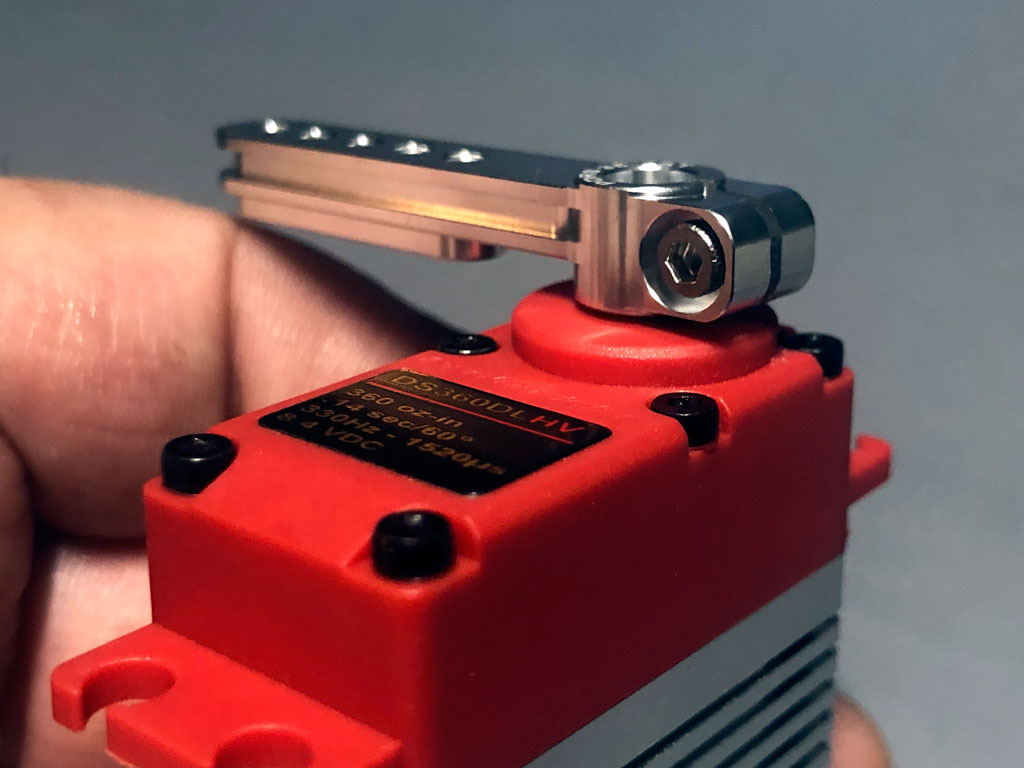
So in this next photo we show one of the recommended alloy servo arms (the other is slightly longer and built similarly). Eyeball how they feature an H-beam profile, (like an I-beam, but on it's side). This because of the direction in which it resists flex.
Know where else you find this H-beam profile being used? In highly stressed connecting rods of automotive racing engines like the ones produced by Carillo!
Also, because everybody adds a nut to the underside of import servo arms where the ball attaches, ours are thick enough to engage plenty of threads per ASTM - no added nut needed.
Anyway, this next photo shows the PDRS35-25T and is a nice example of we're talking about. By the way, the Allen head screw on the side is for backlash compensation, one fitted to the spline and secured, snug this one tight to eliminate any possibility of play, or backlash.
Best - servos and arms
Hitting the entry, nailing the exit - no matter the violence of the acceleration of the start and the stop - calls for the fastest servos we can make. In truth the torque of these servos is perfectly suited for a large model like this 165-inch Carbon Cub - but - with this group of servos you're not buying torque. What you're paying through the nose for is the sheer speed.
- 1) DS255BLHV - throttle
- 1) DS90DLHV - choke (optional)
- 1) DS90DLHV - tow release (optional)
- 2) DS845BLHV - ailerons
- 2) DS930BLHV - flaps
- 2) DS845BLHV - elevators
- 1) DS1155BLHV - rudder
- 1) PDRS105 - Anti-vibration throttle arm (plus another if using choke)
- 2) PDRS45-15T - ailerons (1-3/4 inch vs 1-1/2 inch for the super aggressive)
- 2) PDRS35-25T - flaps (1-3/8 inch vs 1-1/2 inch)
- 2) PDRS55-15T - elevator arms (same 2 inches they recommend)
- 1) PDRS100PP-15T - rudder pull-pull installation
Let me be clear; before deciding these are best servo and arm setup in the world for you, be honest with yourself. If you're more of a sport pilot, or principally fly IMAC maneuvers instead of XA stuff, then our advice is save your money because it's pointless to pay for speed you either can't feel, or won't use.
So these are the best you can install in this model (in our opinion), but not necessarily the best for you. So because only you can judge if you want to pony up for such high performance servos, be sure because we want your business but there's a difference between wanting the best in the world and needing the best in the world . . . there's a difference, take my meaning?
Now allow me to touch on something to do with actually getting this level of performance. The mechanical changes we discovered were a must to avoid servo arm failure. Failure?
25T vs 15T
One of our better competitors is MKS. And just as they go from a 6mm 25T spline to an 8mm 25T spline on the output shaft of their line of high performance servos, we do the same with our super servos. A major difference between us is we opted for the more gnarly 15T ISO standard with our 8mm spline shaft.
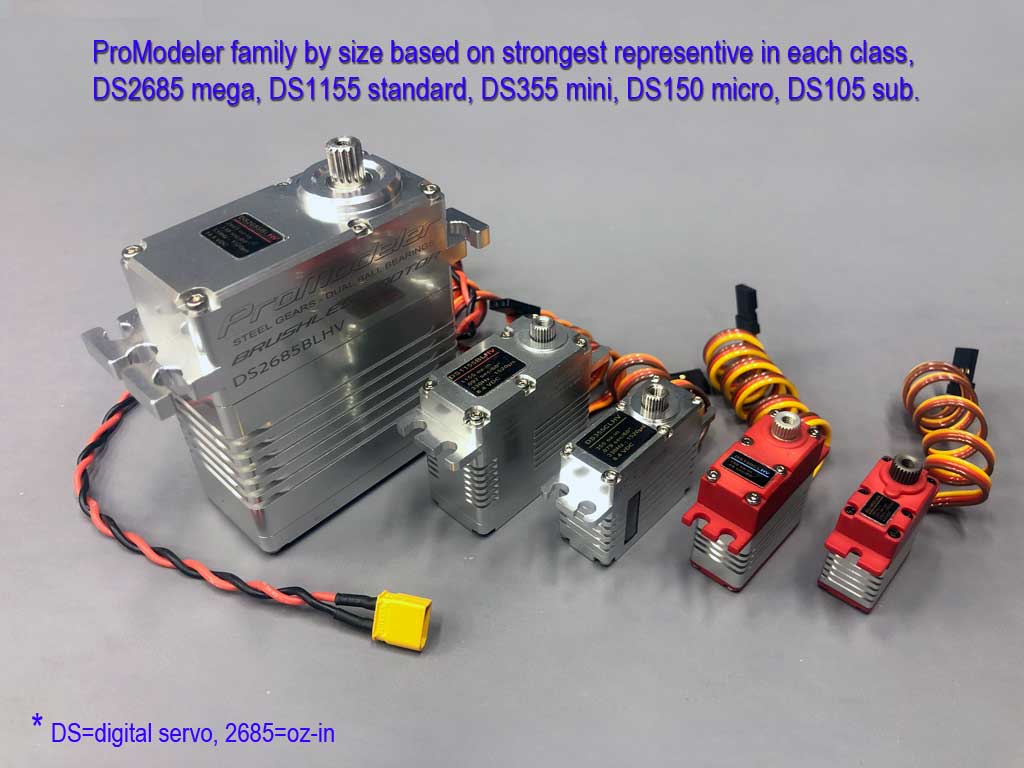
Note; this is the same spline as used for our giant class servos, which range from 1735-2685oz-in of rated torque.
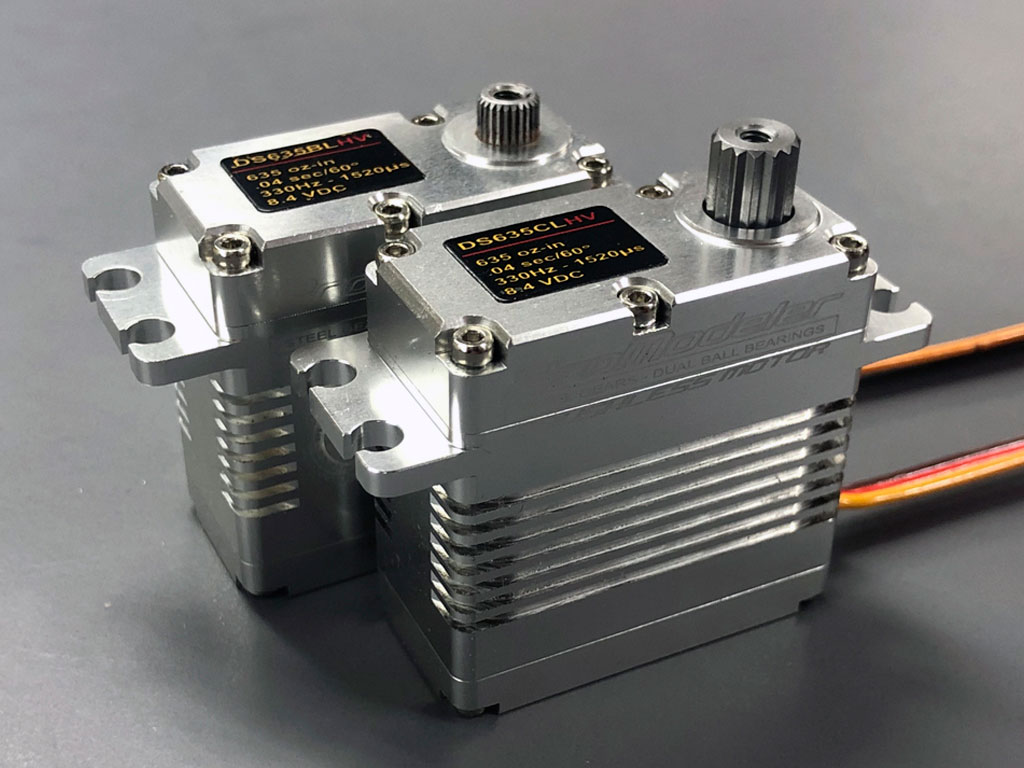
So if you've never seen such massive splines, they splines look out of proportion to what you've always seen. Eyeball the next photo for a gander at the output shafts and you'll see the massive difference between ø6 and ø8 (ø is diameter on a print, and we're dealing in mm).
So all BLS2 servos, DS635BLHV, DS845BLHV, and DS1155BLHV look the same from the outside. The DS635 servo on the left was 1st generation, and which we deprecated after the first production run in favor of the larger spline. So the one on the right of it is basically the same servo, same performance but with the big ass spline.
Circling back to the servo 25T vs 15T arms, we offer what you need in both. For example;
- PDRS45-25T - 45mm long, about 1-3/4 inches to the furthest mounting hole
- PDRS45-15T - same arm, 15T instead of 25T
Now, let's touch on what else you may need in inventory when setting out to equip one of these beasts. I bring it up because when I get started on a project I don't want any surprises that may force me to scurry to the computer or hobby shop to keep building.
Figuring you may be the same, here are a few of the other bits and bobs you want to have on hand.
Extensions
- 5) 12-inch extensions (at receiver to mate up to the four wing servos plus lighting)
- 2) 48-inch extensions - ailerons
- 2) 60-inch extensions - elevators
Extensions - details
Let's touch on servo extensions. They're three-strands twisted together and made up of 20AWG wire. Basically, they're the thickest wire leads we can get crimped into the DuPont housing.
Twisted
Why twisted? To more strongly resist stray RFI (radio frequency interference). And this is a big deal. In fact, it's our advice to don't ever use flat extensions with ignition engines. Why not?
Simple, it's because 'if' the module or high tension leads begin to fail, then the ignition noise (these things are sending 40,000 volts to the plugs) basically swamps the receiver because it's act like a broadcast transmitter of pure noise. And the noise feeds straight into the receiver through the leads 'unless' they are twisted. Airplanes are expensive, right?
Anyway, you're the customer and thus, always right - but - our opinion is a few bucks saved on flat thin extensions is false economy. So heads up whether you add extensions to a servo order (or get them someone else) get the thickest wire to reduce voltage loss and twisted to help protect against stray RFI backfeeding into your receveir.
These are best practice basics! And it's not just our opinion, but down to physics.
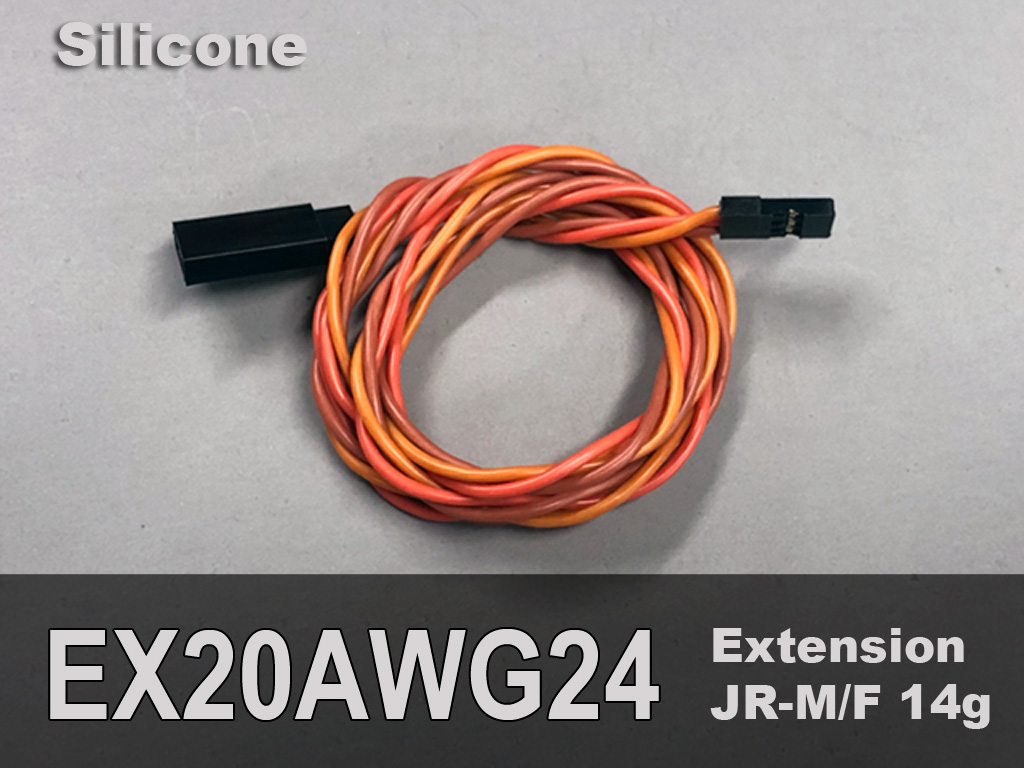
- EX for extension, 20AWG is wire gauge, 24 is length in inches
Insulation
Speaking to the insulation, while there are several materials we could have select for the insulation, we opted for silicone (which is pretty much the same stuff used for fuel lines) because it's silky soft and supple, which makes it great for resisting abrasion as you pull it through wing ribs and such. Combine with high strand copper wire and you get a super flexible extension that's easier to route and doesn't get stiff when it gets cold.
Thickness
20AWG? Why such thick leads? Simple, because the thicker the wire the more it reduces voltage loss. So 20AWG is also the thickest which can be crimped into the DuPont connector. Want to know more about decisions made when using extensions, e.g. how to calculate voltage loss? This white paper discusses this, and more;
- Review to learn more: Servo Leads & Extensions

Note; these articles are free. Clicking the link opens it within a separate page.
And guys, yes I know all this info comes across as a sales pitch, but it can't be helped and it doesn't really matter where you source extensions. This because the servos only know if they're less than 20AWG, and twisted only matters if an ignition goes bonkers. Otherwise, insulation is more a matter of what's important to you.
And as far as important to us, it doesn't really much matter if you add extensions to your order, or not. Why not? It's because we live off the servos not the nit-noids! So this info is offered mostly to educate and inform what is important and watch out for.
Locking extensions
Oh, and heads up, if you order extensions from us, we offer locking ones, too (a drop down menu selection when ordering). Point being, these are the ones you want wherever you cannot inspect the connection.
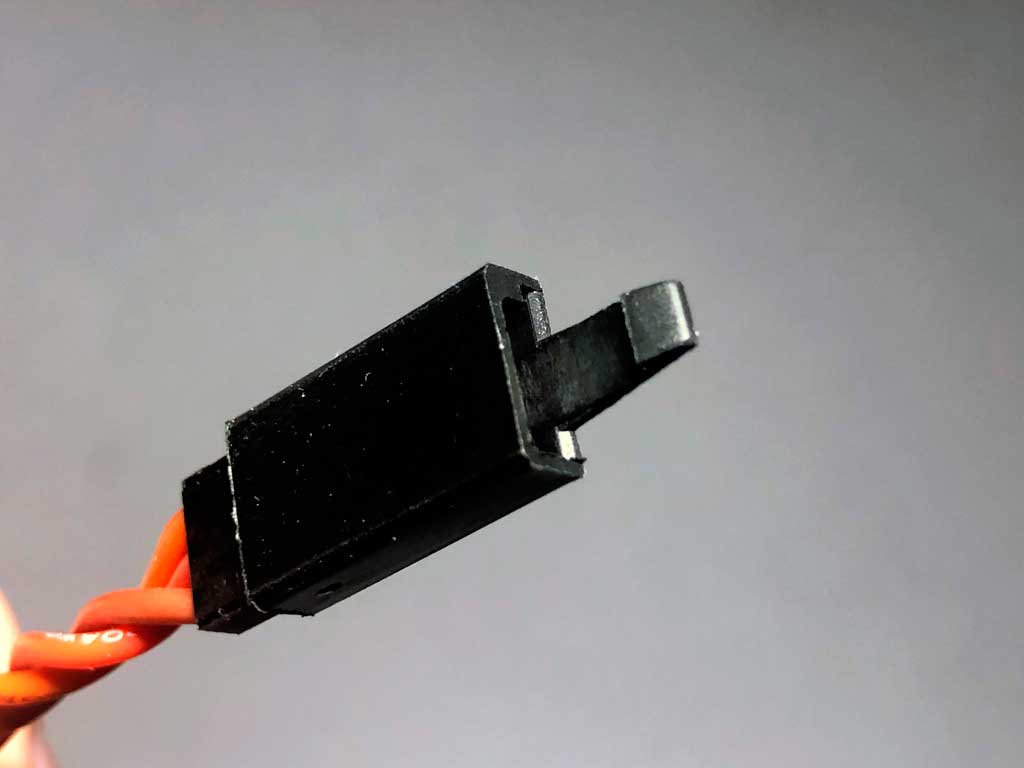
- Locking extensions are quick and easy to use
Capacitance
Also important thing as regards extensions is how the servo works at the end of an extension. Basically, the further away from the voltage source, and the thinner the wire, the worse the servo performs. Once you have the thickest wire, the only thing left to deal with any added length from the receiver is capacitance. So let's touch on this, next.
Folks, this is important; when servo extensions exceed 30-inch in length, it's time to add capacitance. First you've heard about this?
- Review this article; Why and when to add capacitance
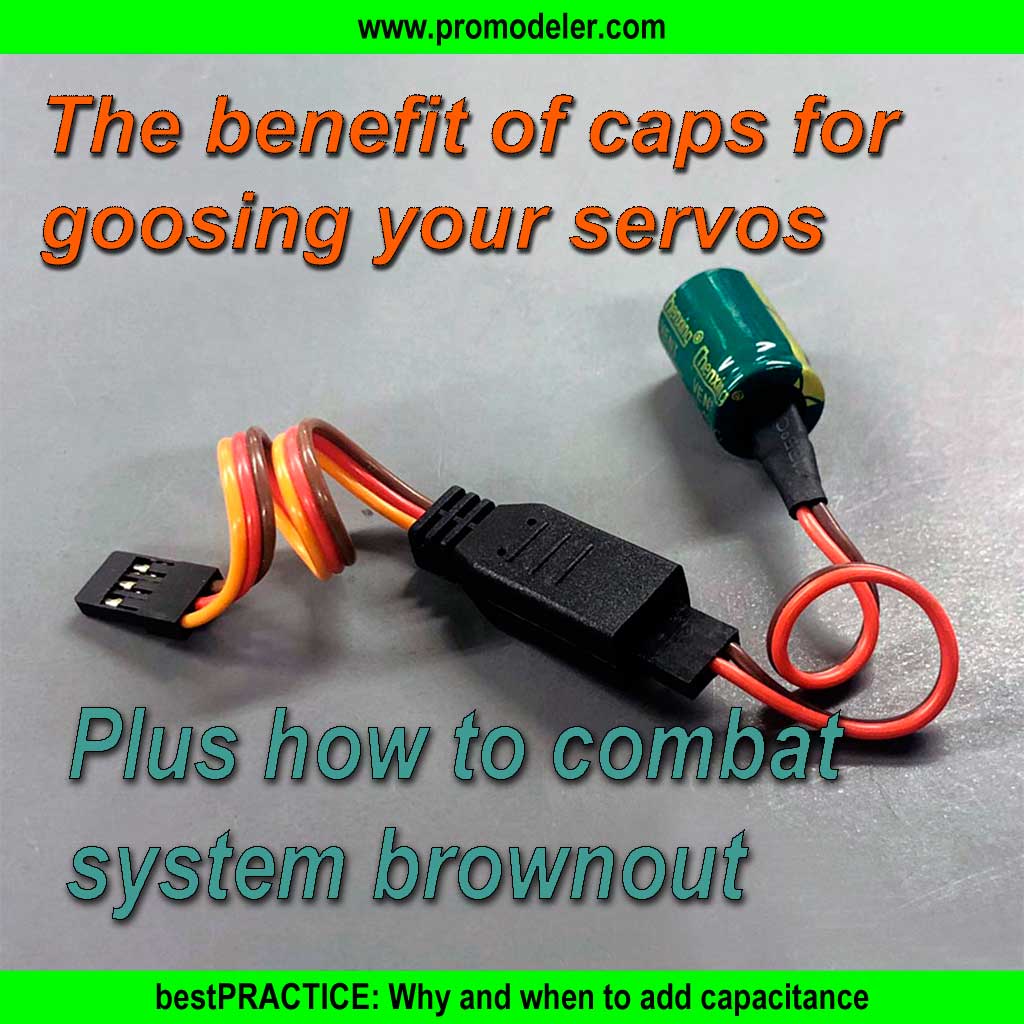
Batteries and switches
- 1) B2S1800D LiFePO4 battery pack - 1800mAh ignition pack (~800-1000mAh per cylinder)
- 1) B2S6000 LiFePO4 battery pack - 6000mAh pack for the avionics (receiver and servos)
- 1) 20A Dual Illuminated Rocker Switch - avionics
- 1) 5A slide switch - ignition
- 1) RCEXL Opto-Kill Switch
So as you may have noticed, in addition to servo and servo arms, the 'other' list included extensions, batteries, and both radio and ignition switches. We've dealt with extensions so now we're going to touch on avionics switches, and ignition switches and also battery packs.
Switches
On the ignition side, one is a manual slide switch and the other an Opto-Kill switch. Both are for your battery-powered ignition module-equipped engine. How it works is quite simple; the battery for the ignition module plugs into the manual slide switch.
This switch is mounted where you can reach it in an emergency on the ground. Typically, this is on a cowl, or the side of the fuselage - but - regardless, it's external to the air frame. Reason being if things go to Hell, you or anyone can slide the switch to the off position and kill the engine. We're going to come back to switches but first, a brief birdwalk.
Birdwalk
My first real job came about the summer after I'd turned 12 y/o. It was mowing the lawn, which until then I'd never really paid attention to because my Dad did it. That summer was also my first opportunity to earn money mowing neighbor's lawns and also I got a paper route, but I digress.
So that lawnmower used a 20-inch blade and was powered by a 3-1/2 horsepower Tecumseh engine. Besides teaching me to check the oil, and start the engine. He also taught me how to tune the engine's high speed needle valve and said he was just showing me how because if the engine ever needed adjusting, there was something else wrong with it.
Anyway, my Dad took pains to warn me about the danger of the mower blade. He also taught me to always wear my steel toed boots instead of sneakers when mowing. And never flip flops! My point?
The prop on larger gassers is every bit as dangerous. Maybe more so because it's not shrouded by the steel mower deck and we're often hand starting the engine. Major point? This business of switches is important, so heads up! More in a bit.
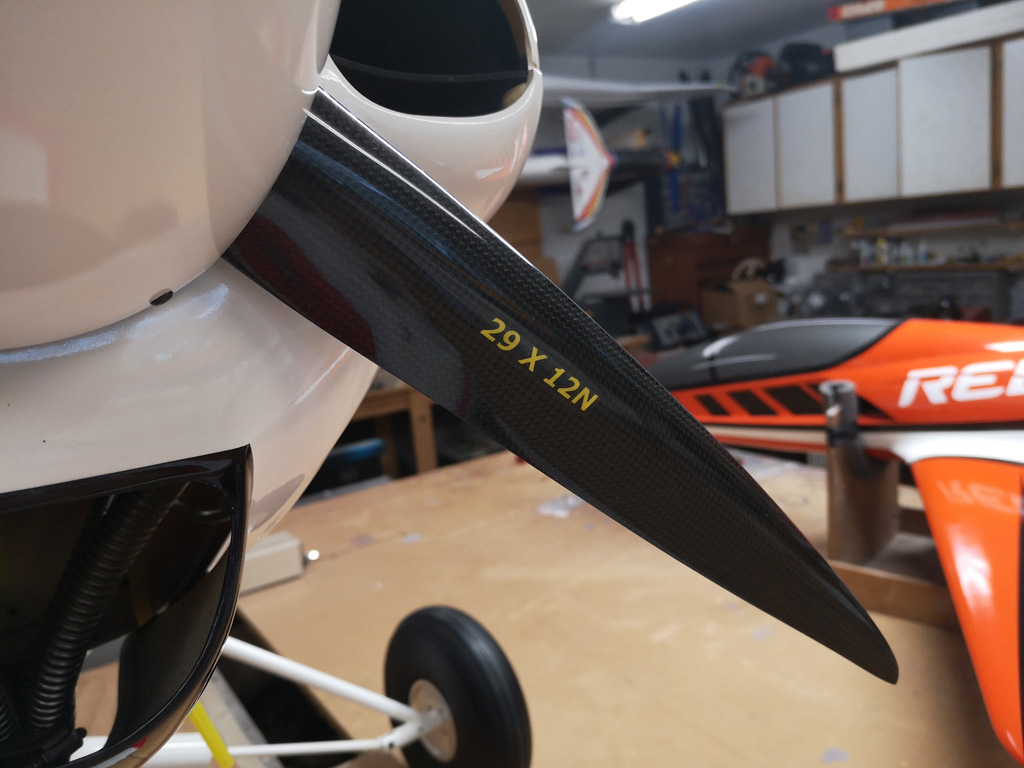
Batteries
Let's touch on batteries before going on. With batteries, it's plural meaning there are two battery packs onboard. One for the avionics, the other for ignition. What's not present in our recommendation are three batteries, e.g. two for the receiver/servos (avionics and one for ignition).
This, even though it's to our benefit (as a business) to promote the purchase of two battery packs for avionics because it's such an easy sale since buyers are conditioned to be afraid of a single flight pack by some vendors. Why not? Simple, we don't recommend two avionics packs because as an engineer, I know a silly practice. More later.
So ignition-wise, the usual recommendation is ~800-1000mAh per cylinder. For a twin, our B2S1800D is a good choice. And because it's an A123 (meaning LiFePO4 chemistry), it's safer than a LiPo or LiIon. Major point being, it's safer to charge and maintain in place (if removal is inconvenient).

- B2S1800 offers plenty of capacity for a day's flying with a twin
As usual, our part numbers encode information, which you can use to identify what you have in your hands without referring to the Internet or some external source to suss out what the basic product specs are. Thus, the B2S1800D breaks down this way;
- B = battery
- 2 = 2-cells
- S = series connection
- 1800 = capacity (mAh)
- D = DuPont connectors
- 6C = C-rating
As regards avionics power, we again steer you to a 2S pack. For this type of model if loaded with high power servos, then get a B2S6000 (again LiFePO4) but now with more than 3X the capacity (6000mAh, or 6Ah - same thing).
Note; it you're using the DS360DLHV servos, then the B2S4000D is perfectly acceptable as due to making less torque, the servos won't consume as much juice.
So all the above is familiar, what may not be is the C-rating, or current rating. Let me explain.
C-rating
The part number incorporates a C-rating and here's how you use this information. Way this works is you multiply the (C) rating by the capacity to determine max current draw in amps, or how much juice the pack can deliver continuously.
So plugging in the numbers for a 3C rated pack and we get 3C x 6A = 18A of current, which is easily 2-3X what you'll need (so plenty of overhead for a big model loaded with high performance servos). Pay attention to this.
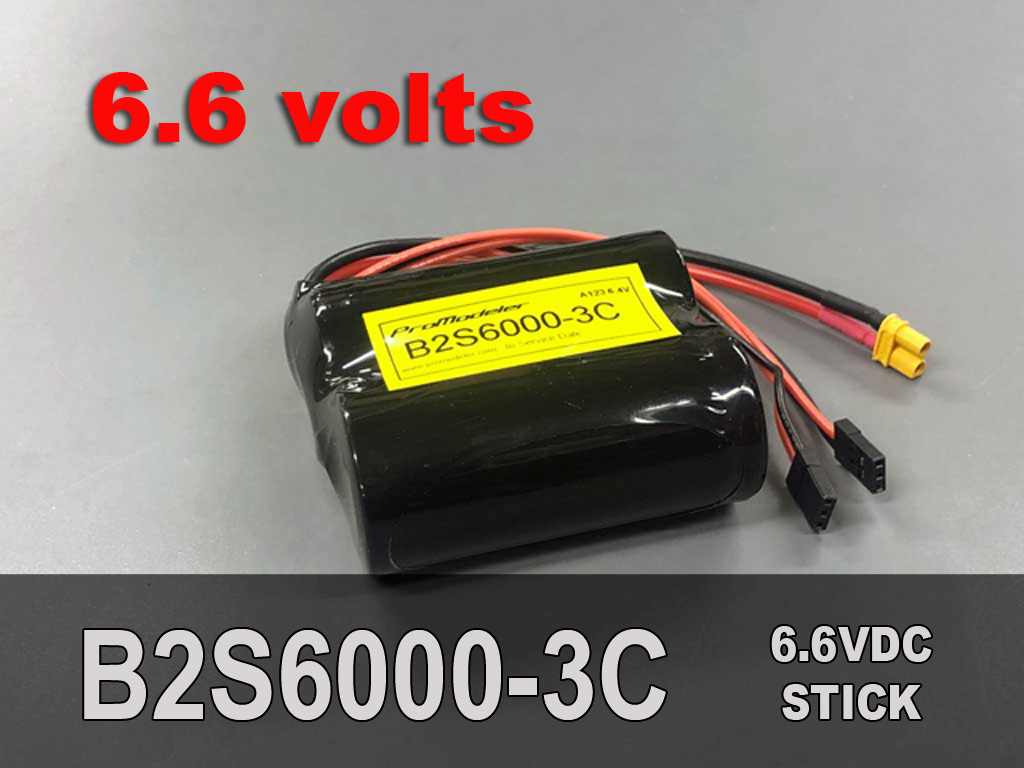
So most guys equip their model with two switches, one for the receiver, the other for the ignition. Me? I use a total of four switches onboard, instead. Let me explain, but heads up, we're going into the weeds with this, so hang with me.
Background - switches
Before we plow on, with rare exception, almost all of these giant size models are relying on an ignition system for the spark (instead of a magneto). Means a battery is involved. And because the engine prop can hurt you really, really badly, this means a way to shut the engine off in an emergency is wise.
So what's developed as common practice is to have two ways two ways to shut down the engine besides closing the carb's butterfly (throttle). So besides closing off the carburetor, the primary shut off is a switch to cut off the power (electricity from the battery pack) to the ignition module. So one method relies on a manual switch. And the other method (throttle servo) happens via the radio. But this isn't enough because what do you do if the throttle servo fails?
Think I'm going over the top by discussing this? Review this if you have a strong stomach;
Engine switches
So in the list above there were two engine-related switches. One being the manual slide switch so you or someone can cut the engine off from outside the model 'and' the other, the optical-kill switch is activated via the radio. This one exists in the event the throttle servo goes teats up. And of course, while we make the best servos possible and our hope is a throttle servo never fails, reason for this is only God is perfect.
So for the rest of us, what General Baden-Powell wrote in the Boy Scout handbook will have to suffice . . . be prepared!
Manual switch
So we have this inexpensive 5A mechanical slide switch available. It's the fashion these days to poo-poo them in favor of magnetic switches, and so-called failsafe switches (supposedly fail-on, but only as long as the magic bits are working).
Anyway, what recommends our mechanical slide switch over a typical hobby-grade switch are two things. First, the small metal shield wrapped around it rejects stray RFI, e.g. from a failing ignition (important since they're mounted nearby). Second, the potting compounded serves to protect the solder joints from vibration damage. And this last is a big deal.
Me? I mount this switch to the model - connected between the ignition pack and the module - such that I can flip the switch and turn off power to the ignition, thus shutting the engine down in an emergency. I make it a practice to confirm function occasionally and recommend you do the same. How?
Simple, manually shut the engine down with the switch at the end of a flight! Benefits are it . . .
- keeps the switch exercised
- muscle memory gets exercised
- confirms the switch works
After all a broken switch you rarely use, and can't quickly reach in an emergency isn't of much use, agreed?
Note; it's not so much slide switches are inherently unreliable, it's using low-quality switches exposes you to greater risk!
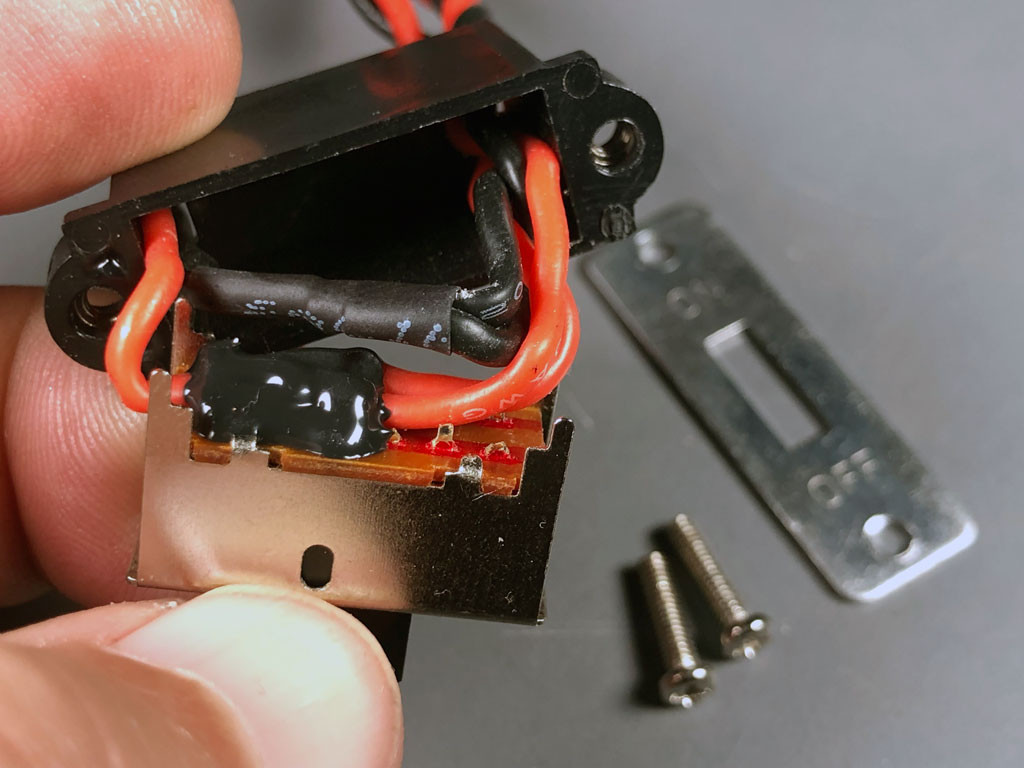
- Genuine Nobel 5A shielded slide switch with potting compound
Opto-kill switch
Reason there are four switches in the ignition-powered model recommendations is because I also rely on an opto-kill switch inserted in series after the manual switch and ahead of the module. Reason, of course, being on the off chance the model experiences throttle servo failure.
If you still need an opto-kill switch, add one to your order. And if all this is news to you, this is what it looks like installed. It's quite compact and weighs a trivial amount. They're widely available and inexpensive, too. Point being, we don't care if you buy elsewhere, just be sure to use one.
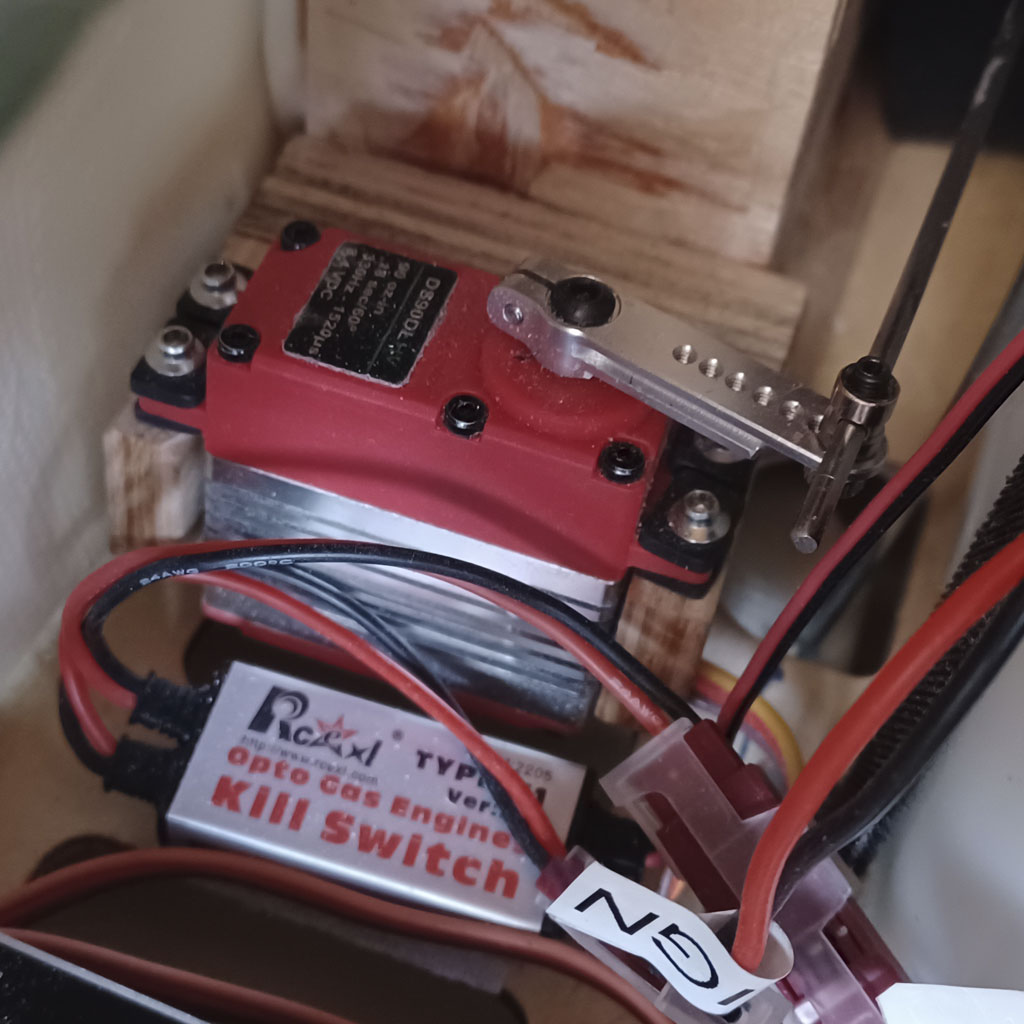
- Mounted with Velcro and on a switched channel
Circling back around to using two battery packs for avionics and our belief it's silly.
Regarding 1 pack and 2 switches
So here's the thing about using two battery packs for the receiver. It's impossible to get a real benefit without adding significant complexity.
Since statistically two of anything doubles odds of failure, now to the 2nd battery, add a widget with 50 more components (either a 3rd party device, or a special receiver that accepts two batteries) and instantly, the failure chain between your model and a smoking hole in the ground just got a lot longer! 'Simpler is better' isn't merely a trite saying.
Another reason I'm a hard sell on using two packs (despite as a modeler wanting to believe the hype) is this; where's the proof? Are models are crashing due to battery packs failure common at your field? They sure aren't at mine!
Moreover, 90% of models are electric, these days, and 100% are flying around with lithium packs for propulsion . . . and for sure those packs aren't failing, either. Meanwhile, there are several downsides beyond a few hundreds bucks for the widget or pricey special receiver;
- 2X the expense for a pack
- 2X the work to charge and maintain
- Dead weight of a 2nd pack
- And there's no test function
. . . this last is important; how do we test it's working before flight? We don't!
Anyway, we could put back up battery devices on the website (they're an easy sale because most modelers are ignorant of statistics). Anyway, if you already have one and need two packs, then the businessman in me says, yippee! But what 'this' engineer recommends, instead, is use just one battery pack for the avionics.
Want to get something to add real safety? Buy a 2nd on/off radio switch for the receiver. Lot cheaper insurance.
2nd receiver switch
So the 2nd radio switch is connected in parallel. In fact, if you know how to solder you can add a 2nd lead to an existing pack. Remove the heat shrink, and solder red-to-red and black-to-black. Presto, you're in business without buying another pack! You gain two benefits.
- Odds of both switches taking a crap on the same flight are astronomical.
- Automatic load balancing
This last is a nice added benefit since the connectors are rated at 3.5A continuous. So using two leads cuts the load through each exactly in half, or put another way, instantly means you can discharge the pack twice a twice the rate. This is important when flying a model with 8 servos.
Note; since a 6C pack with 6Ah cells can be safely discharged at 18A, then the DuPont connectors are the choke point - not - the battery pack. This is why our battery packs also include the 16AWG lead with an XT30 connector (rated at 30 amps continuous).
Statistics
We're not going deep into math. Just a bit of common sense. So, first, you don't need fancy switches. What protects your model isn't a $50 switch, it's mathematics.
Means even ordinary slide switches (like ones we've used for decades) are perfectly fine. So instead of spending big money on dual switch setups, save your money instead and buy good quality switches. Means ordinary switches versus snake oil magnetic and fail safe switches. After all, they're only fail safe as long as 100% of the components that make them work actually functions.
Bottom line? Switches fail. If you plan for it, it doesn't require expensive switches to be safe.
How to
So with a large model like this, specifically because of the load of 9 servos, I'd rather use a pair of 15 toggle switches or better still since access is easy through the opening cockpit door, a pair of 10A switches, instead.
Yes, these still uses connectors rated at 3.5A (although we offer these switches with XT30 and EC3 connectors, instead). But if you prefer the 5A slide switches, because 3.5A this isn't a limit but a rating for continuous current, the 5A switches will safely flow 5A intermittently (like happens in the real world).
This is why we offer both toggle switches and this dual switch (two individual switches mounted for convenience inside one housing).
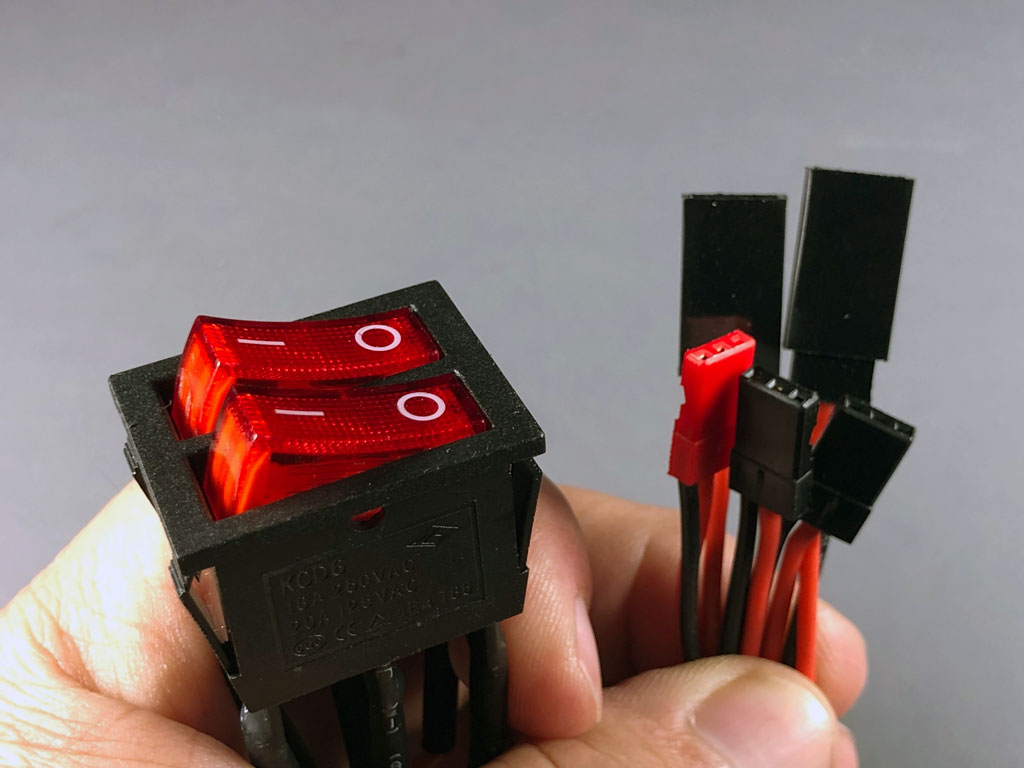
- Charge without disconnecting through the red plug
So in actual use, because these switches are large, folks don't just chop a hole on the side of a fuselage and install it like you would a smaller model. You need to find a place for them.
For example, here's all three mechanical switches installed in my 1/5th scale Ziroli Stearman where the front cockpit floor worked out perfect to host them out of sight but still in an easy place to reach during an emergency.
Note: this model has one of our 15A over-center toggle switches for the ignition instead of a 5A slide because it's supplying juice to a 9-cylinder ignition module.
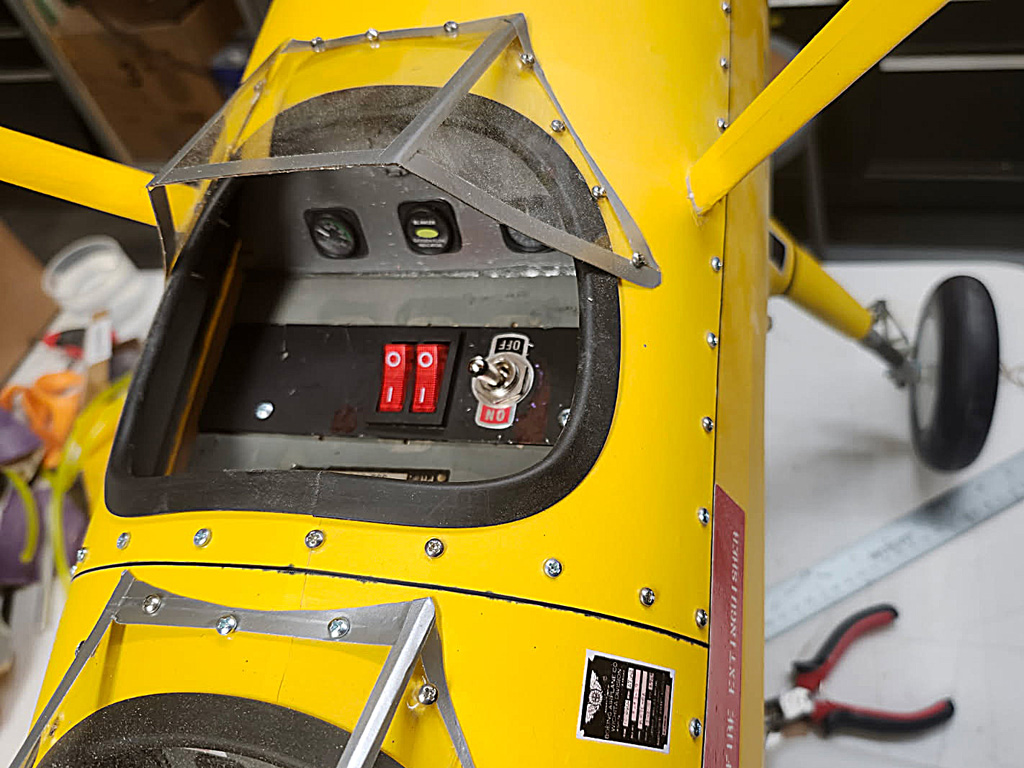
- Finding the perfect spot is key
Dual rocker switch
So because these dual rockers are illuminated switches, if you forget and leave the model powered, it's easy to suss out. Allow me to share this photo as an example. It's of a pal's TopRC Zero, which he equipped with a pair of the dual rockers.
Two switches for the receivers; one side of the other for the ignition pack, and the 2nd switch for juice to the electric-powered retractable landing gear system. The purpose of the photo is just to show you how/where he mounted them. Convenient because the upper section of the Zero pops off with a magnet holding the canopy in place (so easy access).
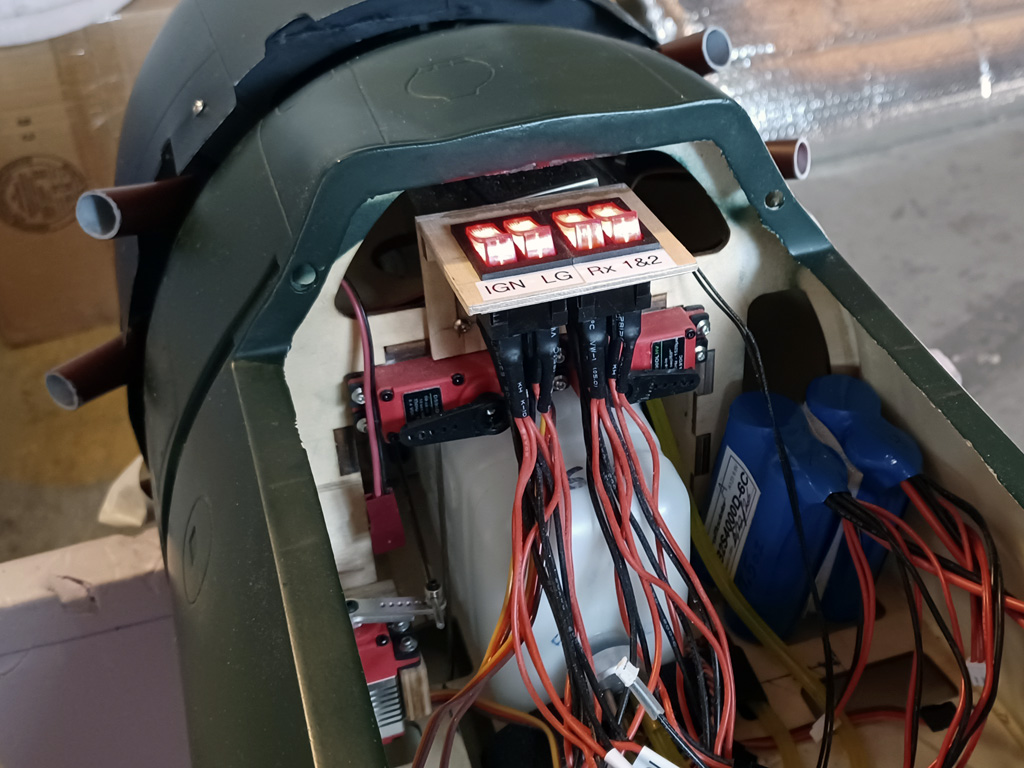
- Bright illumination makes it easy to confirm function
So next, let's touch on servo installation.
Servo Installation
Aileron servo installation
Hangar 9 favor what we refer to as a surface-plate mounting system for installing wing servos (ailerons and flaps).
Installation is easy because you first epoxy the plywood mounts to the plywood plates, and after that cures, place the servos in the plywood mounts, mark for the mounting screws, and drill the holes. Moreover, if you screw up, pound a toothpick into the hole, CA in place, cut it off flush, sand smooth, then mark and drill again. Easy peasy, no harm, no foul.
Then just screw the servos into the plywood mount using the included vibration isolation mounts (as in included with servos), then align and install the servo arm. Next, flip the assembly over, set it in place flush into the wing surface, and secure the plywood mount with four more screws at the corners.
Note; if for whatever reason you didn't want to use the supplied plywood mounts, we offer CNC-machined sidemounts.

Major benefit of this plate-style style mount installation is the servo remains hidden (except for the linkage, which remains visible for easy adjustment and inspection).
As this photo shows, it's a very neat method of installing wing servos. Quite honestly, I also like this for elevator servo installations on giant scale aircraft, but I digress.
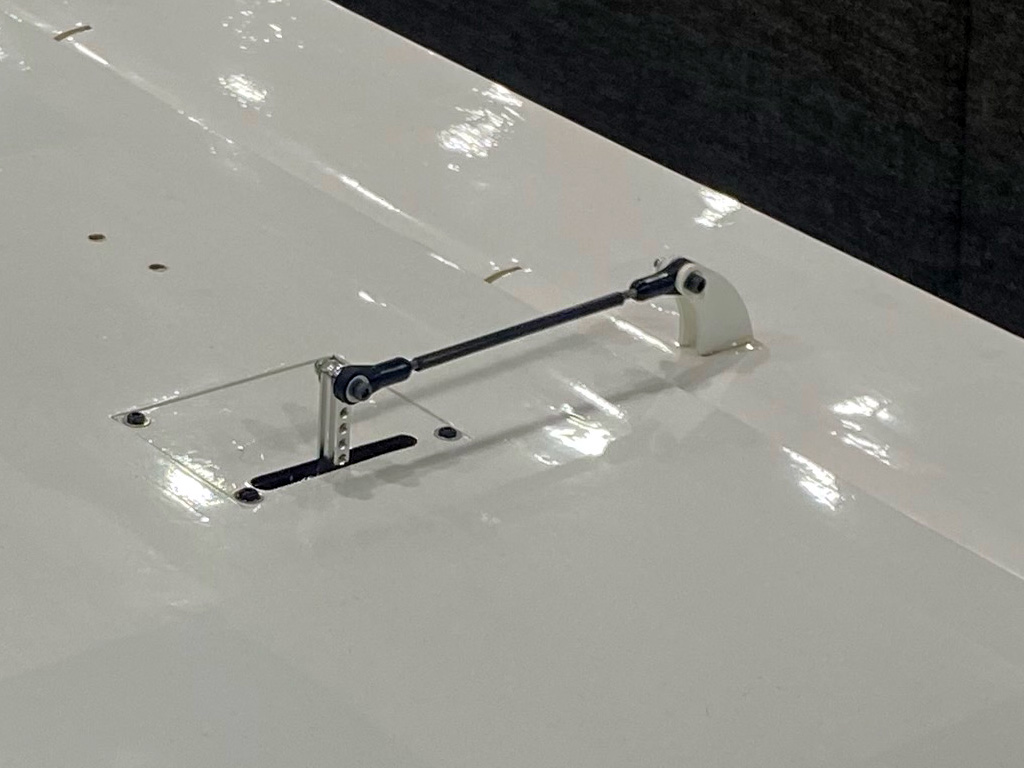
Is there a downside of the above linkage setup? Well, its not actually scale because the full scale aircraft uses pull-pull cables for ailerons, which remain visible. Does this really matter since this model isn't intended for competition? Nope, not in the slightest. Upcoming is a brief birdwalk on full scale wing control linkage setup, but more later.
Anyway, my only build tip is this; after it's all assembled, take it back apart and add a drop of thin CA to the wood at all the screw holes. What for? It's because this will harden the newly formed threads (in the wood). These are formed/cut by the screw as it goes into the wood the first time. So is this necessary?
Nope, but it's something I do, which pays off in future. When? It's when models are stripped down for yearly maintenance. This is called an annual inspection in the full scale world of Part 91 aircraft, e.g. like for full scale Carbon Cubs. And to be honest? You're wise to do it with your models, also.
Reason is simple, the engines fitted to these models vibrate considerably (some folks actually refer to them as paint shakers). So because of the steel screw fitted to the formed threads in the wood, the mounting threads may become wallowed by vibration. Thus, hardening the wood thread ahead of time proves invaluable over time. Recall, I told you how to repair a mount hole in the wood, above, but better still? If you don't have to mess with this, ever!
Note; the payoff isn't this week, it's next year, and the next, and the next, and so on.
So the real benefit comes when your models get to be ten years old. By then it's been through several maintenance cycles of repeatedly removing and re-installing the servo plate mounting screws to inspect everything. The idea is to not have extra work to do.
And bear in mind, this is the stuff you do in the winter months. It's also, when you also check the fuel lines, the security of hinges, eyeball axles and wheels, etc. Words to the wise. Trust me, you'll be glad each time you drive the screw home a steel screw into wood that you had the foresight to harden the threads in said wood.
Anyway, next, make up the linkage and Bob's your uncle . . . move on to the flap servo.
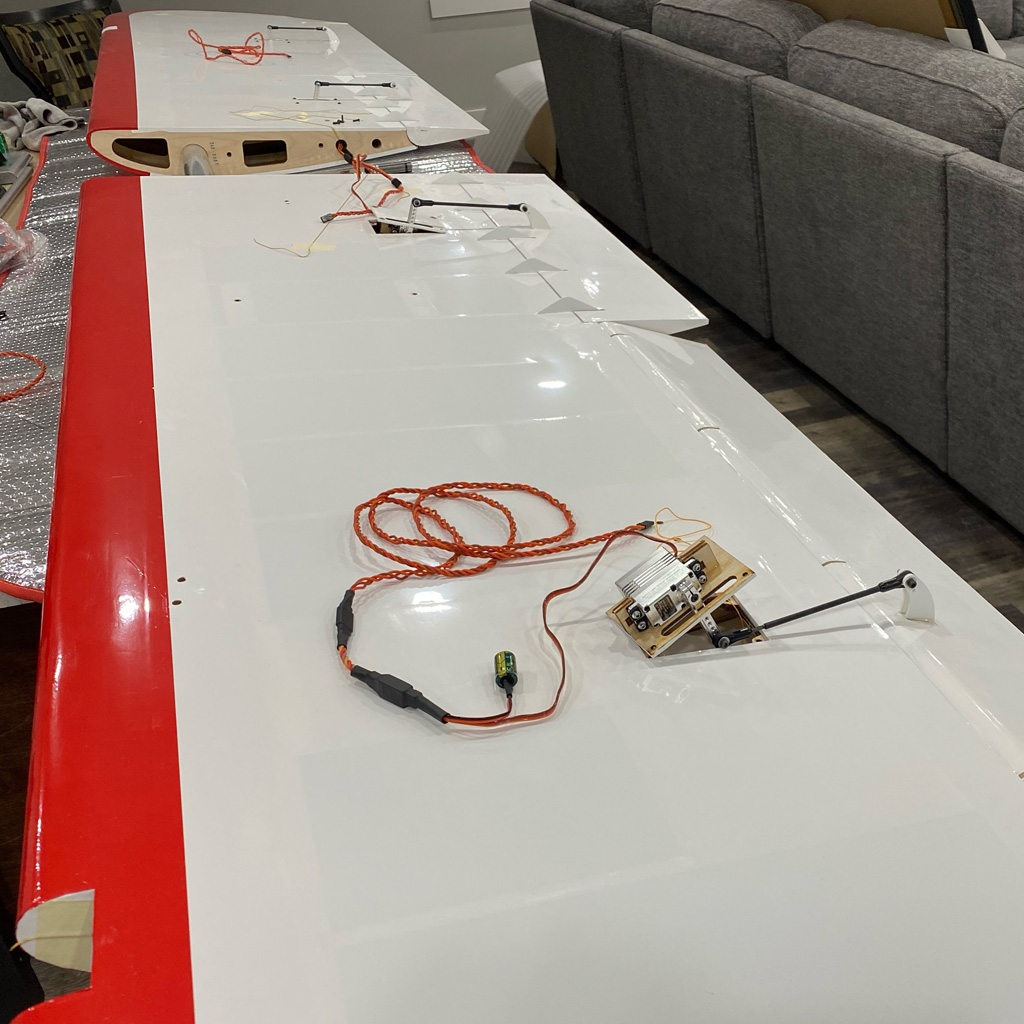
Flap servo installation
The flap servos are mounted in pretty much the exact same way. In this photo we get a close up view. These mount close to the root so no extension is necessary. And technically, neither is a cap.
Maurice used them anyway because he's a highly experienced modeler. Read this as a belt-and-suspenders kind of guy.

Is there a rule of thumb for using capacitors on servos? Yes, when the extension is 30-inches, or longer, it's wise to add capacitance. True for any servo, any brand. This isn't about just an, it's due to physics.
So is capacitance ever bad? As in when you're using just a 12-inch extension? Nope, never hurts because what the cap does is goose the circuit just when servos begin moving (when current draw spikes). Anyway, we'll touch on this further in a little bit.
Anyway, it's my opinion Hangar 9 (and remember, opinions are like belly buttons in that we all have one), are one of those companies that go the extra mile. Meaning that last little bit, which others ignore. So a great example is the use of wing servos mounted on the underside of the using plywood plates and side mounts. In part, this is what makes their models a joy to build and own. And folks, let me be honest, my opinion is formed by this next mounting method.
Wing pocket and the elusiveness of perfection
And no, not present on this model, the below photo shows what's called the pocket method. And for wings, I dislike it immensely because the axis of rotation for the servo's output shaft and the hinge line of the control surface are 90° to each other instead of being parallel. The result is the linkage swings side-to-side as it transits. Swings?
Yeah, to see an example of swinging linkages, look at more cheaply built models. With these, instead of going to the effort of hiding the servo within the wing structure, they go cheap during the manufacture and just use a pocket, like in this photo.
See how very offset the linkage is at neutral? So as the servo rotates, this linkage follows a curved path, in essence swinging side-to-side as it transits. Mechanically, it works out fine but I think of it as a clusterfuck level of ugly because of the bending moment applied to the pushrod's linkage ends.
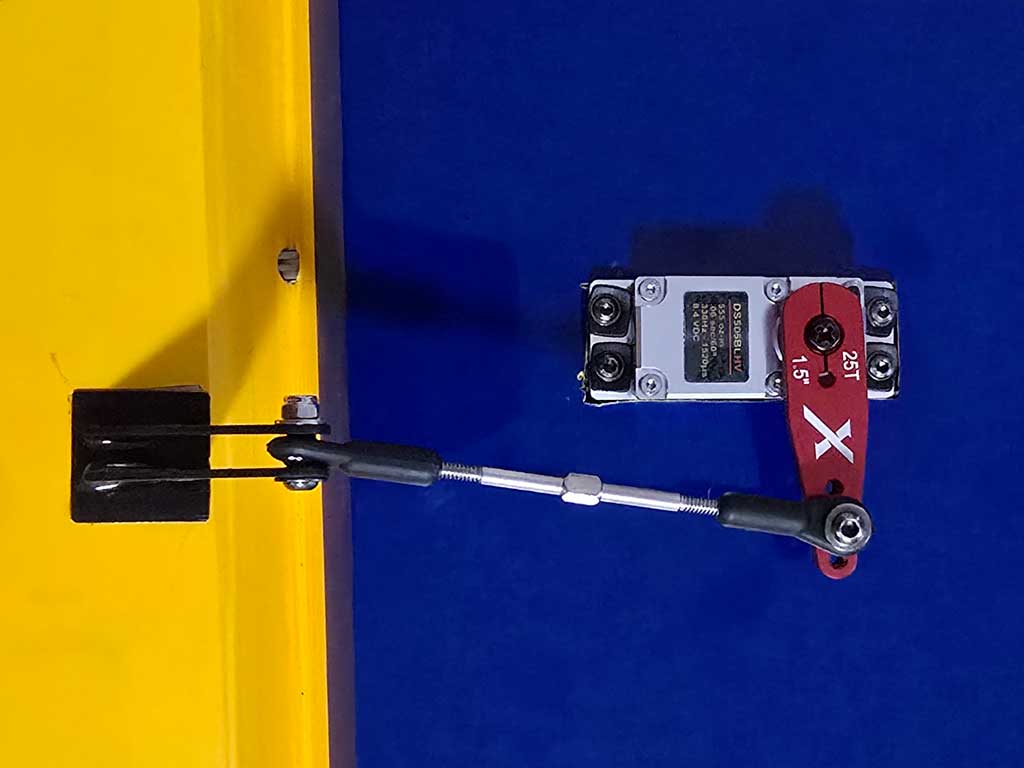
So the primary benefit of the pocket type install for wing-servos is they're cheaper to build. That's it, it's all about cheaper, not better.
As for the servo, with this installation it just drops in on rails, is secured with four mounting screws, and the entire top of the servo remains visible. Is there a downside beyond being ugly? Not really but I still go grrrr, which is why I appreciate Hangar 9 going the extra mile.
So are they (Hangar 9) perfect? Actually, no because since they trouble themselves to do the flap hinges the way they did, I'm surprised they didn't hide the linkage like this.
Note; this is the linkage for a Cessna 180 my friend Gaines Smith drew but it serves the purpose of showing how very easy a hidden flap linkage is to do. And Hangar 9 knows how because they did the flaps of their Aermacchi MB-339 this exact way!
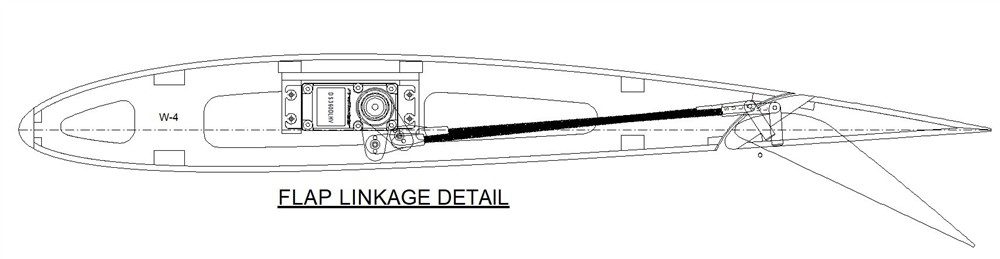
So the full scale aircraft uses a hidden linkage for the flaps and hasvisible cables for ailerons.
Here's a page from the owner's manual showing the control path for the wing's control surfaces.
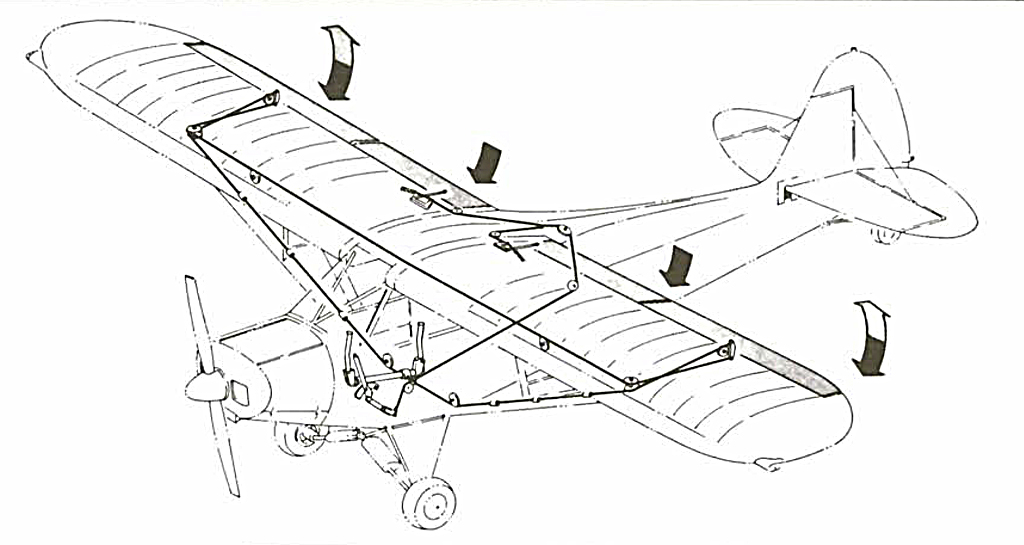
Elevator servo installation
The elevator servos are interesting. They've resorted to using plates again when it's my opinion, this is a better place to use the pocket style of installation because it maintains linkage axis of rotation of servo output shaft and elevator hinge line in perfect alignment (meaning the axis are parallel). Sigh.

So it's easy for me to run my mouth about preferring the elevator servo installation be within a pocket. But this is because it's not my money being spent on manufacturing this model. Saying it's easy to talk a good game.
By the way, an immediate benefit of a hatch installation for the elevator servos is the arm protrudes whilst the servo is better protected from the slime of goo if you use a smoke system. Honestly? It wouldn't surprise me this was on their minds when deciding on the elevator servo installation being plates instead of pockets because this aircraft is a natural for a smoke system.
Moving on, the rudder servo installation is next.
Rudder servo installation
The rudder servo install is simplicity itself. Just mount within the fuselage and drive home four screws and you're done. In this photo a tiller arm has been used for the pull-pull cables.
We think we have a better way of skinning the cat, using the same thing sailors discovered centuries ago when dealing with ropes . . . instead of a tiller, use a pulley! More in a bit.
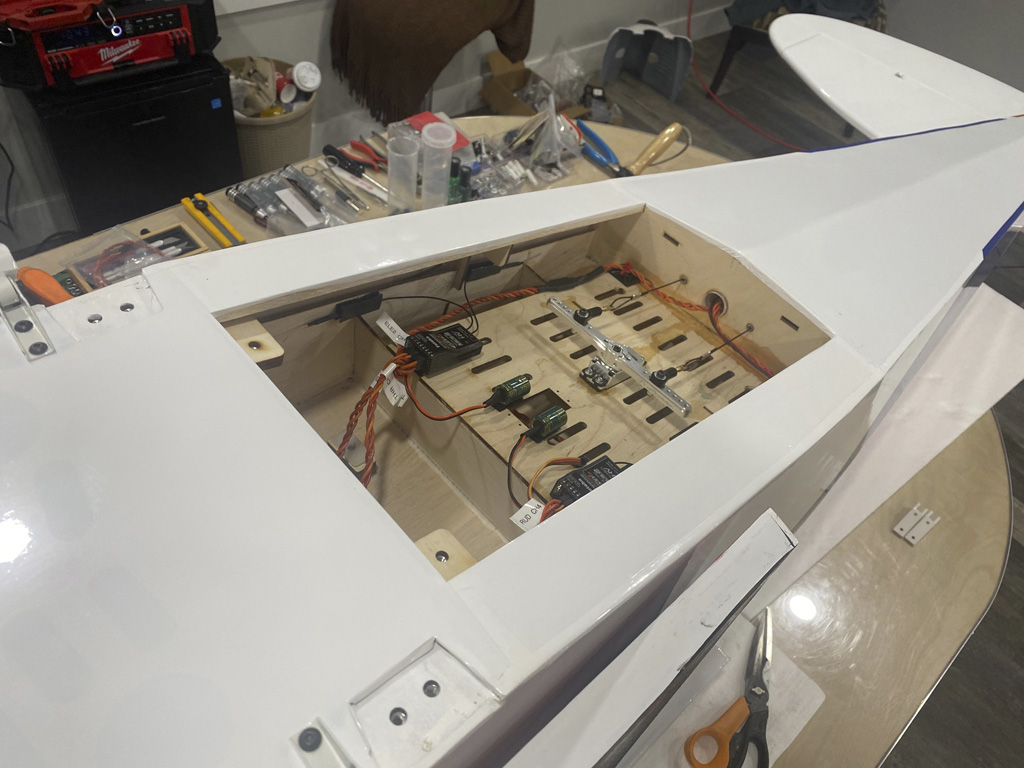
So if I recommend a pulley instead of a tiller, why is this? Review this article to learn more;
- Why a pulley beats a tiller: Advantages of pull-pull via pulley
And by the way, we produce these in four sizes to include 34mm diameter, 50mm, 75mm, and 100mm. The latter being about the same as the 4-inch arm he used.
For most sport use, the 75mm pulley we recommend within the Better group is all you need. And I'd bet a doughnut it's plenty of throw for all hot dog pilots, too. Proof? Eyeball where Maurice ended up mounting the links on the tiller in the above photo, probably about 1-1/2 inches out from center instead of the full 2-inches on each side!
Anyway, it's our experience it's only the really hard flying pilots who will want the larger 100mm pulley we recommend for the Best-build. If that's how you feel, then get the 75mm instead of the 100mm because it's your toy. So how can you tell if the 100mm is too long a radius and should have stuck with the 75mm pulley?
Easy! If you give the model full rudder and it's way too much throw (meaning you're forced to reduce ATV to maybe 50-80% each way), then you'd be way better off with the 75mm pulley. Reason being using ATV to dial things down effectively gives up a TON of the resolution of your servo. Don't say nobody told you!
Anyway, we're just making a recommendation based on experience - but - the feel you prefer is strictly up to you.
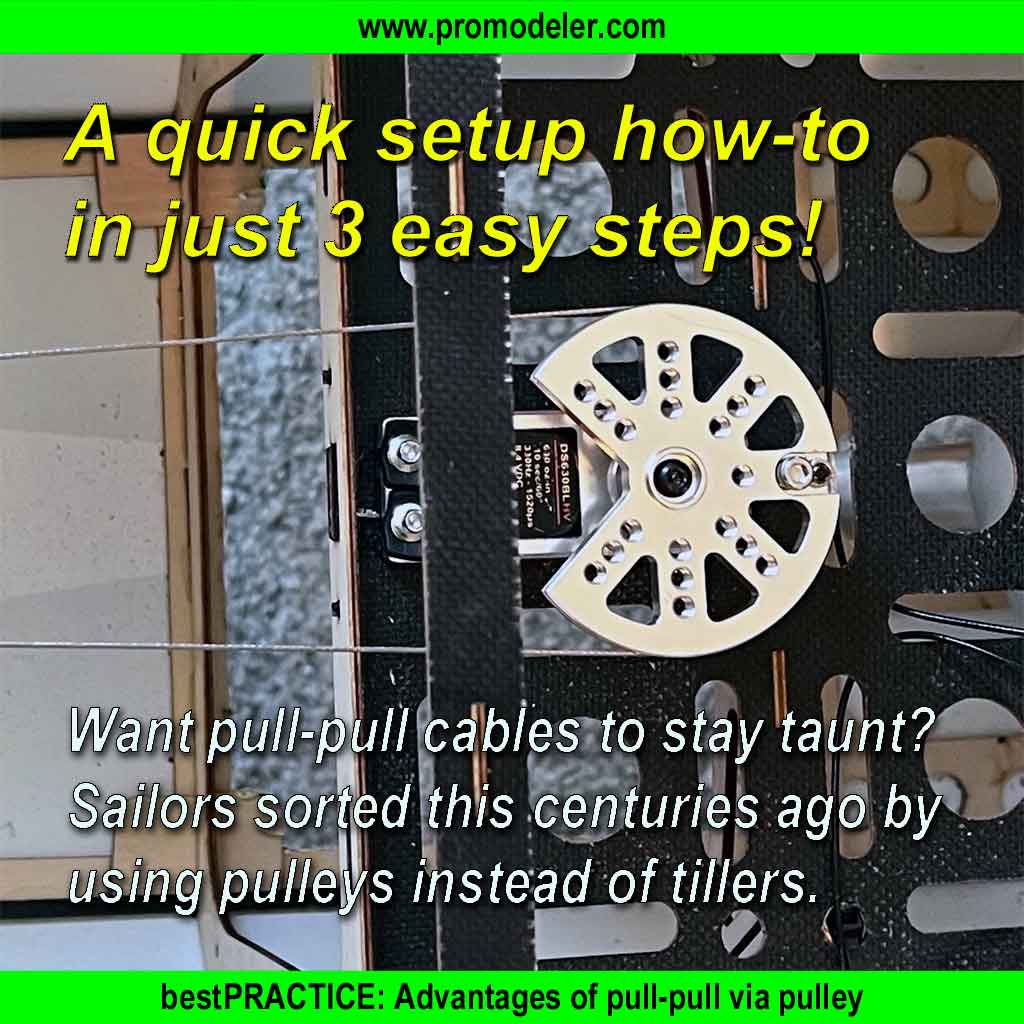
Anyway, the finished cable runs for the pull-pull look like this. Lot of detail in the photo, the elevator servo installation is buttoned up, the sweet scale type tail wheel, and of course the rudder pull-pull cables to the control surface.
The alloy tube for the horizontal surfaces is also visible (so you know what to expect). And as you can see, the stabs are secured with a pair of bolts, which thread into the fuselage. All standard fare for this class of model.

Throttle servo install
The throttle servo is simplicity, itself! Four mounting screws and Bob's your uncle! Make up the supplied linkage using the steel rod and plastic link ends you're done. Or are you?
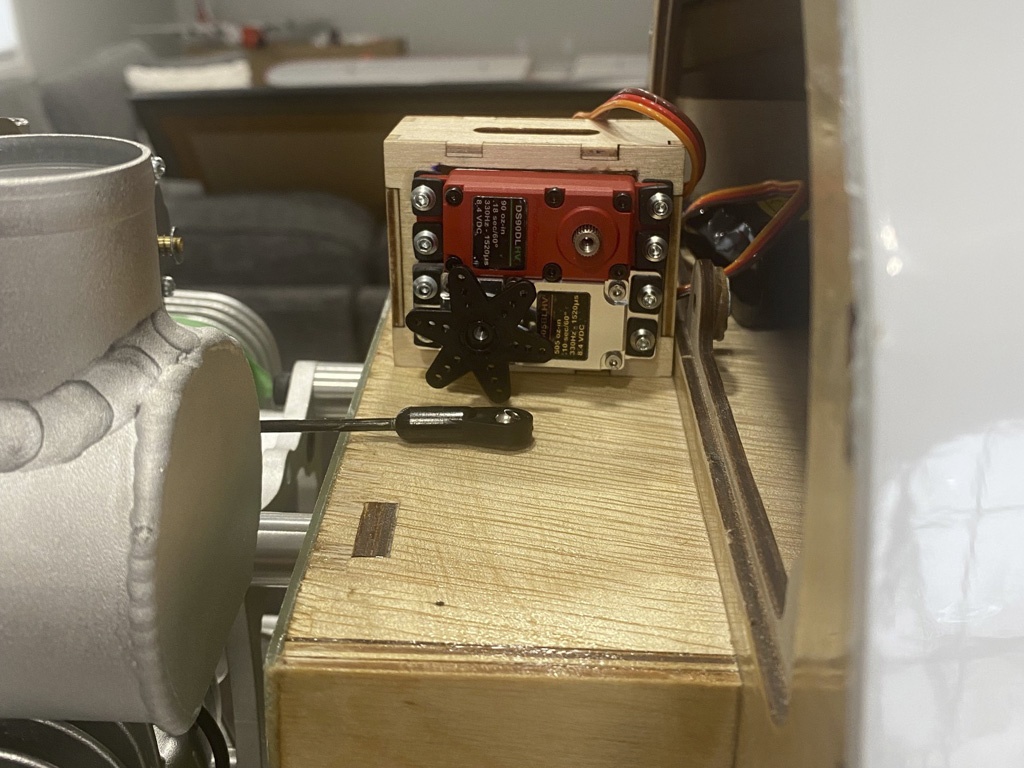
So here's the question . . . how good an idea is it to use a steel pushrod rod between a servo and a paint shaker like a DLE170? As it turns out - in our opinion - there are better ideas for accomplishing this mission. Why?
It's because while these are superb performing twin-cylinder engines, due to how they fire, they still generate fierce vibrations. And because vibrations and delicate avionics don't mix and a steel pushrod does an excellent job of transmitting engine vibrations to the servo's delicate potentiometer, you should use plastic, instead. How?
Simple, relocate these servos to the same plywood mount as used for the rudder servo (there's plenty of space) and use Sullivan Gold-N-Rods to control the throttle and choke butterflies, instead!
Note; these plastic pushrod within a housing are technically referred to as Bowden cables.
Recapping, our advice, instead of using short steel pushrods, it's better to use a plastic Bowden cable to connect servo to carb's butterfly arm. Why? To better block damaging engine vibrations from affecting the servo's delicate potentiometer.
To learn more, review this article;
Receiver installation
So the crew at Hangar 9 really have thought of everything and this includes the receiver installation. Here's how Maurice installed his (as per the manual). And in my opinion, it's how you should mount yours, also.
Only thing I'd do different is first either wrap the receivers in a piece of sheet foam rubber, or buy foam rubber sleeves for added vibration protection.
Note; he's using dual receivers and the caps are insurance against brownout
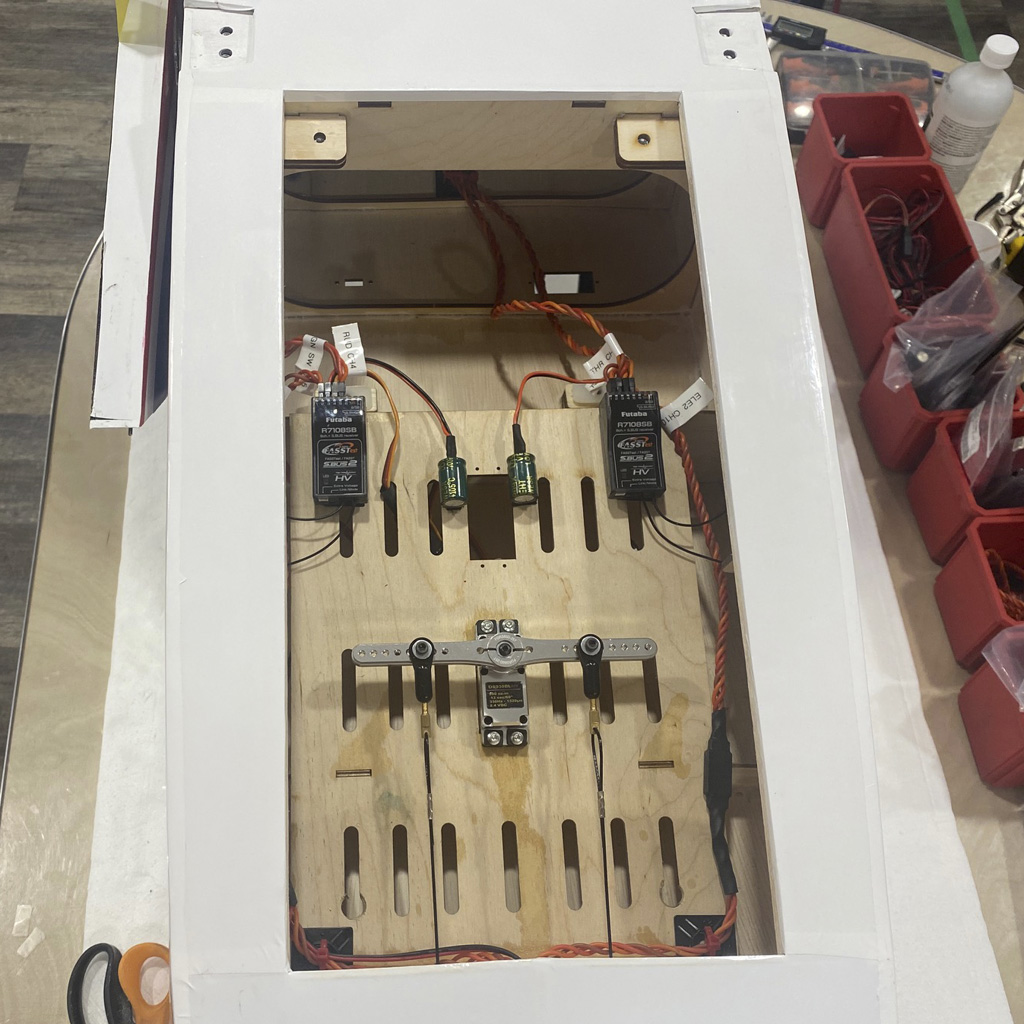
Engine installation - part 1
So what's the engine installation got to do with an article about getting the best servos for you? Nothing except the deal was that in exchange for your reading our yap-yap about our products, we'd tell you everything we know. This, in hopes of helping you attain the best possible equipment installation - not just servos, but everything!
So in this photo, you see a bog-standard engine install of an engine equipped with cans (ordinary mufflers bolted to each jug). Cheap, simple, it just works.
Note; the exhaust exits right beneath the engine. Downside? Exhaust bark is a bit sharp.
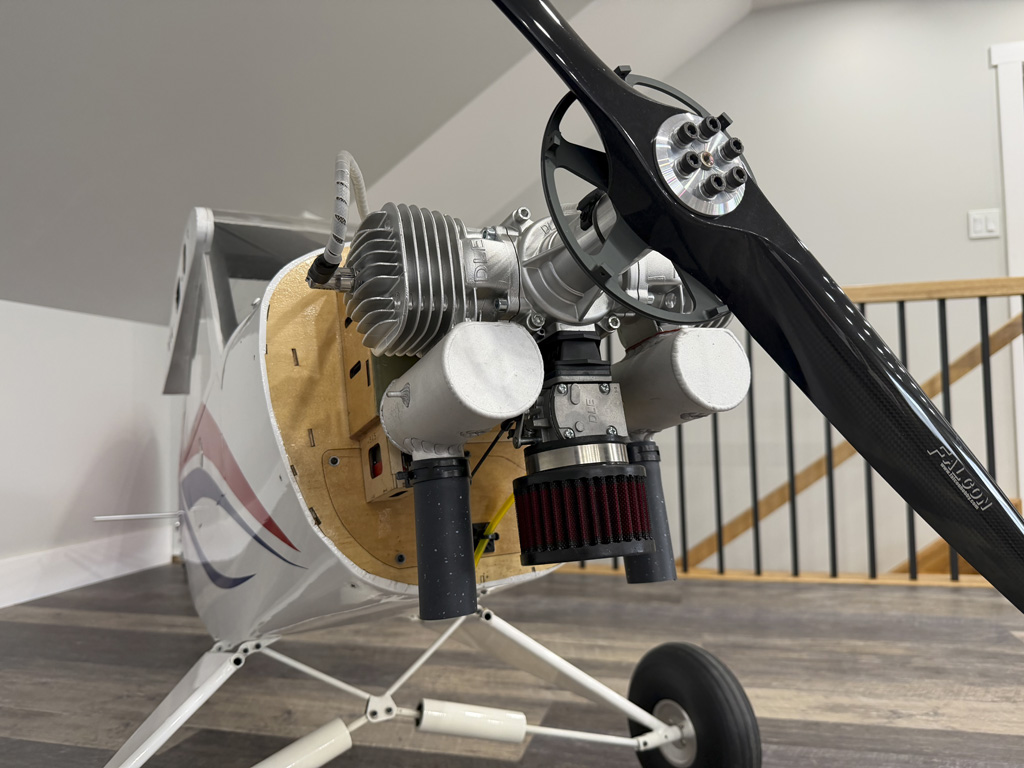
So modelers being modelers, there's always another way to skin the cat. Take note of the hatch in the firewall. The purpose of this is to allow using a tuned canister-type exhaust system. In this case, the modelers at Hangar 9 have made it easy to mount an alternate exhaust system consisting of tuned canisters.
The benefit? Far more quiet! Anyway, with this system, a pair of exhaust headers take gasses aft through the firewall. And here is where the firewall hatch proves useful.
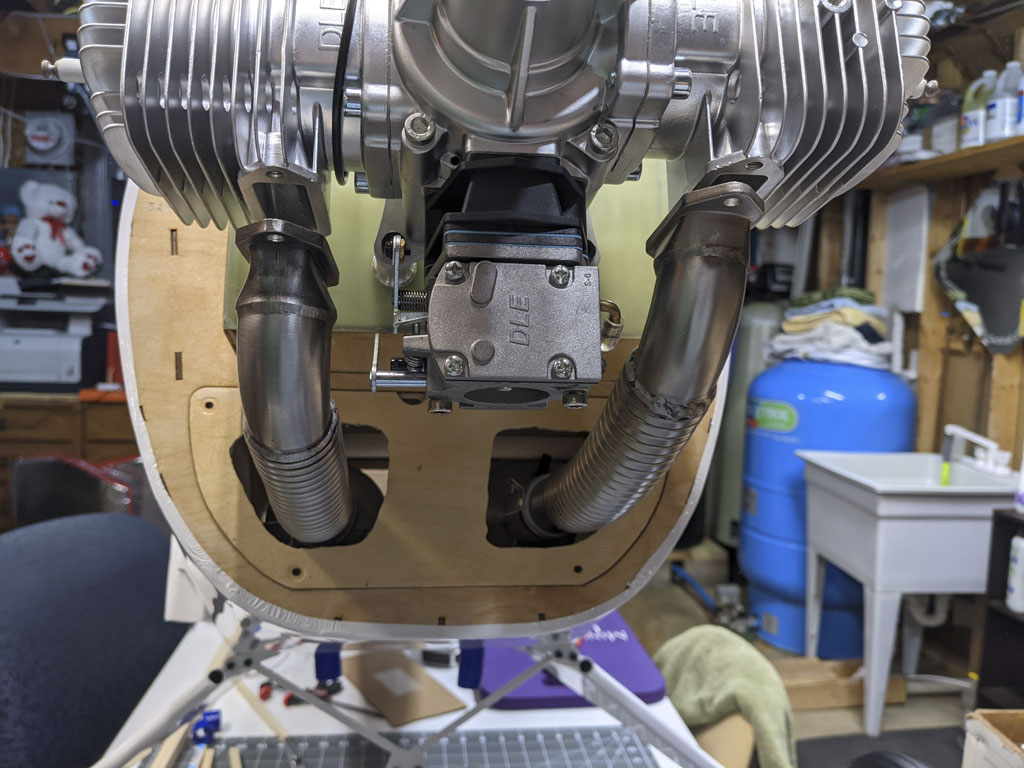
So for this to work, instead of mufflers, you're going to using canisters. This is how they compare size-wise.
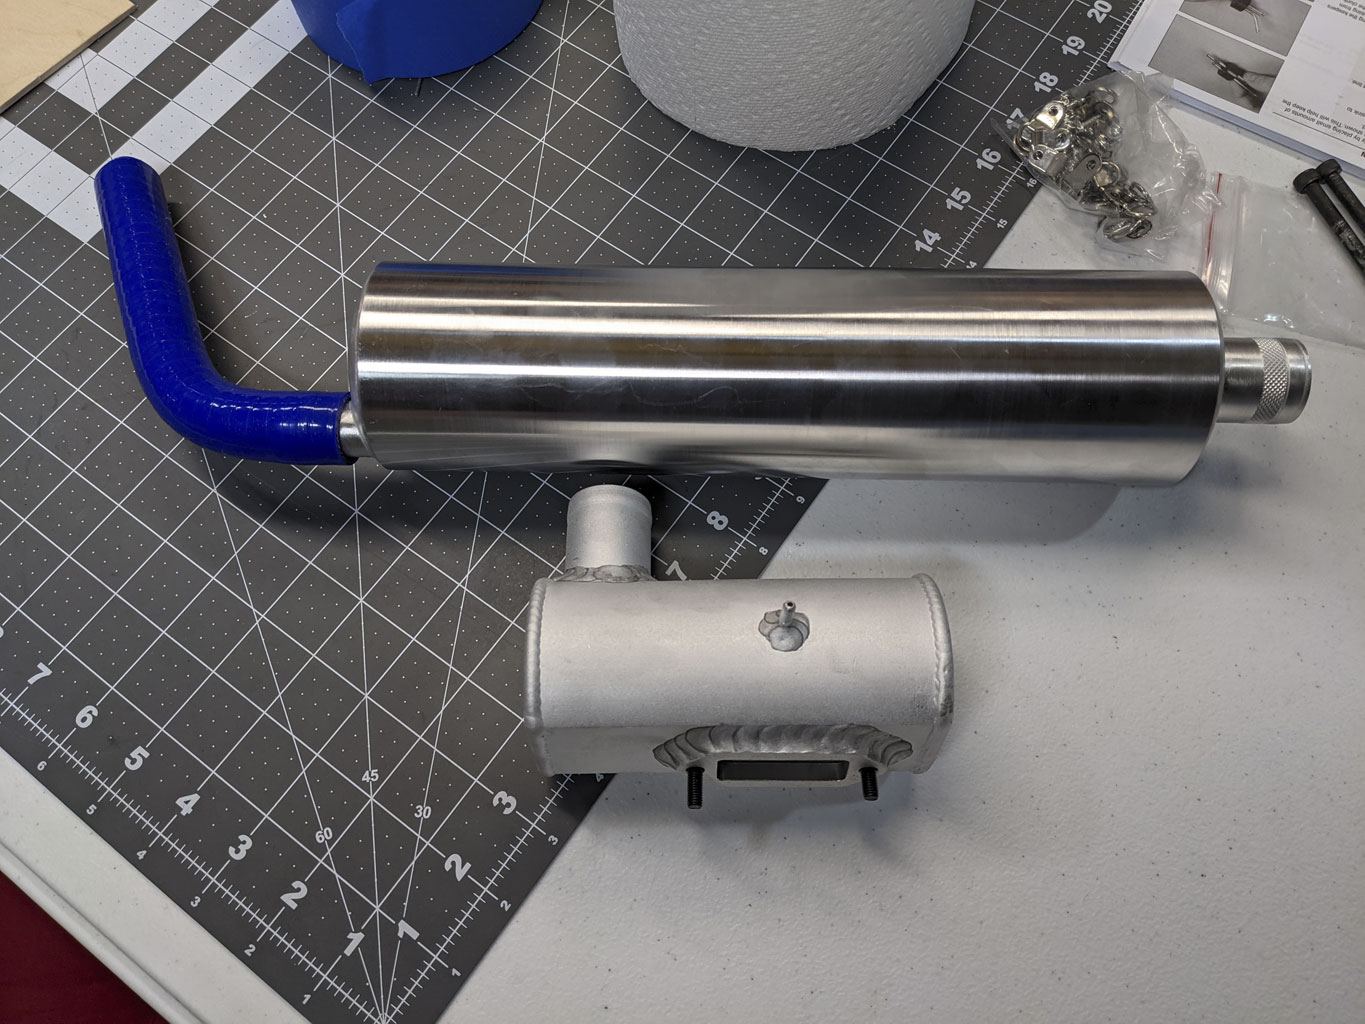
Anyway, Hangar 9 design engineers thought of what to do with larger canisters, too (it's my further opinion, these guys are 1st class modelers). And this isn't me brown nosing because there's nothing in it for me. Remember, we sell against their Spektrum servos, so even if they know we exist, they for sure don't like us!
As I mentioned, the model is supplied with a canister bulkhead in the firewall. It's also supplied with a canister mount bulkhead. So eyeball how the silicone rubber provides heat isolation to the plywood. Pretty neat!

And this is how they look mounted when you peer through the canister hatch opening in the firewall. Pretty slick!

And now this view shows you what you see when looking down through the plywood cockpit floor. As you can see, exhaust gases exit the model through the bottom.
Also, these openings all work to allow cooling air to flow through the fuselage. This is good!
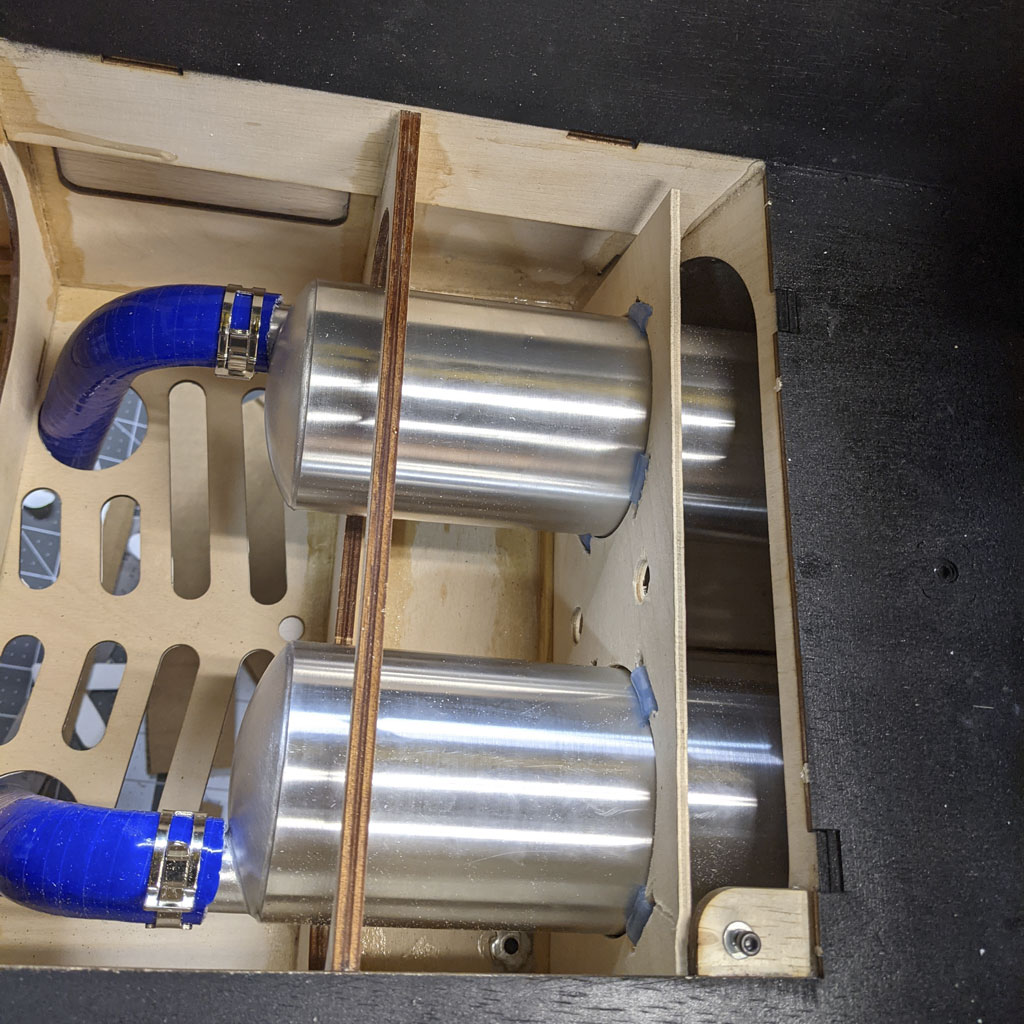
And once the hatch floor is buttoned up, you have where to install a pilot figure!
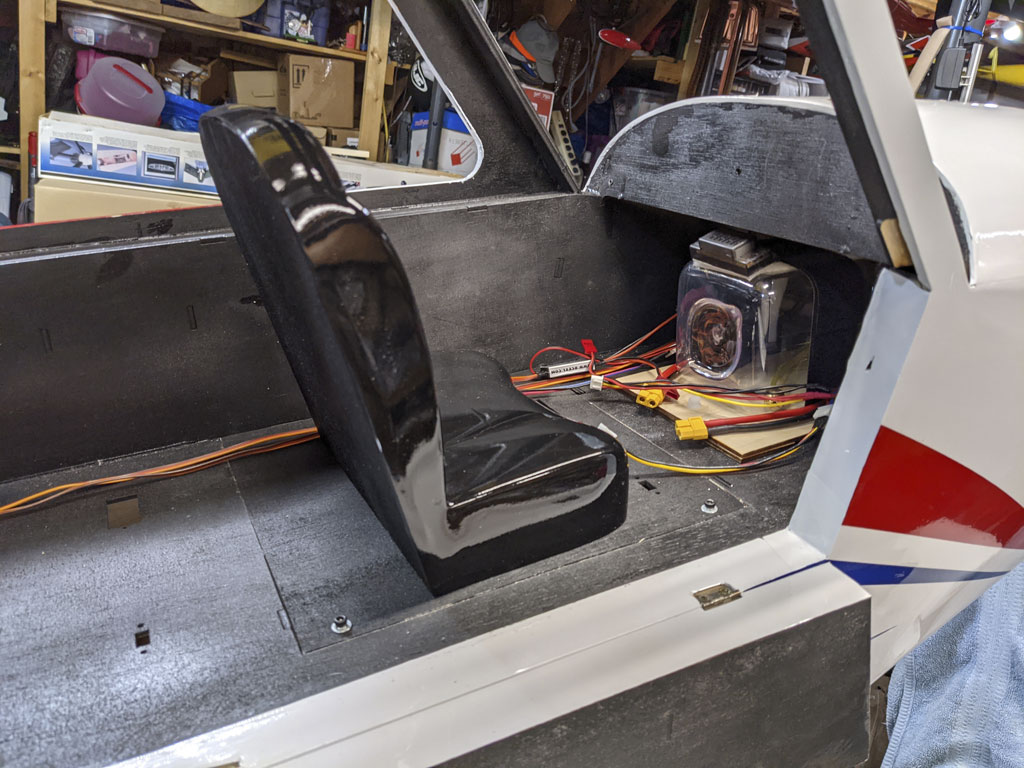
So is this the last word in exhaust systems? Nope, as it turns out we have one more interesting installation to share with you.
In this photo we see the corrugated exhaust pipes for the Rotor Motor 170 FS, which Henry Piorun installed on his Carbon Cub. So these come right off the exhaust headers and exit straight down and back.
Honestly? It really doesn't get any better than this.

So what's next? Better cooling for the engine!
Engine installation - part 2
So now that we've touched on various exhaust configurations, let's eyeball cooling because while the cooling for the engine as designed is perfectly workable, this is an area models almost universally seek to improve. This, because modelers being modelers isn't limited to Hangar 9 engineers!
Basically, many modelers take one look at the inlet openings and immediately have a further though. To wit; I bet I can make this better if I install duct work to funnel the air directly to the cooling fins surround the jugs so it's not lost flowing around the engine.
And they're right. This is how the air flows in the stock configuration. Straight shot. Works.

So the above photo shows near perfect alignment between inlet airflow and the jugs. Thing is, many modelers shared photos of how they approached skinning this cat, a.k.a. improved on how Hangar 9 supplied the model.
For example, in this photo, Chris Stevenson made ducts for himself to better funnel cooling air to his DA150 engine. The improvement is obvious because now the air can't bypass the cooling fins!
No question, this is better, especially on a hot summer day.

What if you don't want to make the ducts yourself? Then just do what Mike Feitinger did, instead.
Mike reached out to RC3DPrint in United Kingdom and they made a set for him! Their prices are quite reasonable even accounting for overseas shipping and duty once it hits stateside.
And all they asked was regarding what model and which engine was involved. Turned out like this. And a measure of Mike's experience, eyeball how he supported the plug leads to better preclude vibration damage. Nice job, agreed? There's even a pair of thermistor installed into the cylinder heads to monitor temperature. Sweet, eh?
Note: thermistors monitor resistance whilst thermocouples monitor voltage. The former are quicker, cheaper, and more precise.
Note; Mike added, The fit was pretty good, a little bit of trimming and they fit great.
Further to the above engine, as an engine guy, I think the darn thing looks pretty good what with the bar stock crankcase. Me? I find this MVVS175 NP engine to be extraordinarily attractive, don't you?
Anyway, these Czech Republic made MVVS Engines are truly bits of kit. And you can (just tell by looking) these guys give a damn about what they produce. Yes, significantly more costly than typical east Asian imports - but - you always get what you pay for!
So are Chris and Mike the only ones doing cooling shrouds? Nope, lots of others shared photos of their work. However, none, however, more appealing than what Henry Piorun got up to.
As you can see in this photo, which is the before he painted them version, he made them of balsa and ply with fiberglass and even some carbon fiber. Pretty sweet setup, agreed?

And for what it's worth, this bad boy of an engine is the big brother to one I have, which is their 85cc twin (85 FS) These use the exact same 42.5cc jugs (but only two for mine) while Henry's use four of the jugs to make his four cylinder boxer configuration.
Interestingly, and like that bar stock MVVS 175, which Mike runs, this too is a product of the Czech Republic. Pricey? Not as much as you might suspect. Link for if you're curious - Roto Motor 170 FS
Anyway, here is the finished product. A shame to cover this work up, in my opinion.

So next let's touch on wheels and tires and we'll call it done.
Tundra tires
As supplied, the tires for the model look kind small in the eyes of many. Easy fix, just takes money.
First up are the PMT 262mm tundra tires. Widely available, in this photo you can see they make things a fair bit better visually compared to the stock set up. For this photo we have the aid of Tristan Twisselman of TwistAir Cinema to thank.

But you can find ones even larger if you want the bush plane look. Point being, if you poke around eyeballing the photos aircraft of backcountry pilots, meaning folks flying in the bush in Idaho, Montana, Alaska, etc. it won't take long for you to be lusting for even larger tundra tires. Larger? Yes!
So guess what? Yup, as with engines, it's back to the Czech Republic we go! This time to Badan Airplane Kits where these guys have a set of 400mm tundra tires - and 400mm ÷ 25.4mm/in = 19-inches. Like do these really look the part, or what?
Anyway, I don't have a photo of them mounted to the 165-inch Carbon Cub - but - I have the next best thing. Kris Signore said it was OK to use this photo of a set of these beside the PMT 262mm mounted to to his Extreme Flight 140-inch Turbo Bushmaster.
The TBM is a large model in its own right, and presented this way this gives you a sense of scale. Big set aren't they? Be absolutely perfect for the right pilot.

So I reached out to Dan Bartušek at Baden Airplane Kits and he informs me the 400mm are out of production and now they offer 500mm, instead. Here they are mounted to their 4.3m clipped wing Carbon Cub kit before it gets covered to become an ARF.
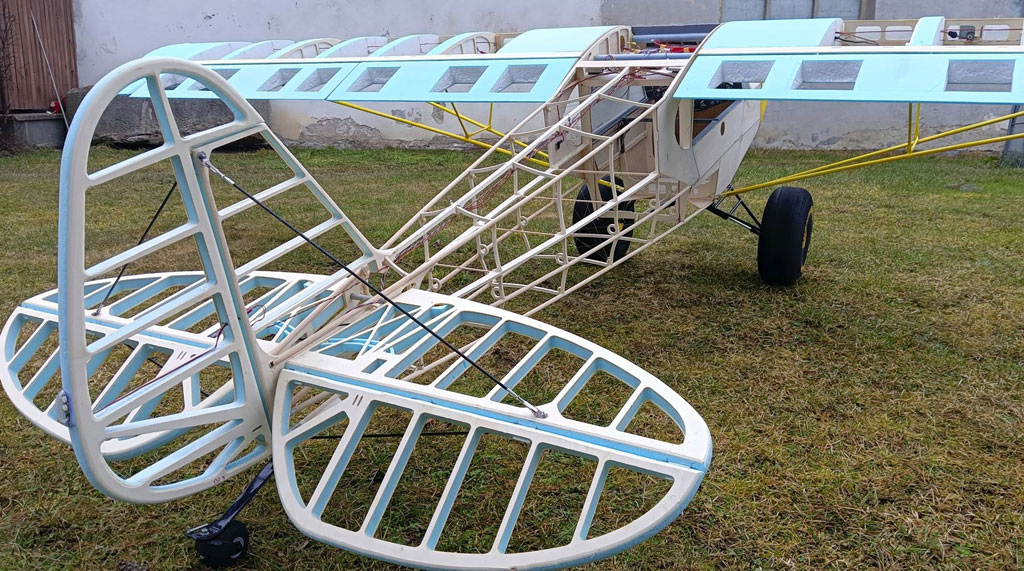
And with that, we're almost done. Let's wrap this up!
Pilot figure
It's my opinion building this model and leaving out the pilot figure is a mistake, but as I've said before, opinions are like belly buttons in that we all have one. Thing is, finding a 2.5-inches-to-the-foot pilot figure is easier said than done.
Like first I reached out to Ren at Premier Pilots who stops making them at 25%. Fortunately, he guided me to Wilson at Tailored Pilots. They're in the United Kingdom and so busy it takes a week or longer just to hear back from them. So busy after paying, your order goes into the build queue and will take a few weeks to be sewn together and be ready to ship. After this, you'll pay through the nose for DHL shipping from England.
If this doesn't deter you, then know this, his bespoke 40% figures are breathtakingly realistic. Just pause a moment and admire this example.
Note; this photo shows the figure optioned out to the max with all the optional bits available like head set, ball cap, fleece jacket, joystick, seat cushions, pants, scarf, and whatever else I missed. This is the whole enchilada figure-wise.

Anyway, and because I asked, Wilson kindly shared a few photos. Complete with prices, too! For example, I shared the figure above because it shows the various options. How much do these cost?
Well, I'm leaving out the pricing details because they may change. But all you need to know is this; every single item of clothing added to the figure itself. E.g. want yours with a jacket (fleece) versus summer jacket? That's a bit extra. Seat belt, hat, sunglasses, headset, seat cushion, etc. . . . these are all options because there's no such thing a a free lunch
Pricey? Some may say, yes - but - I'll offer this; these things are hand made. They not only look fantastic, but the reason they cost nearly as much per item as full scale clothing is because the cost isn't in the materials themselves. Think about it, the real cost is for the highly skilled tailor required to make the items in miniature!
Major point being, why shouldn't a skilled tailor be remunerated fairly? No offense, but only a fool can't wrap his head around this. So heads up before wasting their time asking for pricing.

Added to which, and especially considering the market for a 40% fleece lined jacket isn't huge (like it would be for a full-size jacket, which even at Target sets you back north of 100 bucks for a children's size), expect to pay what it's worth. And even then, fairly priced in my estimation considering the full-scale is being made in east Asia by tailors in a sweat shop and in the hundreds of thousands. So why do I mention this regarding what the added details are worth?
Simple, because this will clue the astute amongst you on the value. Because it should prime the pump, so to speak, regarding what to expect you'll be spending. This, before wasting Wilson's time by reaching out for a detailed price and then being too embarrassed to respond. Saying prepare yourself realistically so you don't get the quote and sit down whilst wiping your brow and saying . . . daaaamn!
Oh, and expect the summer jacket (black one besides the brown fleece-jacket) to cost a tad less, but not half less.

So all I'll say is this; after ponying up what this project will set you back, doesn't it strike you as false economy to play the role of tightwad at this stage of things? But that's just me.
Anyway, I'll close with a few details regarding the items themselves. The bits and bob you may ask Wilson to customize to suit your fancy.
Pilot figure
- Standard civilian, 1:2.5 scale - pilot includes 3D printed plastic boots, heavier resin boots are available for a bit extra
- Seated height (slightly reclined) - 350mm
- Shoulder width - 200mm
- Total height - 640mm
- Weight – 630g
Options
- Standard seat belt harness
- Premium seat belt harness - includes metal fittings and complex folding and stitching detail on the webbing
- Standard parachute harness
- Premium parachute harness - extra webbing and metal fittings, complex folding and stitching detail
- Headphones - durable 3D printed plastic, heavier resin version is available for a bit additional
- Baseball cap
- White bucket hat
- Sunglasses
Shipping - TBD
Wilson also mentioned; we have made several 1:2.5 (40%) scale Cub pilots, but to be on the safe side I would like to see some seat/cockpit photos, with either a ruler or tape measure in shot. The most important measurements are the seated height (measured from the seat cushion to expected top of head) and the shoulder/cockpit width. I can then check these sizes against our pilot, and confirm the size. The photos I shared of our previous pilot builds.
- Contact details:
This email address is being protected from spambots. You need JavaScript enabled to view it.
Wilson adds; if your enquiry is urgent then please call the office on (+44) 7415 799666 but recall we're GMT, so +5hrs ahead of US Eastern. Also, due to the nature of the of the hand made items, payment is in advance, and some may take longer than others to complete. If you have ordered a pilot figure please MAKE SURE YOU SEND A REMINDER MESSAGE a couple of weeks before the estimated delivery date, just to ensure we are on track. Also, due to our workflow we can only answer messages during weekday mornings.
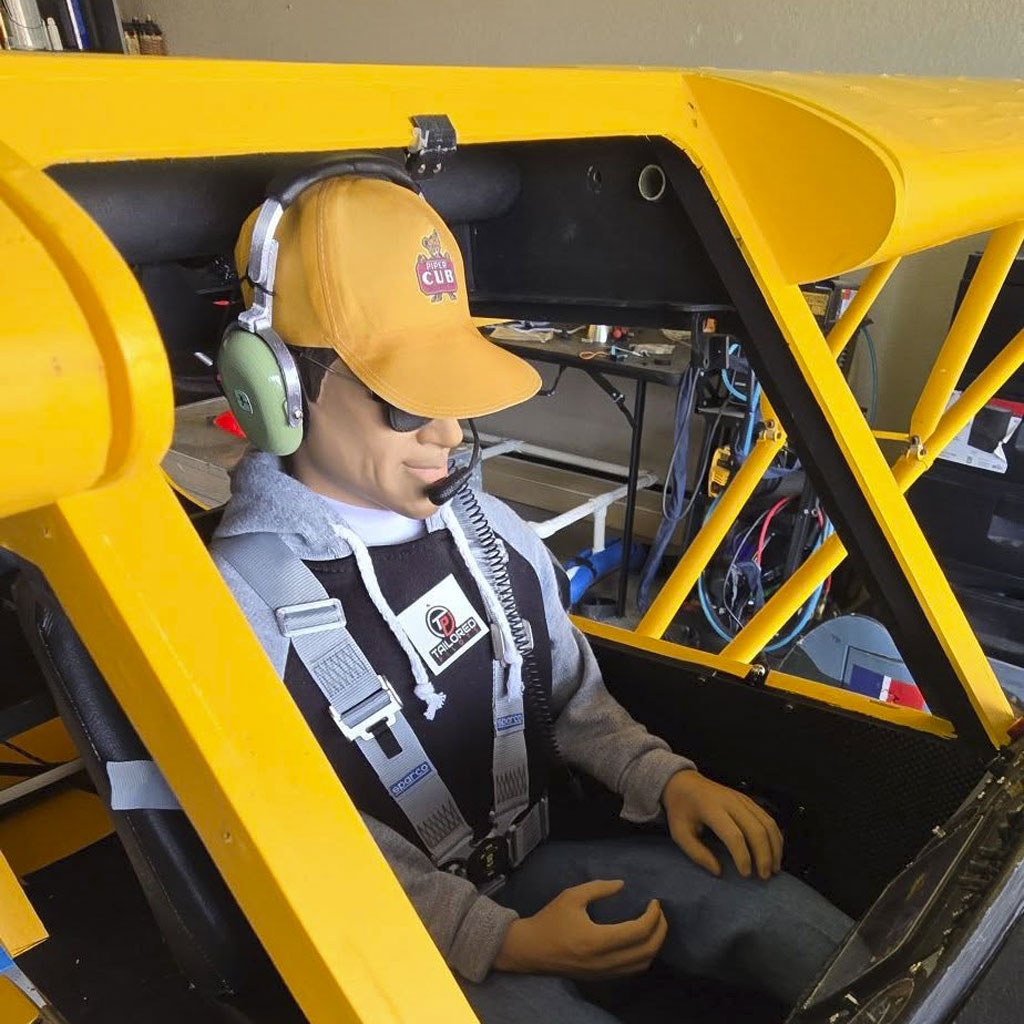
And there you have it. What's in it for me to bring this 40% pilot figure to your attention? Nothing really, I'm not really a 40% kind of pilot due to my bum shoulder. Point being, I'm satisfied with 20% and 25% figures more commonly available and didn't ask Wilson for anything. I'm sharing in the interests of helping you complete the best build possible.
Anyway, let's wrap this up!
Wrap up
So here's where we wrap up this white paper. We've guided you equipment installations including a great sport setup for your servos that's super economical. Plus two other setups, one optimized for more aggressive piloting, with the other for the über serious XA-pilots amongst you.
We touched on background regarding the full scale aircraft, explored the what and why regarding the arms, batteries, and switches, engines with an emphasis on cooling schemes, tundra tires, and even pilot figures! So that's it, the end!
Comments? Email us, or call, we welcome your thoughts. Last thing; I mentioned Maurice and toting one of these fully assembled. Trust me when I say the rig won't struggle with the load, nor will it hang out beyond the confines of the bed!
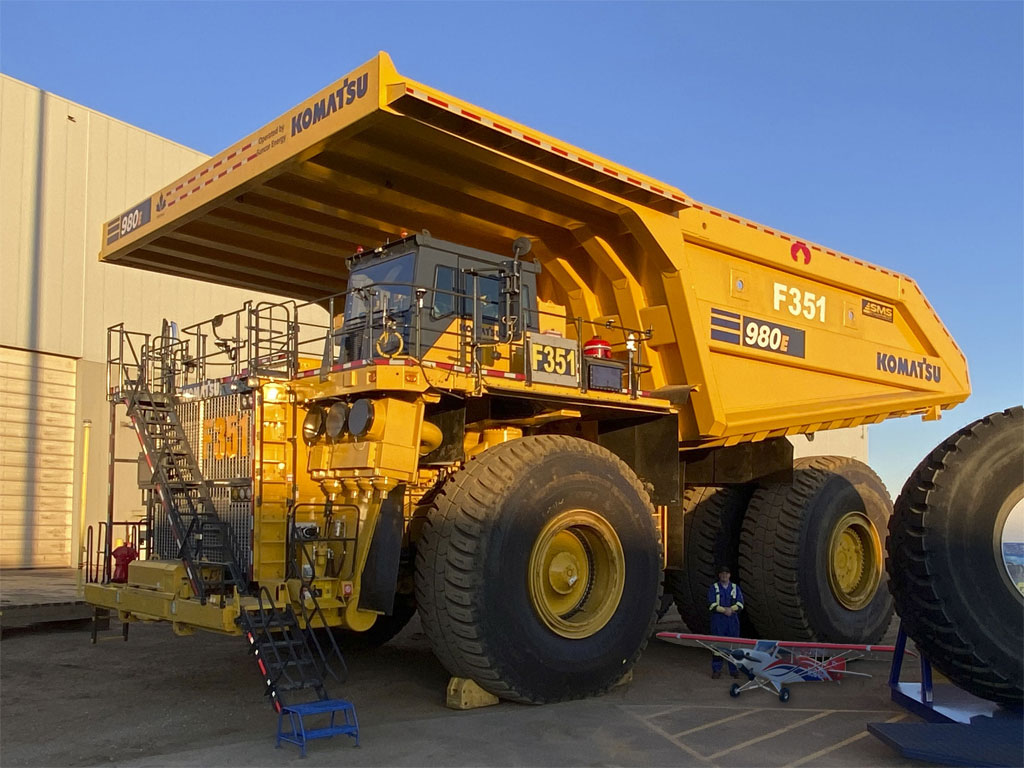
- Carrying this model fully assembled is made easy courtesy of Komatsu


