
Introduction
The Goldwing RC 106-inch Yak-55M has been around since 2010 (and the domain is for sale so they're out of business). It's considered a 33% class aircraft and is suitable for both IMAC and XA-type use depending on power and servos. These models span 103-110-inches and back in the day were mostly equipped with 85cc singles to 111cc twins - but - these days, contenders are principally 120cc twins from the likes of DLE, 3W, and Desert Aircraft.
Servo-wise, they're outfitted with standard-class servos all around. These include a throttle servo (plus maybe one for choke). There's also one servo per elevator. However, the ailerons are equipped with 2-servos each, and depending on how long it's been in service, instead of one rudder servo, there may be two rudder servos ganged together using tiller arms . . . like this.
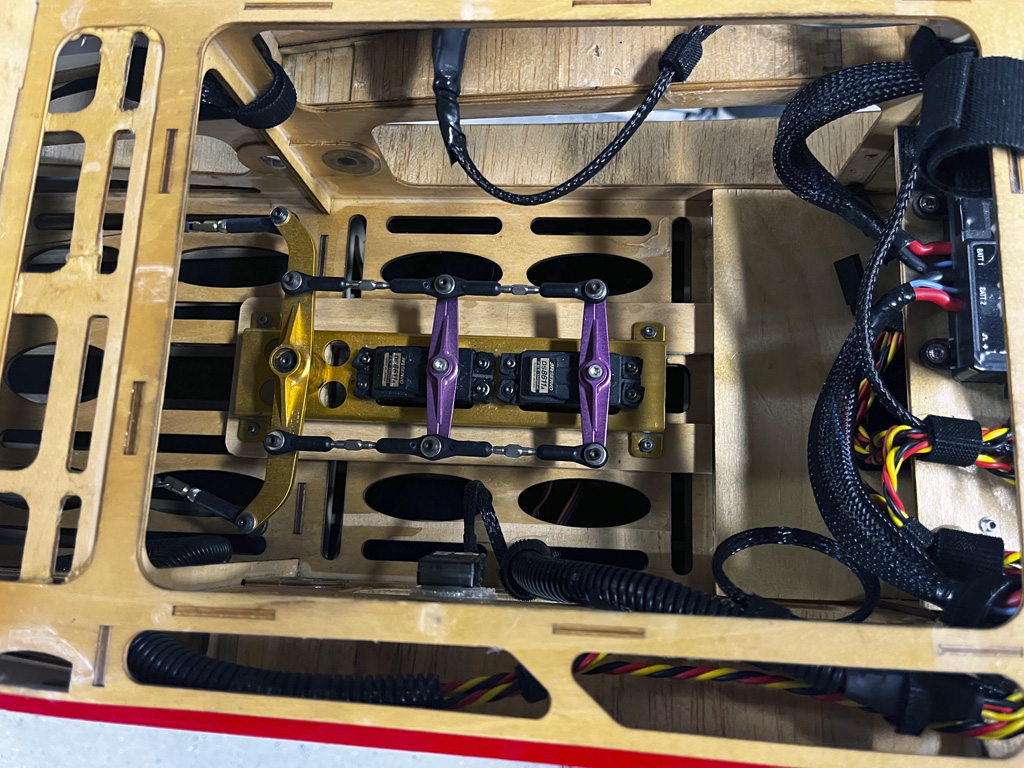
- When servos weren't sufficiently powerful, they were ganged together

Note; whether it was the two servos for each aileron, or a pair ganged together for rudder, they're 'never' combined via a Y-harness.
The reason for this is is due to the current flow required for each servo when added up (by going through one connection to the receiver) easily exceeds the current rating of the servo connector. Point being, it's always one servo per channel. How? Simple, by using master->slave relationships setup within the transmitter's programming.
But this is routine stuff covered in manuals and thus, beyond the scope of this article.
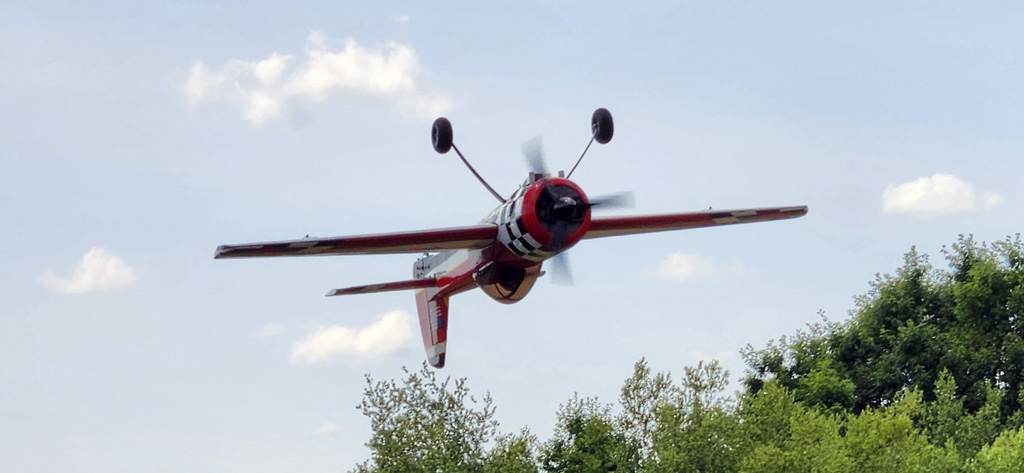
- Inverted and steady as a rock, the 55M is a sweetheart
Background
Most often, these reduced scale examples of civilian acrobatic models represent aircraft powered by Lycoming's 540 cubic inch flat 6-cylinder engine. Examples include German designer Walter Extra's various model like EA-260 and EA-300, Oklahoma-based Zivkov Aeronautics Edge 540 (as used in Red Bull competitions), Czechoslovak Zlin Z-50, as well as the South African Slick design.
Then there are the Russian design bureaus, Sukhoi and Yakovlev. Their entrants include the agile Su-31 and über capable Yak-55M, respectively. And both favor the Vedeneyev MP-14 9-cylinder radial. This, incidentally, is the same air cooled engine as used on the Pitts Model 12.
Note; what differentiates the 55 from the 55M is the latter's shorter span allowing a more rapid roll rate.
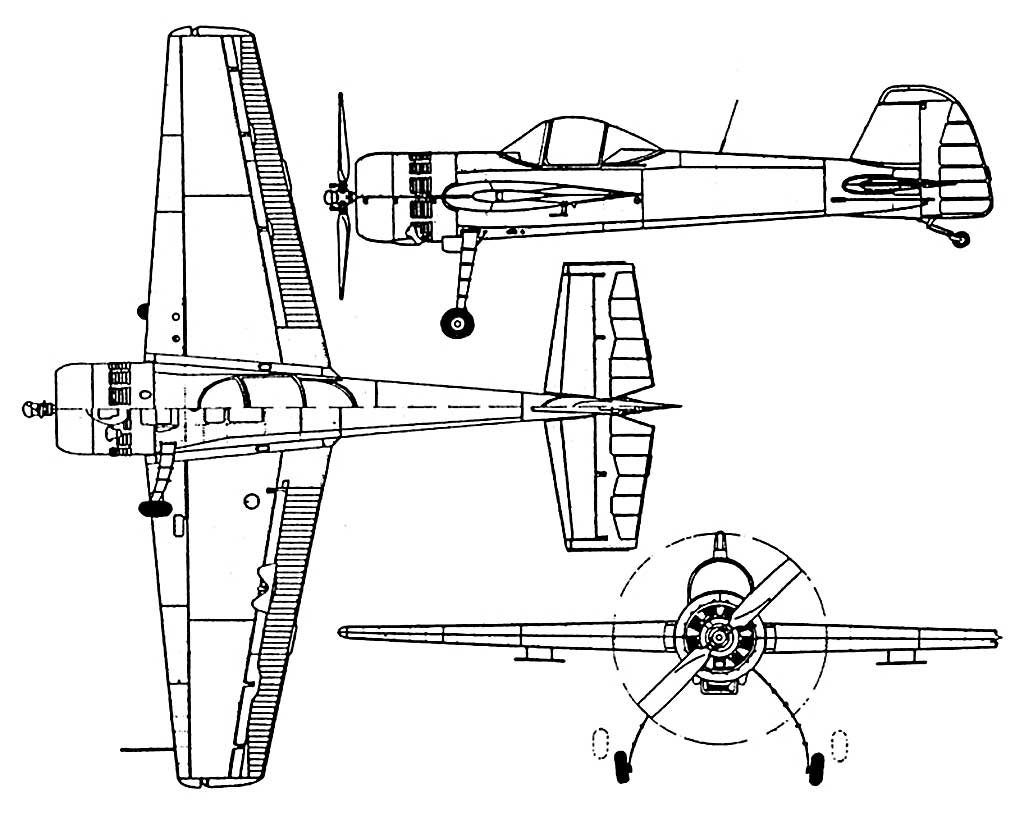
- The very short nose is a reflection of the weight of the engine
Why our focus on the Goldwing RC, a rather long in tooth model whose manufacturer is no longer in business? Simple, it's because a fellow name of Mike Maljanian of West Boylston, MA reached out for advice regarding servos for his (that's him in the article's hero photo, above).
Thing is, I figure there may be others out there looking to either refurbish one these, or possibly even equip a NIB example from scratch. After all, folks buy models with the best of intentions only to get busy. So it gets put on a shelf and never gets built. That, and/or these very capable aircraft are flown a few years, then eventually fall out of favor, and it's time for them to find a new home.
Major point being, if it's not brand new, these warriors are typically owned by a class of pilot who aren't your typical balsa buster. In a nutshell this translate as well cared for airframes. So occasionally, one comes on the market - either new or used - so our idea with this article is that it will serve as a template for setting up yours!
And as for how it came about, quite often it's a phone call. Or as happened in this instance, Mike emailed . . .
I've an older 106” Goldwing Yak55M which I've been flying in IMAC with
for 5-6 years. It weighs 28-29 lbs. This weekend one of the right
aileron servos locked up. Fortunately, I was able to land the plane
without an issue. Plane has JR DS8611a throughout. Two on the pull/pull
rudder, two on each aileron and one on each elevator. What would you
recommend for a replacement in a ProModeler? A plastic case is fine.
It’s what the 8611a have and they are original to the airplane which
is from back in 2011.
. . . so we chatted a while and I got a feel for his skill level and intentions for the aircraft. Then I shared my thoughts in terms of an economy build, a better build, and the best build money can buy. Who are you on this broad spectrum? Dunno, it depends!
Anyway, here goes, the recommended equipment list for a 33% model based on if your intent is sport, IMAC and/or XA.
Note; this is going to be the same-same equipment list as for a similar size, similar powered airframe by other manufacturers like Pilot RC, Extreme Flight, Apex Aerotech, Skywing, AJ Models, or Flex Innovations.
Avionics
Sport - Servos and arms
- 1) DS90DLHV - throttle (plus another for choke)
- 4) DS360DLHV - ailerons
- 2) DS360DLHV - elevators
- 2) DS360DLHV - rudder (if you prefer to gang two servos, one if you don't perform knife edge loops)
- 1) PDRS105 - Anti-vibration throttle arm
- 6) PDRS35-25T - flight controls (flight controls, less rudder)
- 1) PDRS40D-25T - when ganging two rudder servos, otherwise for a single servo, get
- 1) PDRS50PP-25T - Pull-Pull (rudder using cables)
These DL-series servos we're guiding you to are offered in a range rated between 90-360oz-in of torque. If there's one thing folks especially appreciate it's the finned aluminum center case because they run cooler on hot summer days than all-plastic designs.
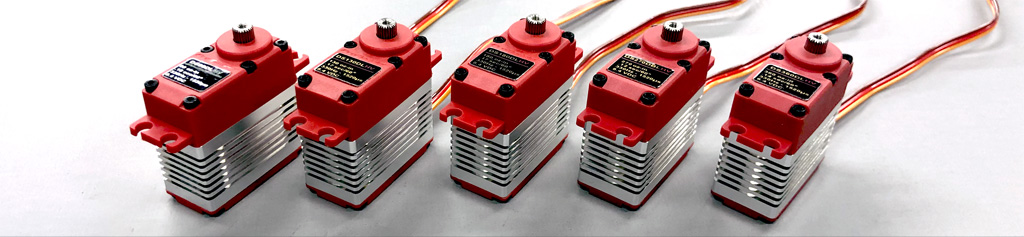
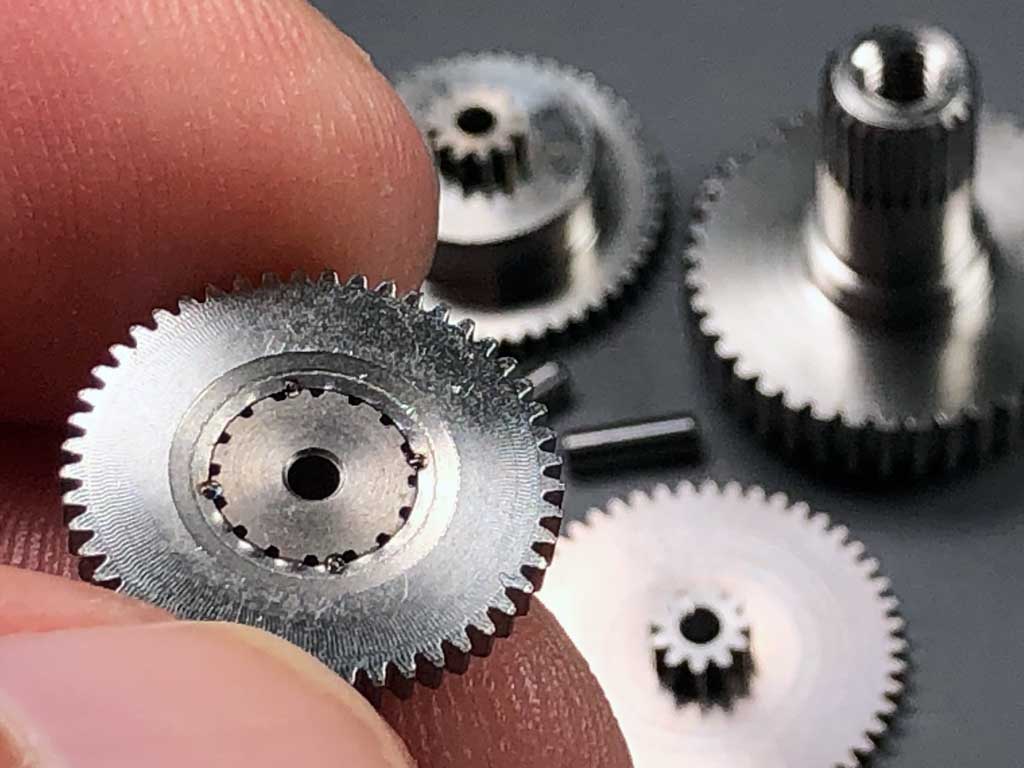
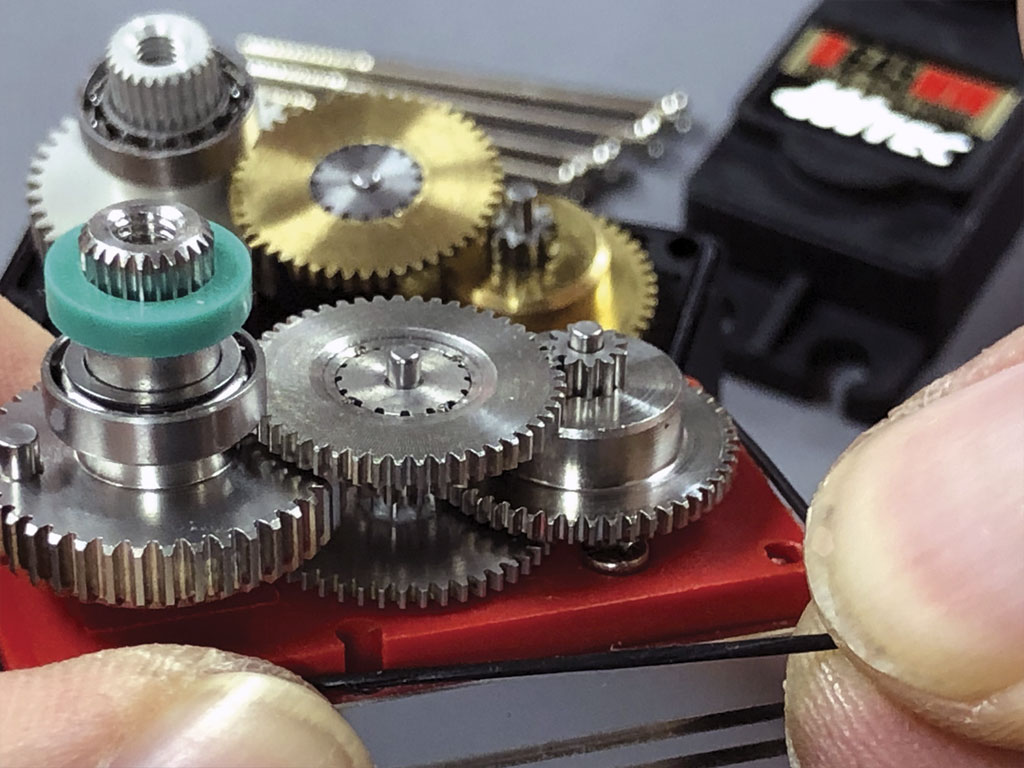
Another detail folks appreciate about the DL-series servos are the durable stainless steel gears. How can we offer stainless in a sport servo? Simple, we agreed to our gear hobber's demand we use them across our entire lineup in exchange for a great price. So you win with better gears, we win because they cost less, and they won because it increased their sales volume of stainless gearsets!
What this means for you is getting the same-same more durable heavy duty stainless steel gear sets as in our top-of-the-range all-alloy brushless servos (like we recommend for IMAC and XA duty). Best part? It comes without breaking the bank.
Better - servos and arm
- 1) DS255BLHV - throttle
- 1) DS90DLHV - choke
- 4) DS505BLHV - ailerons
- 2) DS505BLHV - elevators
- 1) DS630BLHV - rudder
- 1) PDRS105 - Anti-vibration throttle arm (plus another if using choke)
- 6) PDRS45-25T - flight controls (less rudder)
- 1) PDRS75PP-25T - Pull-pull rudder
Best Servos and arms
- 1) DS255BLHV - throttle
- 1) DS90DLHV - choke
- 4) DS635BLHV - ailerons
- 2) DS845BLHV - elevators
- 1) DS1155BLHV - rudder
- 1) PDRS105 - Anti-vibration throttle arm (plus another if using choke)
- 6) PDRS55-25T - flight controls (less rudder)
- 1) PDRS100PP-25T - Pull-pull rudder
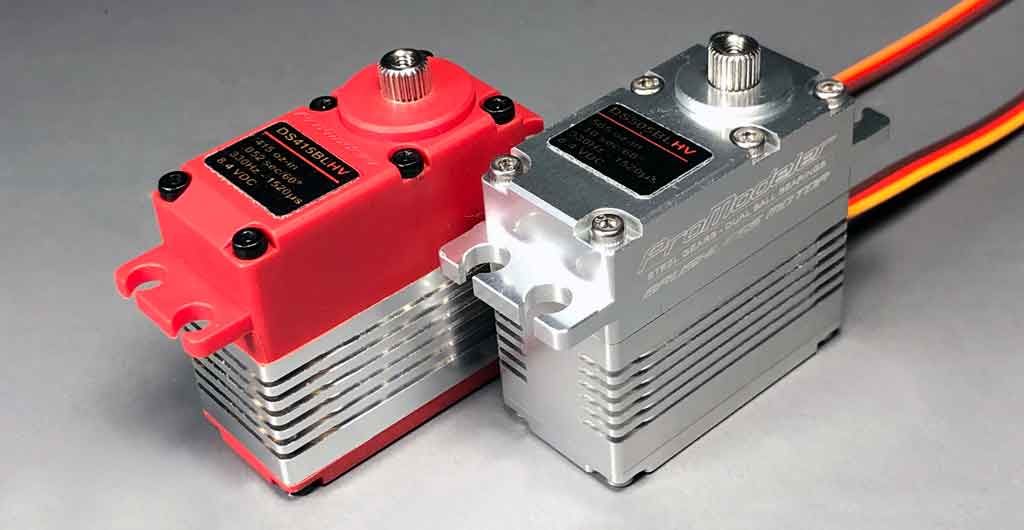
So in this servo group we take you into some of our all-alloy servos. This is how they compare when placed side-by-side with a hybrid case servo (hybrid meaning the case is comprised of both engineering polymer and aircraft aluminum).
Other stuff
- 4) 8" extensions (at receiver to mate wing)
- 2) 12" extensions - inner aileron
- 2) 18" extensions - outer ailerons
- 2) 36" extensions - elevators
- 2) B2S2600 LiIon battery pack - one each for avionics and ignition
- 1) 20A Dual Illuminated Rocker Switch
- 1) 5A slide switch - ignition
- 1) RCEXL Opto-Kill Switch
So as you may have noticed, while I was at it, besides making a recommendation about servos and arms, I've also mentioned what you'd want in the way of other stuff. E.g. servo arms, extensions, batteries, radio switches, plus a slide switch and an Opto-Kill.
These last two - specifically - so you have the means to shut the engine off both manually from outside the model 'and' via the radio in the event the throttle servo goes teats up. And of course, we know we make the best servos possible and we hope our throttle servo never fails but only God is perfect. For the rest of us, what General Baden-Powell wrote in the Boy Scout handbook will suffice . . . be prepared!
Extensions - details
Let's touch on servo extensions. They're three-strands twisted together and made up of 20AWG wire. Basically, they're the thickest wire leads we can get crimped into the DuPont housing.
Twisted
Why twisted? To more strongly resist stray RFI (radio frequency interference). And this is a big deal. In fact, it's our advice to don't ever use flat extensions with ignition engines. Why not?
Simple, it's because 'if' the module or high tension leads begin to fail, then the ignition noise (these things are sending 40,000 volts to the plugs) basically swamps the receiver because it's act like a broadcast transmitter of pure noise. And the noise feeds straight into the receiver through the leads 'unless' they are twisted. Airplanes are expensive, right?
Anyway, you're the customer and thus, always right - but - our opinion is a few bucks saved on flat thin extensions is false economy. So heads up whether you add extensions to a servo order or get them someone else because these are basics! And it's not opinion, but physics.
Insulation
Speaking to the insulation, while there are several materials we could have select for the insulation, we opted for silicone (which is pretty much the same stuff used for fuel lines) because it's silky soft and supple, which makes it great for resisting abrasion as you pull it through wing ribs and such. Combine with high strand copper wire and you get a super flexible extension that's easier to route and doesn't get stiff when it gets cold.
Thickness
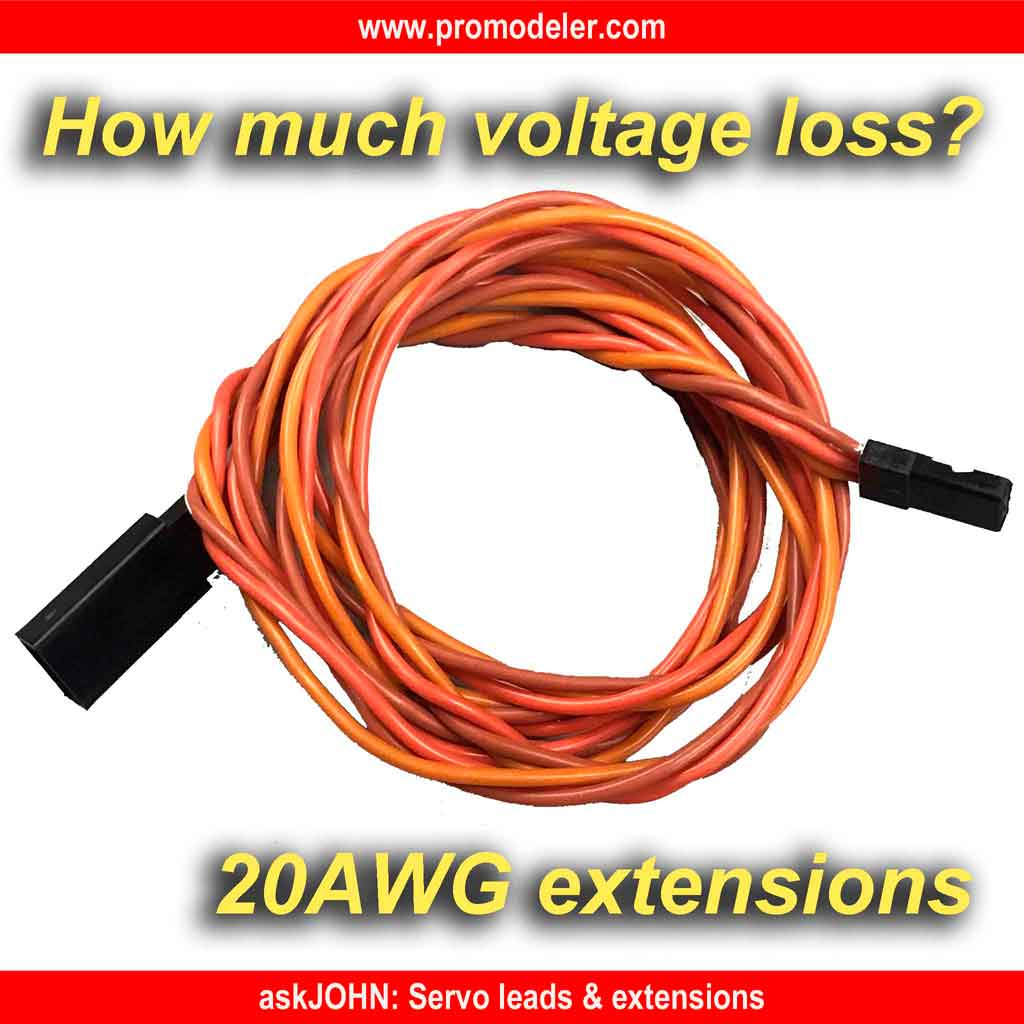
20AWG? Why such thick leads? Simple, because the thicker the wire the more it reduces voltage loss. So 20AWG is also the thickest which can be crimped into the DuPont connector. Want to know more about decisions made when using extensions, e.g. how to calculate voltage loss? This white paper discusses this, and more;
- Review to learn more: Servo Leads & Extensions
Note; these articles are free. Clicking the link opens it within a separate page.
And guys, yes I know all this info comes across as a sales pitch, but it can't be helped and it doesn't really matter where you source extensions. This because the servos only know if they're less than 20AWG, and twisted only matters if an ignition goes bonkers. Otherwise, insulation is more a matter of what's important to you.
And as far as important to us, it doesn't really much matter if you add extensions to your order, or not. Why not? It's because we live off the servos not the nit-noids! So this info is offered mostly to educate and inform what is important and watch out for.
Locking extensions
Oh, and heads up, if you order extensions from us, we offer locking ones, too (a drop down menu selection when ordering). Point being, these are the ones you want wherever you cannot inspect the connection.
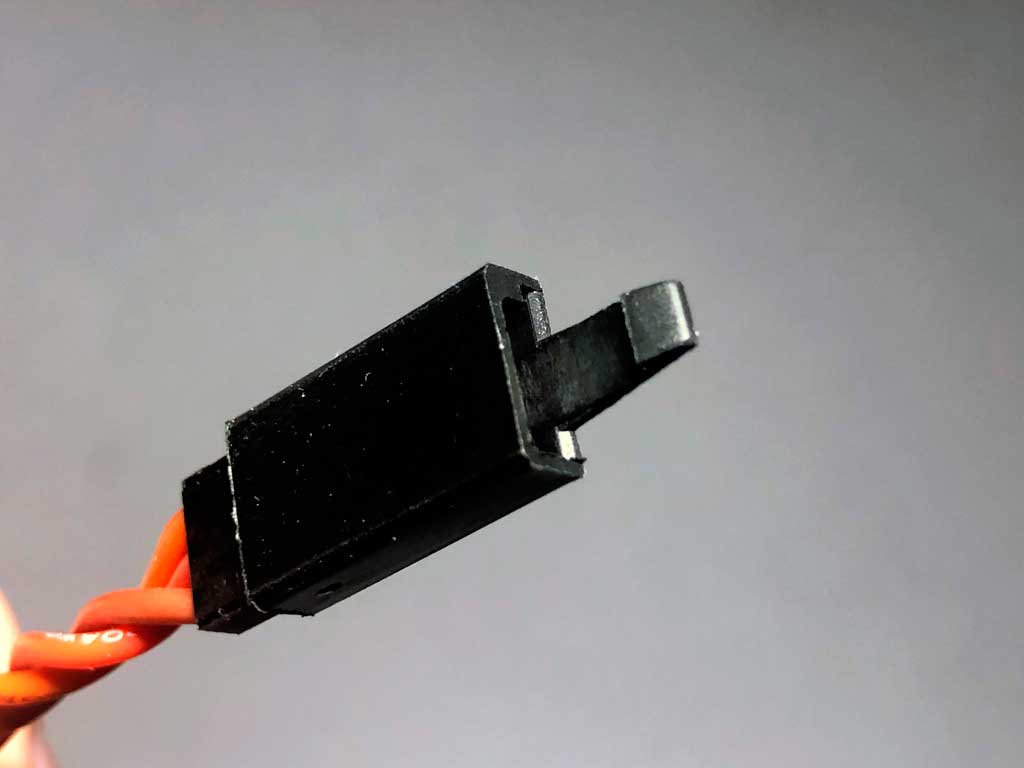
- Locking extensions are quick and easy to use
Capacitance
Also important thing as regards extensions is how the servo works at the end of an extension. Basically, the further away from the voltage source, and the thinner the wire, the worse the servo performs. Once you have the thickest wire, the only thing left to deal with any added length from the receiver is capacitance. So let's touch on this, next.
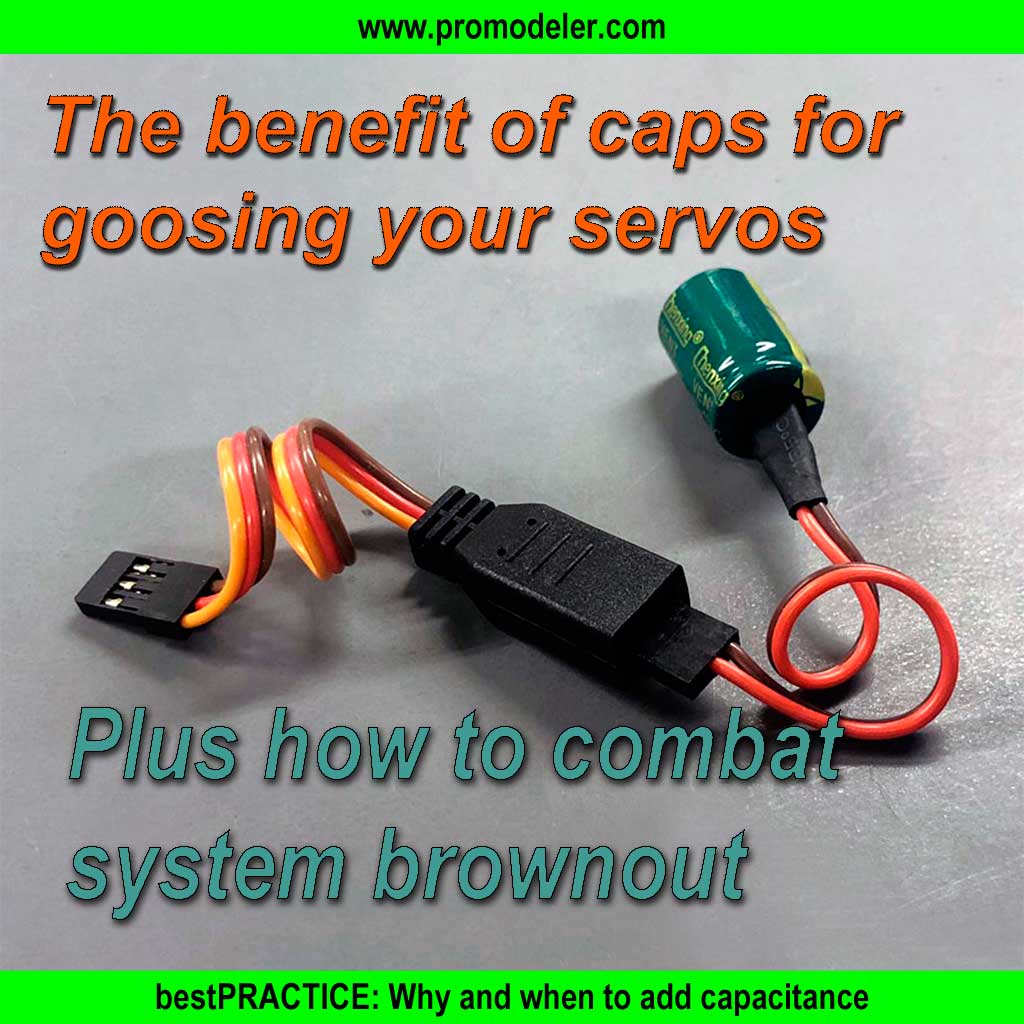
Folks, this is important; when servo extensions exceed 30-inch in length, it's time to add capacitance. First you've heard about this?
- Review this article; Why and when to add capacitance
Servo arm details
As regards servo arms, we guide folks to aluminum servo arms for this model instead of plastic. Why? Principally due to the weight and speed of which it's capable.
Basically, we stop recommending our heavy duty polymer arms once models get into the 18-20 pound range - unless - they're relatively slow (think 30-pound Piper Cub). Same holds for heavy duty plastic servo arms offered by others. The key detail is don't use plastic because you get to the point where the splined output shaft can strip the plastic. So because this model is in the range of 30 pounds, we guide folks to aluminum, only, for the servo arms on the flight controls.
And in our case, not just any aluminum but 7075-T6 instead of 6061-T6 (like we use for cases and imports use for servo arms). Why is this? Simple, because 7075-T6 is a shit ton stronger than 6061-T6 (shit ton is a engineering technical term). In fact, when comparing tensile strength, the 7075-T6 at 572MPa vs 276MPa for the 6061-T6 is a touch over 100% stronger! In fact, it also exceeds the 370MPa tensile strength of mild carbon 1018 steel . . . so you get the strength of steel at the weight of aluminum! Added to which, these are priced reasonably close to imports so if you can budget for alloy arms, these are what you want.
Anyway, you really should care about the servo arms because there's a lot of money riding on this recommendation. Remember, we all like squeezing a nickel until it squeals . . . right up until it costs us big time. Heads up!

- Big radial cowl tapers down to nought
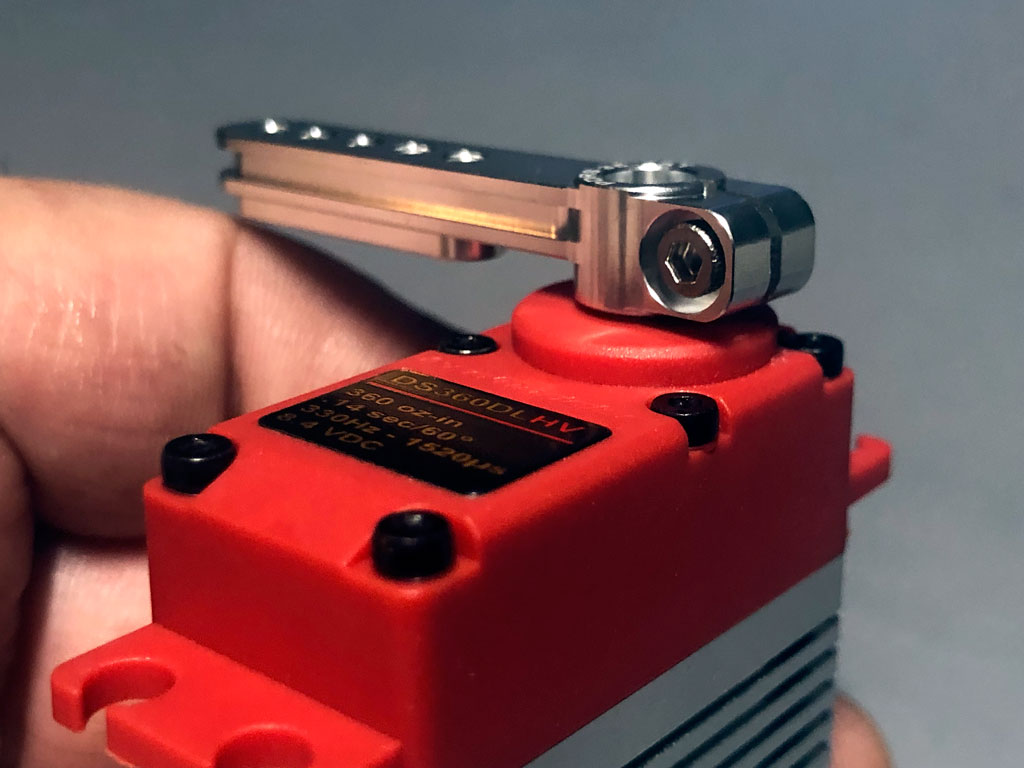
So this is a typical ProModeler alloy servo arm. Eyeball how these arms feature an H-beam profile, (like an I-beam, but on it's side because of the direction in which it resists flex). Know where else you find this H-beam profile being used?
In highly stressed connecting rods of automotive racing engines, like the ones produced by Carillo . . . and for the same reason! Another thing is these aren't your typical flat Chinesium arms where you're tempted to add a nut to the backside of the screw to sleep better. It's because we use the Machinery Handbook as well as the next guy so we ensure there's 2d depth in the threads (two diameters) so this is not necessary. After all, details count.
- PDRS35-25T with backlash compensation
Best servos?
So there's a problem I don't know how to resolve short of a conversation. It regards the answer to which servos are best for you. And the answer is always . . . it depends. On what? Very simple, it depends on how you're going to power the model, and how you plan to fly it.
By this last meaning it's one thing if you're a sport or club pilot. For example, you mostly fly circuits and perform the odd rolls or loop maneuvers two mistakes high, because then it's pretty easy to guide you into a set of economical servos with the certainty you're going to be very happy.

- Purposeful look . . . ready to take throttle up
But it's a horse of a whole other color if you're a sport pilot who flies the model like you stole it down . . . like down low on the deck, then come in and pull up into a wicked Lomcovák or snap roll only to come around inverted - and to cries of lower - you get down and dirty a mere foot off the deck! Take my meaning about sport versus SPORT?
Especially considering this puppy goes every bit of 30 pounds. Added to which, it'll hit an easy 100mph in level flight (maybe more depending on the engine). So this ain't a toy! And what this means in practical terms is when you dive the model out of the sun and pull up at the end of the field and flash into a victory roll, the elevator servos, for example, are seeing some pretty serious G-loads. And at high speed, the ailerons and rudder, in particular, are seeing pretty high aerodynamic loads. Loads you don't want to play around with. Means if you're a hard flying pilot you may consider at least opting for some of the servos from the better group for elevator, capisce?
Next, there's an issue between IMAC and XA maneuvers. Guy who kills me says, 'I fly IMAC, then pauses and adds, but sometimes I pull out the stops and perform XA-maneuevers, too.' This is a problem for the same reason we learned in Bible study you can't serve two masters. You really need to either set the model up for IMAC-maneuvers, which straight up is the purpose of the equipment list from the 'better' group, or XA-maneuvers, which is the 'best' group. So just as you can't be a little bit pregnant, if you fly XA, then equip the model for it. Otherwise, don't bitch the servos aren't fast enough because 'speed' is what you're paying for when you want our very best.
So the reason we're paid the big bucks is to tell you these things . . . without sugarcoating the realities. Remember, the guy selling models wants to sell them to as many folks as possible. So telling someone their existing servos may not be up to the job only hurts their sales. Point being, an airframe vendor's incentives doesn't actually align with yours.
So we're trying to anticipate the 'what if' about flying these things when we put together our avionics list. Saying there are subtle differences between a given set of servos and the 'right' servos for your build. Anyway, if you're unsure about the best course of action, then call us and let's chat! I promise, between us we'll suss it out. And besides . . . I always love talking airplanes!

- From the business-end it has that tough guy look
DL-series details
Anyway, Mike expressly said he was open to polymer case servos. That said, I took him at his word about the last few years flying IMAC so I tried to influence him toward better. However, I later noted he opted for a modification of the better list to something a bit stouter torque-wise without opting for the speed of the servos in all-out XA list. Why? Dunno, some guys like a bit of overkill. Basically, he went for a touch more torque-wise on all the flight controls.
Nevertheless, maybe you're wondering if a set of DL-servos with the polymer cases would do for you? Well, know this; the recommended DS360DLHV are the top of the range in DL-series servos. That, and they're the servos that turn more first time buyers into loyal fans than anything else we offer. However, all five servos in the series are build the same other than gear ratio and motor. means mechanically, if you've seen one, you've see them all.
That's why this photo may help you understand why the DL-series may be your cup of tea. And note, this is the DS180DLHV juxtaposed with the world's best selling the servo, the Hitec x645-series. If you're curious how they compare head-to-head, then this article delves deeply - with loads of photos and captions - about what you get for your money;
- Learn more; Hitec D645MW vs DS180DLHV
- ProModeler DL-series DS180DLHV servo juxtaposed with a Hitec D645MW
So let's get going and wrap this up. Here are details regarding installation. No surprises for any experienced pilot. And if you're new to giant scale acrobatic models, maybe you'll see details that help you. First up, the two aileron servo installs.
Aileron servo installation
Each wing panel gets two servos for the ailerons. The inboard needs a 12-inch extension and the outboard an 18-inch. Remember, we offer locking extensions (there's a drop down box in the product selection to choose them) and our advice is select these when ordering because once you pull them into the wing you can readily inspect them.
In the alternative, resort to your usual tricks involving dental floss, hot glue, or aftermarket plastic clips. Just do 'something', OK?
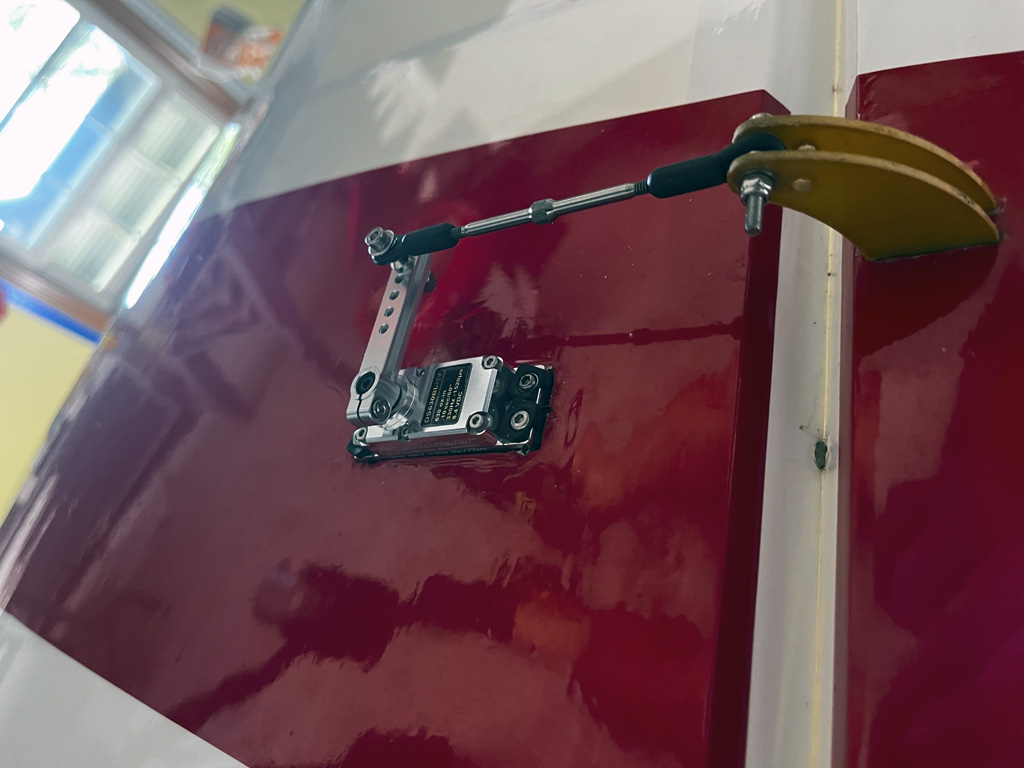
- Inboard servo installed and he used slightly longer PDRS40-25T
And no surprise, the outboard servo installs in the exact same way. Just connect the extension, drop it into the pocket, and secure with the four servo mounting screws. Easy peasy! 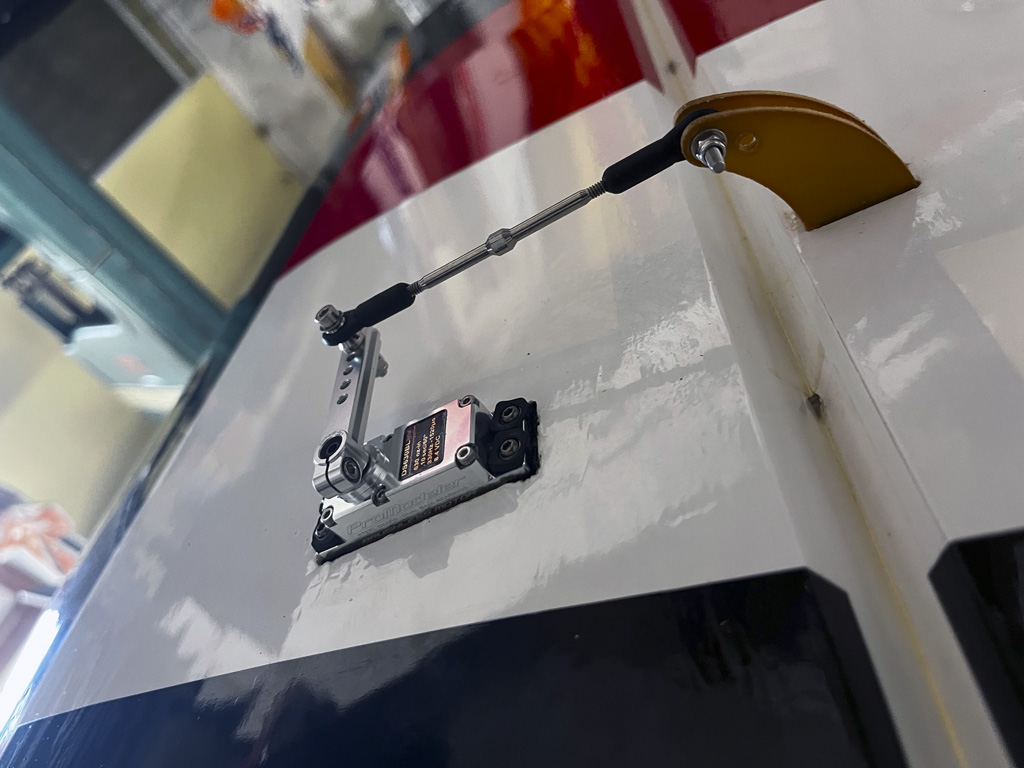
- Outboard servo installed the same way
Rudder servo installation
So when it came to the rudder, Mike went his own way and used a tiller arm instead of a pulley. It's a nice clean installation using a DS630BLHV plus an SWB 4-inch horn.
Note; SWB is no longer in business despite making some very, very nice arms and titanium pushrods.
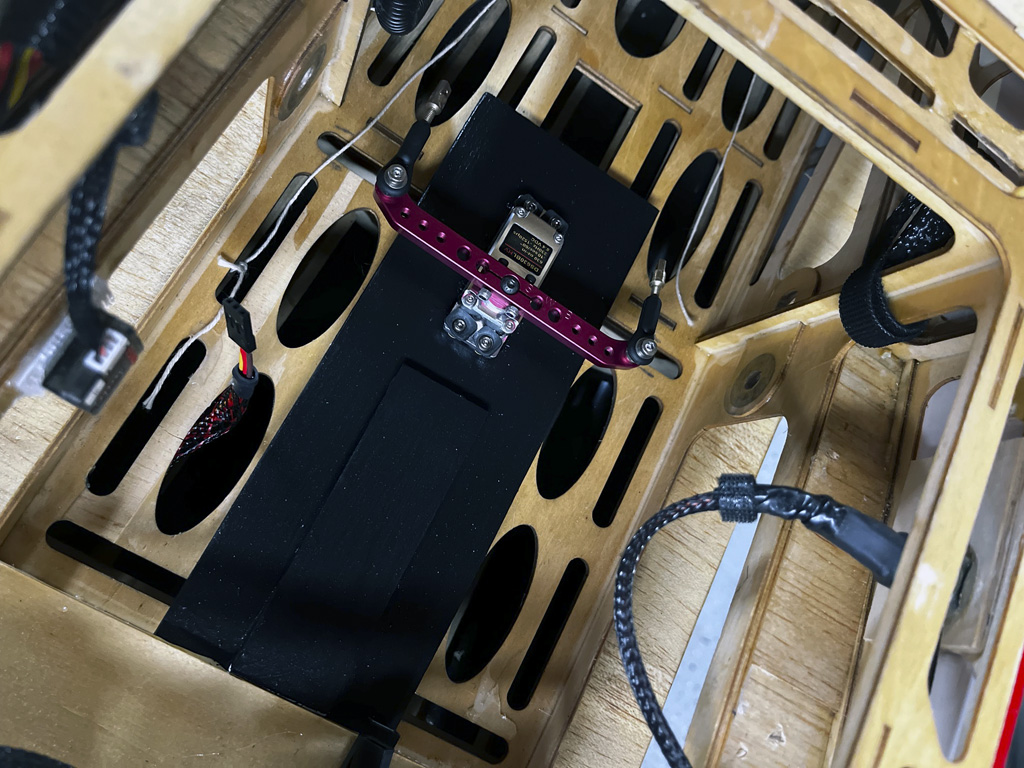
- Tiller arm for pull-pull cables
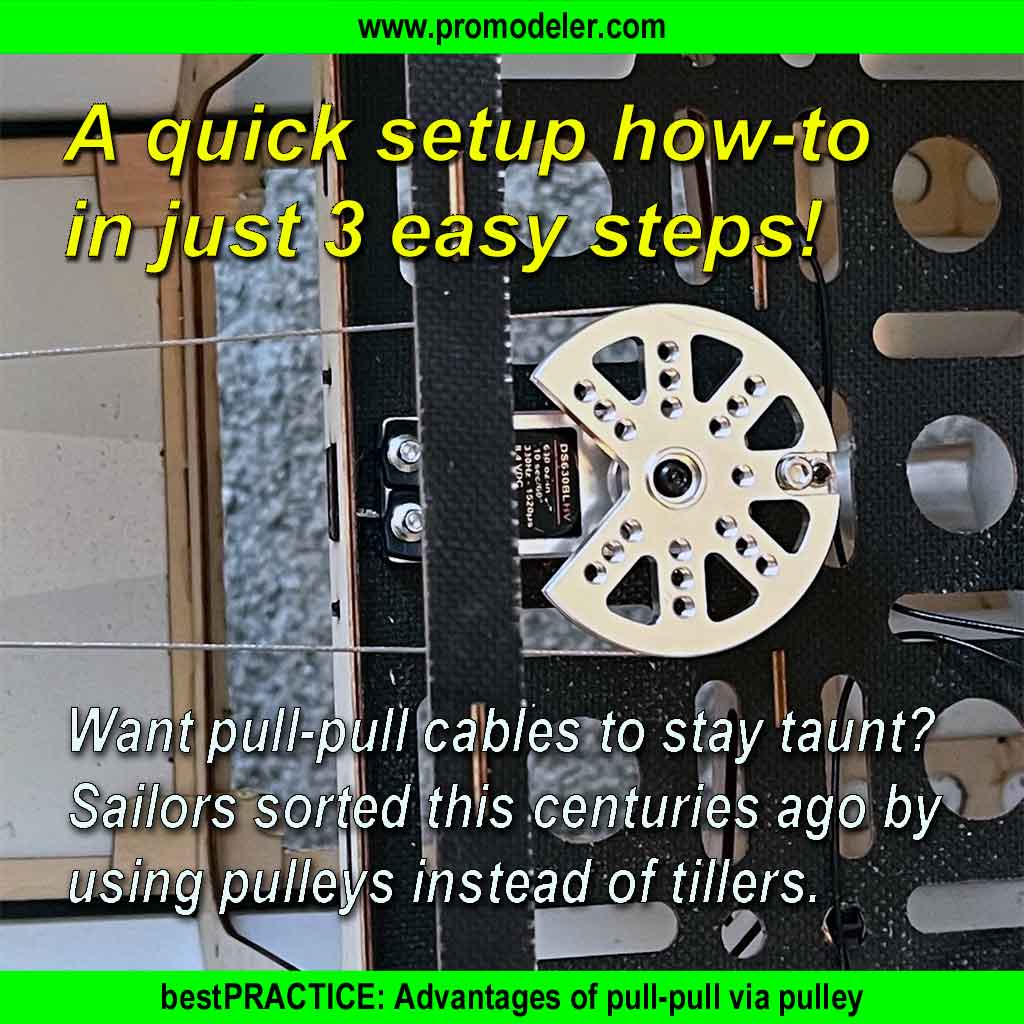
So if I recommend a pulley instead of a tiller, why is this? Well, to learn a bit more about why, review this article;
- Why a pulley beats a tiller: Advantages of pull-pull via pulley
And by the way, we produce these in 34mm diameter, 50mm, 75mm, and 100mm (the latter being about the same as the 4-inch SWB arm Mike used). For most IMAC routines, the 75mm pulley is all you need but for XA, then the 100mm is definitely the one you want. How can you tell if you went too far?
Simple, if you use full rudder and it's too much throw so you dial it back with ATV to maybe 80% each way, then you may well have been better off with the 75mm pulley because that's effectively giving up a TON of the resolution of the servo.
Look, we're making a recommendation based on experience - but - the feel you prefer is strictly up to you.
Engine installation
Now let's look at the engine install and wrap this up. Mounting is per standoffs, as usual.
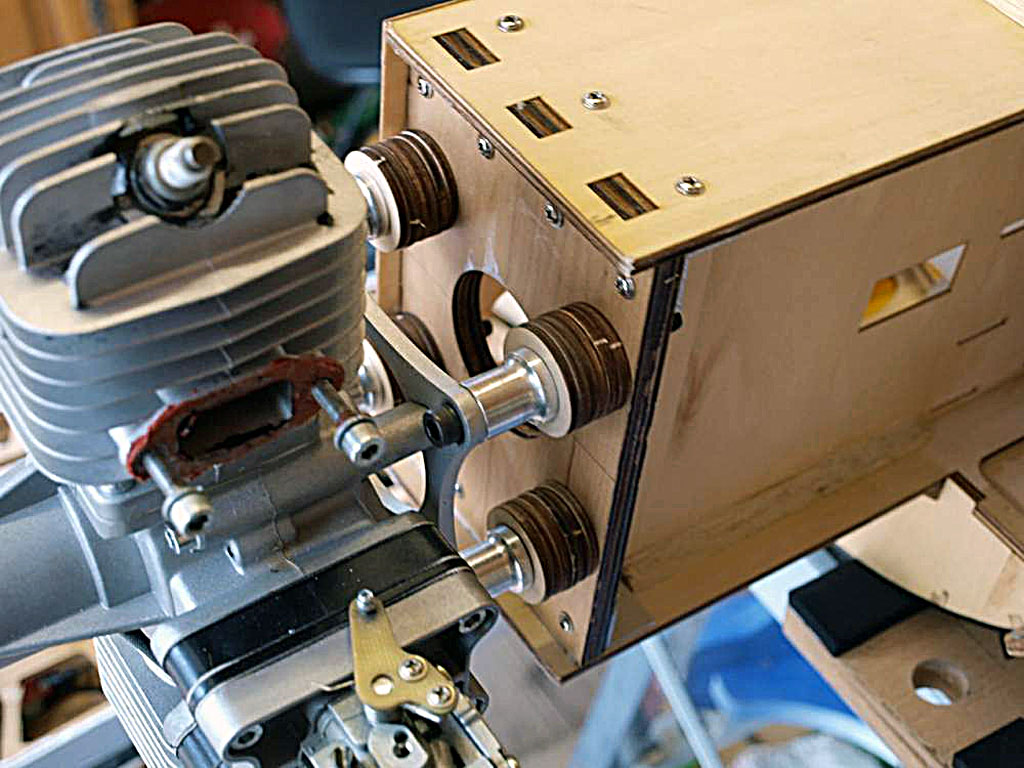
- Engine install uses four stand offs
What you end up with a nice looking set up like this! Canister mufflers, black paint to hide the wood grain, and ignition module mounted on top of the engine box. So here's the thing, if the model is being refurbed as part of getting new servos, then what a savvy pilot like Mike mentioned on the phone is worth noting.
Mike said he's already pulled the tank and replaced the fuel line. And not just between tank and engine but also the fuel line attached to the clunk inside the fuel tank. He also said he gave the control surfaces a good tug to check the security of the hinges while he had all the linkages loose. Like I said, a savvy guy.

- Professional engine installation with lead protection installed
Battery and switch
So what's left? Well, one thing I've neglected to touch on are the battery pack for the avionics (receiver and servos), ignition, and switches for both. Let's go there, now.
Dual packs
There's a school of thought that says, use 2 battery packs to power the receiver and servos for greater safety.
Major vendors like Spektrum even have a name for it . . . PowerSafe. Others, like ARS and Futaba are on the bandwagon with similarly complex widgets with which to take your money. Honestly? I get the appeal because - like everybody else - who doesn't want safety?
Thing is, for safety, I'd rather use one battery pack and two leads in parallel, instead. Connects to the receiver like this.
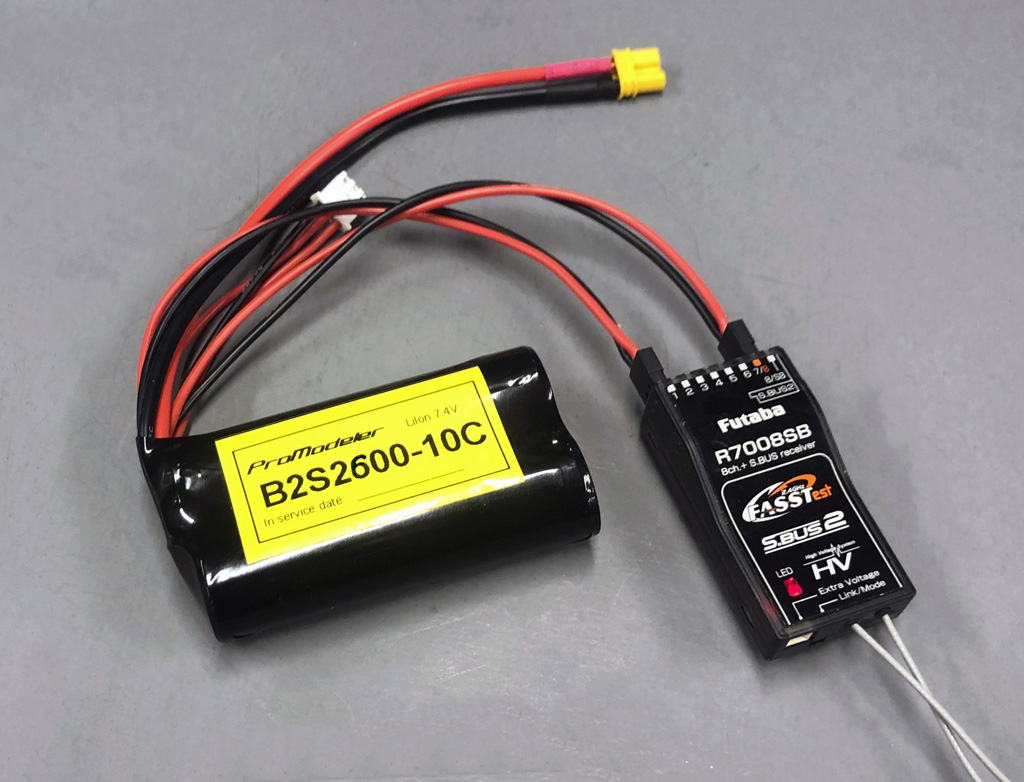
- Receivers use a power bus - means connecting a pack anywhere
Regarding 1 pack and 2 switches
So here's the thing about using two packs. It's impossible to get the benefit without adding significant complexity.
Since statistically two of anything doubles odds of failure, now to the 2nd battery, add a widget with 50 more components and instantly, the failure chain between your model and a smoking hole in the ground just got a lot longer! 'Simpler is better' isn't just a trite saying.
Another reason I'm a hard sell on using two packs (despite as a modeler wanting to believe the hype) is this; where's the proof? Are models are crashing due to battery packs failure common at your field? They sure aren't at mine! Moreover, 90% of models are electric, all using lithium packs for propulsion . . . and for sure those packs aren't failing, either.
Meanwhile, there are several downsides beyond a few hundreds bucks for the widget;
- 2X the expense for a pack
- 2X the work to charge and maintain
- Dead weight of a 2nd pack
- There's no test function
. . . this last is important; how do we test it's working before flight?
Anyway, we could put these things on the website (they're an easy sale) and if you already have one and need two packs, then the businessman in me says, yippee! But what 'this' engineer recommends, instead, is one pack.
Want to get something to add real safety? Buy a 2nd switch.
Switch
Most guys building this models use two switches. One for the radio, another for ignition. Instead, I use three . . . two for the radio.
So the 2nd radio switch is connected in parallel. In fact, if you know how to solder you can add a 2nd lead to an existing pack. Remove the heat shrink, and solder red-to-red and black-to-black. Presto, you're in business without buying another pack! You gain two benefits.
- Odds of both switches taking a crap on the same flight are astronomical.
- Automatic load balancing
This last is a nice added benefit since the connectors are rated at 3.5A continuous. So using two leads cuts the load through each exactly in half, or put another way, instantly means you can discharge the pack twice a ttwice the rate. This is important when flying a model with 8 servos.
Note; since a 10C pack with 2.6Ah cells can be safely discharged at 26A, the connectors are the choke point - not - the battery pack.
Anyway, you don't need fancy switches. What protects your model isn't a $50 switch, it's mathematics. Means even ordinary slide switches (like ones we've used for decades) are perfectly fine so save your money and buy good quality switches instead of buying the snake oil about failsafe switches. They're only failsafe as long as all the components that make them work actually functions. Bottom line? Switches fail. Plan for it because it doesn't take expensive switches to do the job.
Speaking of which, we have this inexpensive 5A slide switch available. What recommends it over a hobby-grade switches are two things. First, the small metal shield wrapped around it rejects stray RFI, e.g. from a failing ignition. Second, the potting compounded serves to protect the solder joints from vibration.
Slide switches aren't inherently unreliable, it's using low quality switches that exposes you!
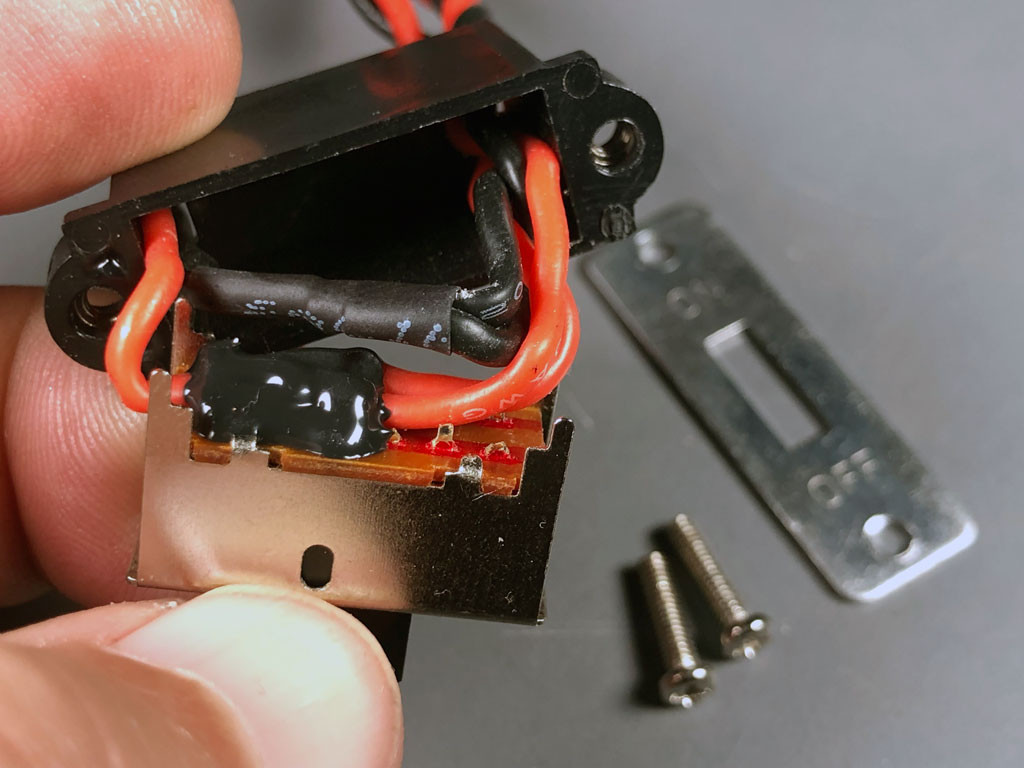 - genuine Nobel brand 5A shielded slide switch
So with a large model like this, specifically because of the load of 8 servos, I'd rather use 10A switches, instead. Yes, still uses connectors rated at 3.5A but this isn't a limit, so it'll flow 5A. However, because in the real world the servo loads are intermittent, they're easier on the contactors inside.
This is why we offer this dual switch (two individual switches mounted for convenience inside one housing).
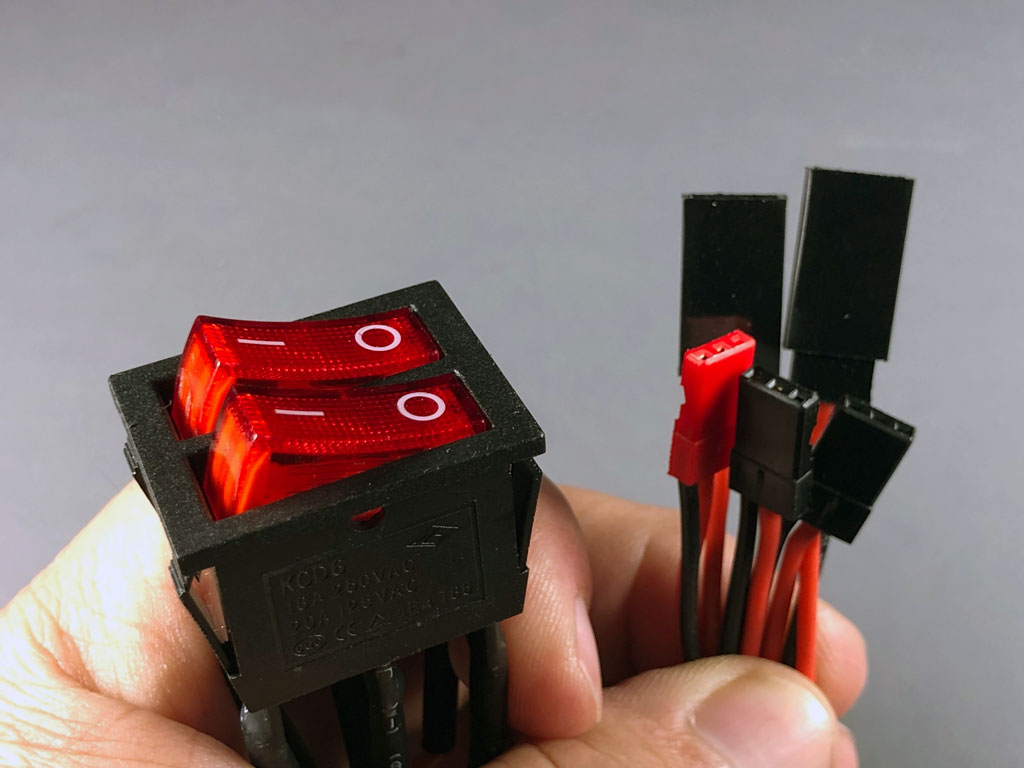
- Charge without disconnecting through the red plug
So in actual use, because these switches are large, folks don't just chop a hole on the side of a fuselage and install it like you would a smaller model. You need to find a place.
For example, here's all three switches installed in my 1/5th scale Ziroli Stearman where the front cockpit floor worked out perfect.
Note: this model has one of our 15A over-center toggle switches for the ignition because it's supplying a 9-cylinder module.
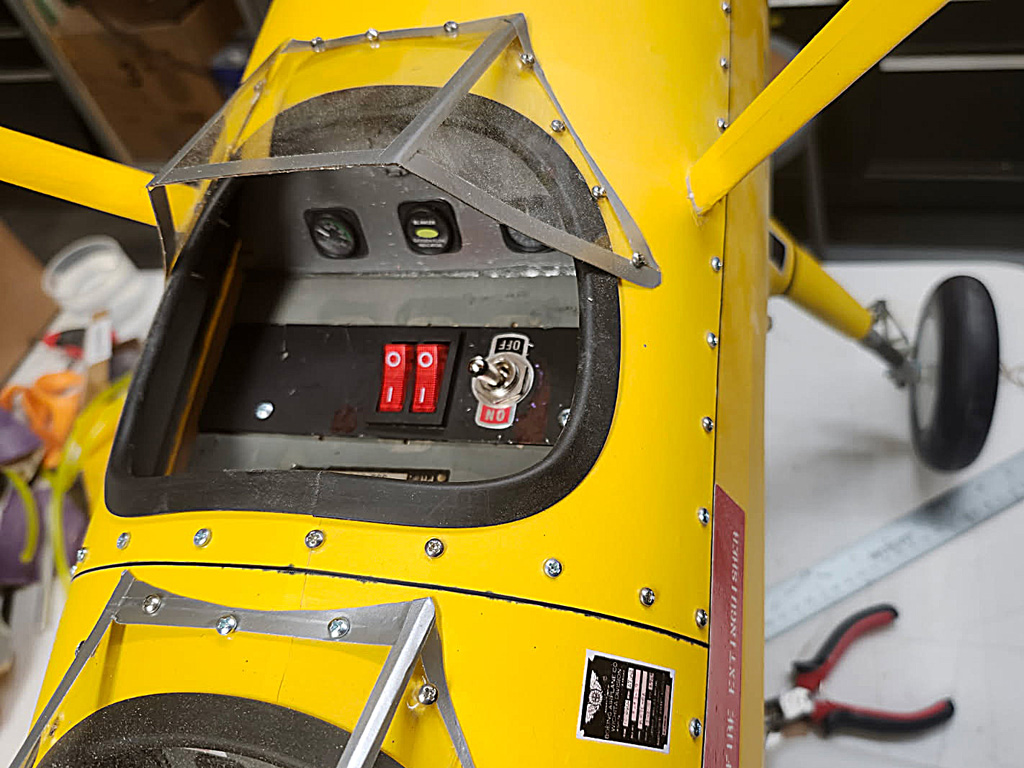
- Finding the perfect spot is key
So because these are illuminated switches, if you forget and leave the model powered, it's easy to suss out. Allow me to share this photo as an example. It's of a pal's TopRC Zero he equipped with a pair of the dual rockers.
Two switches for two batteries; one for the avionics, the other two switches for the ignition pack. The latter, incidentally, also supplies juice for the electric-powered retractable landing gear system.
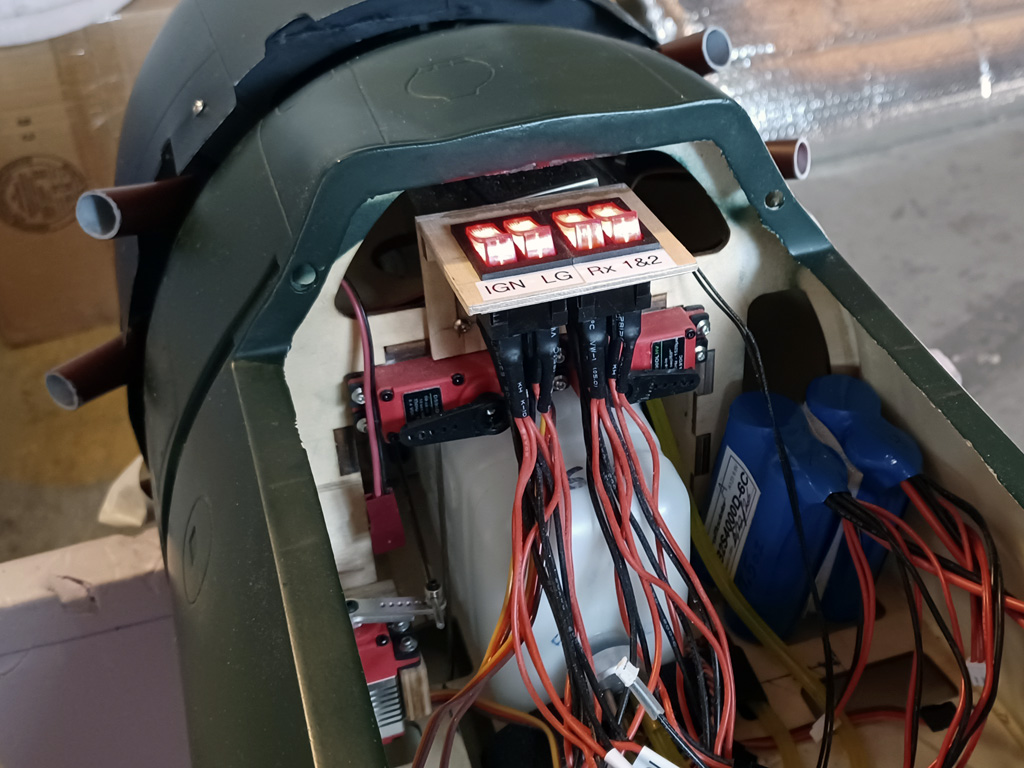
- Bright illumination makes it easy to confirm function
By the way, technically, there are four switches in the ignition-powered model recommendations. This is because I also rely on an opto-kill switch inserted in series after the manual switch. Reason, of course, being on the off chance the model experiences throttle servo failure. After all, we make good servos but only God is perfect!
If you still need one when you order, we offer these on the site. If you're unaware of the product, this is what it looks like installed.
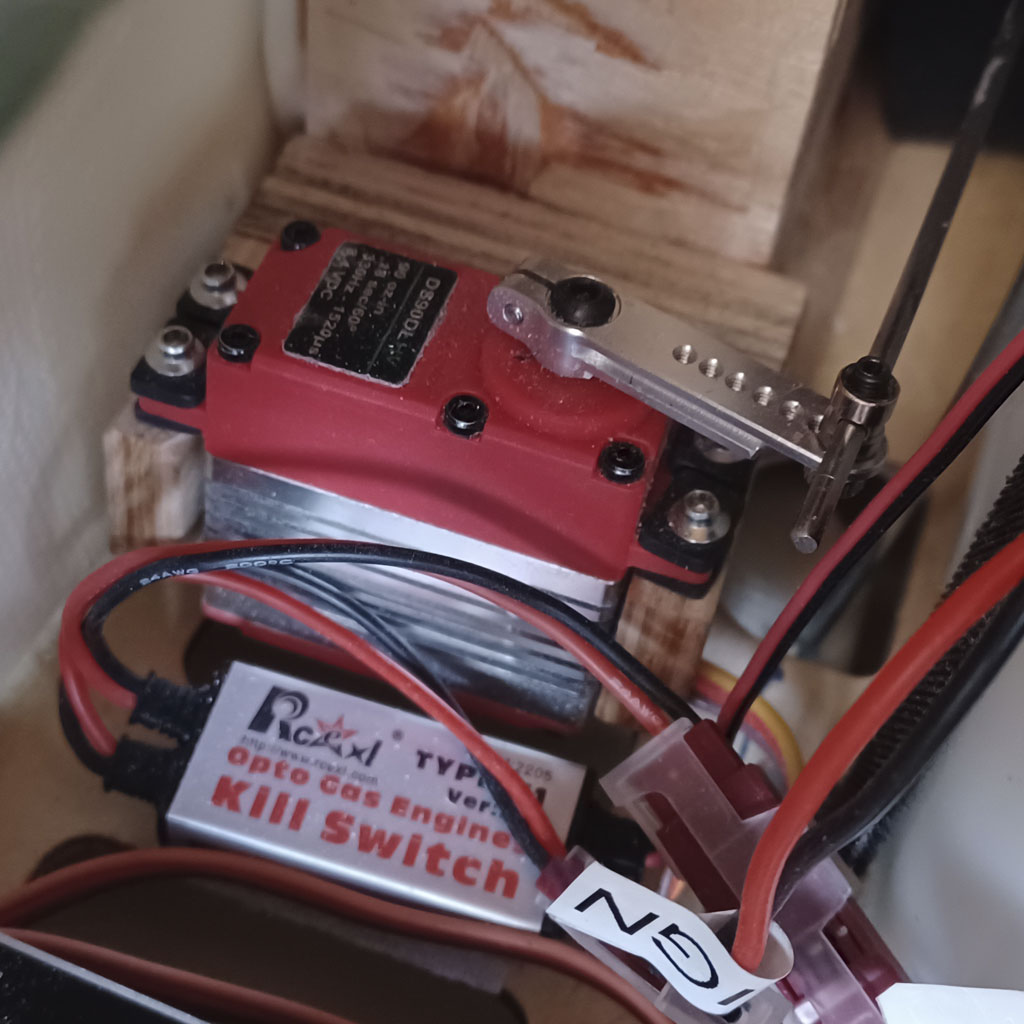
- Mounted with Velcro and on a switched channel
Wrap up
So we've shared three equipment alternatives based on if your focus is on sport flying, IMAC, or XA-type maneuvers. We've tried not to be obnoxious in recommending products but obviously, we're going to mention our wares. We hope, however, we've shared some good ideas for your build in exchange for the propaganda.
If you have further question, or just want to pick our brain, reach out via email or telephone (top left corner of every page on the site, or in the footer). And if you're curious what it's like to live with such a model, Mike kindly shared this photo of his mounted within his trailer!
Note; he's used E-track to create a second level, a loft area

- Eyeball this photo clsoely for tips


